Purpose
This guide provides step-by-step guidance for new users of the Affinda platform to create a new information extraction model. By following these steps, users will have a performant model for any document type that they wish to process in just minutes.This tutorial is for new users of the Affinda Platform looking to get started with document automation. To follow this tutorial, Users should hold Organization Owner or Admin permissions.
Step-by-Step
Visual Learner? Follow along with our Video Tutorial:Upload your document(s)
When you first create a Workspace, you will be prompted to upload your first document(s).To add a new Document Type to an existing Workspace, first upload an example document.
Select 'Add New Document Type'
After uploading, you will be prompted to select ’+ New Document Type’.
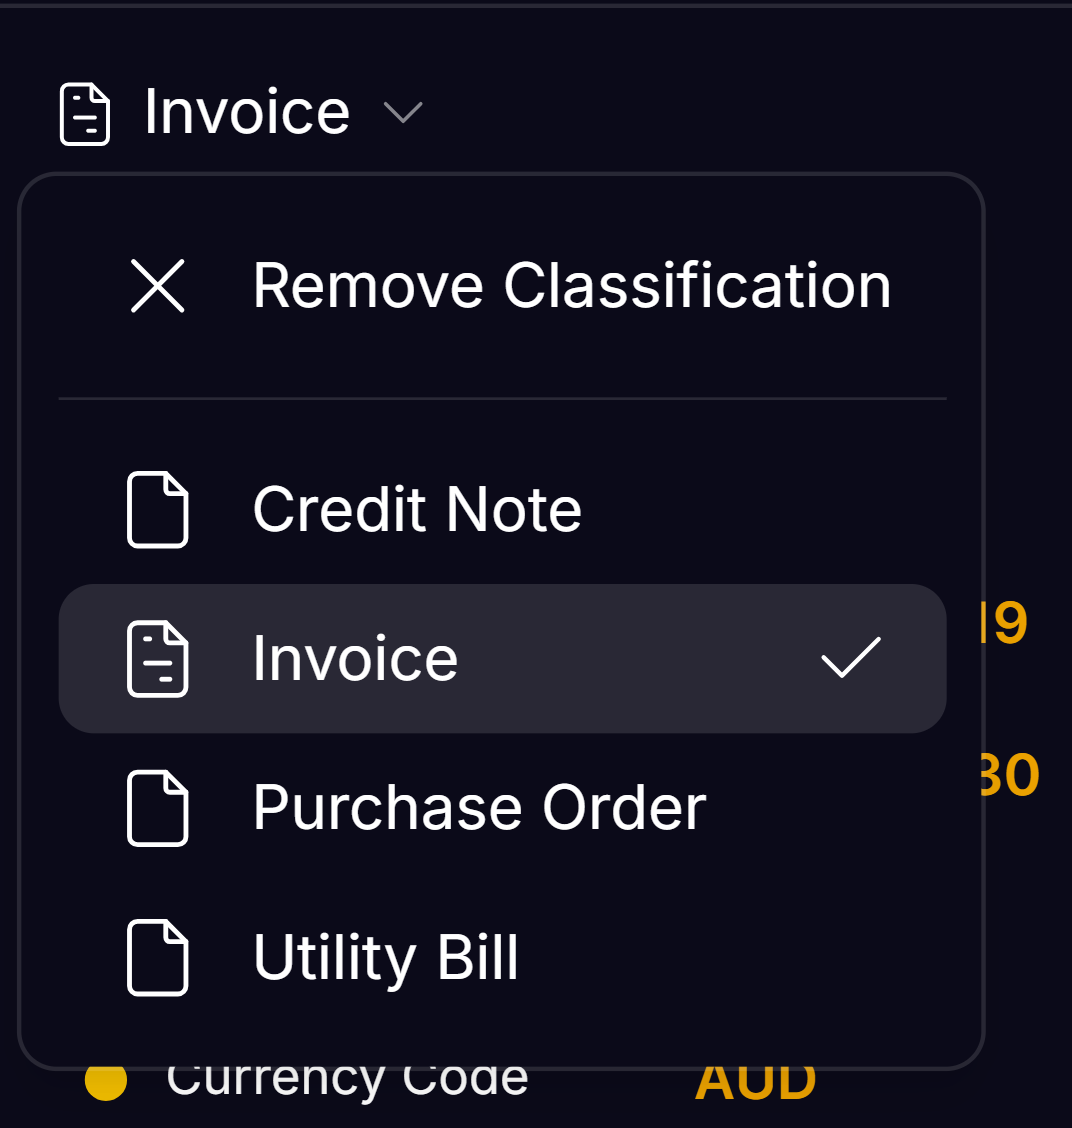
If a Document Type has already been added to your Workspace, the classification model may automatically classify the document. To override this, click the dropdown next to the Document Type (above the list of fields in the right-side panel) and select ‘Remove Classification’.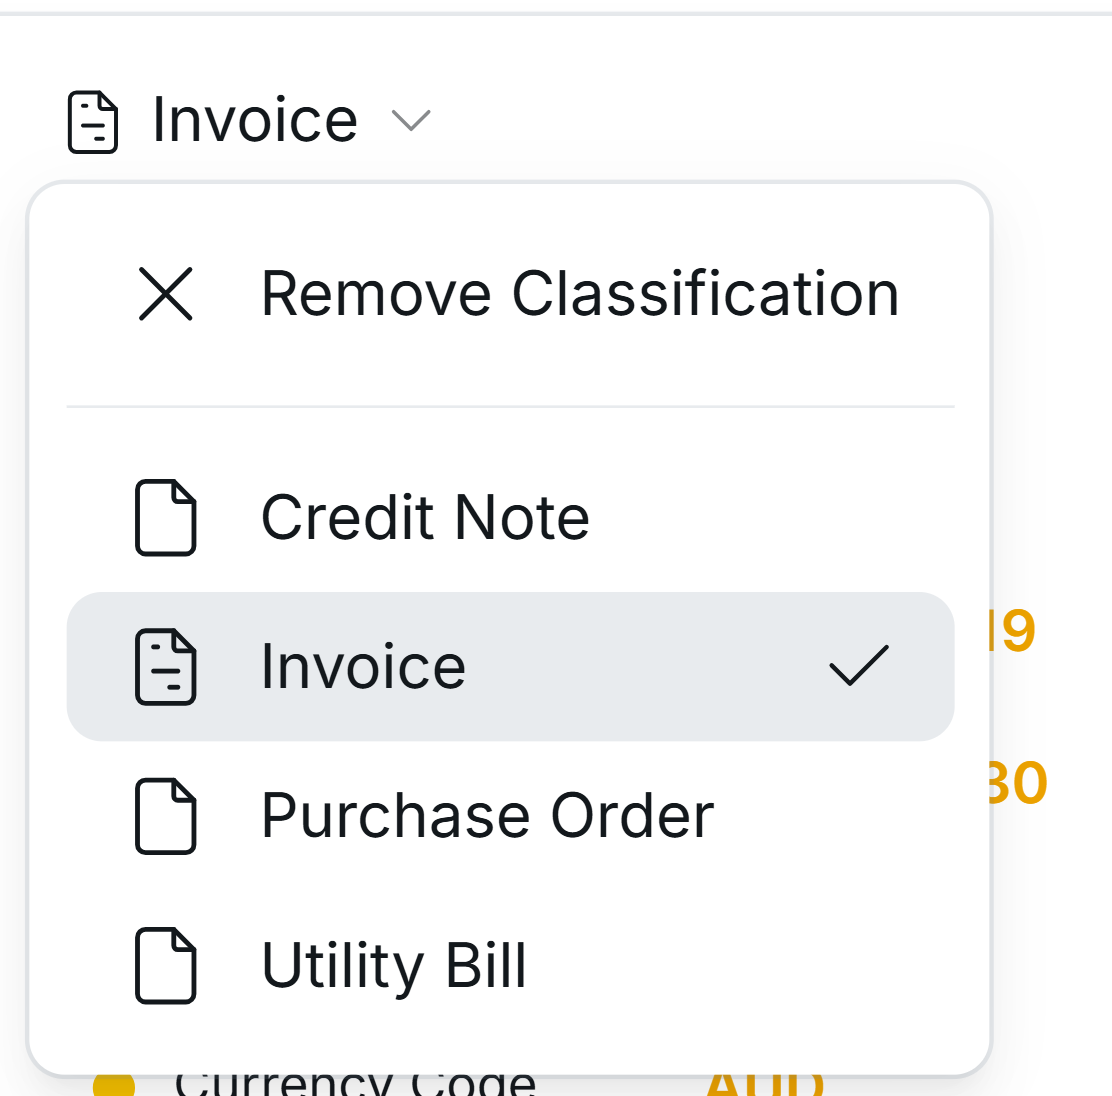
Set up your Document Type
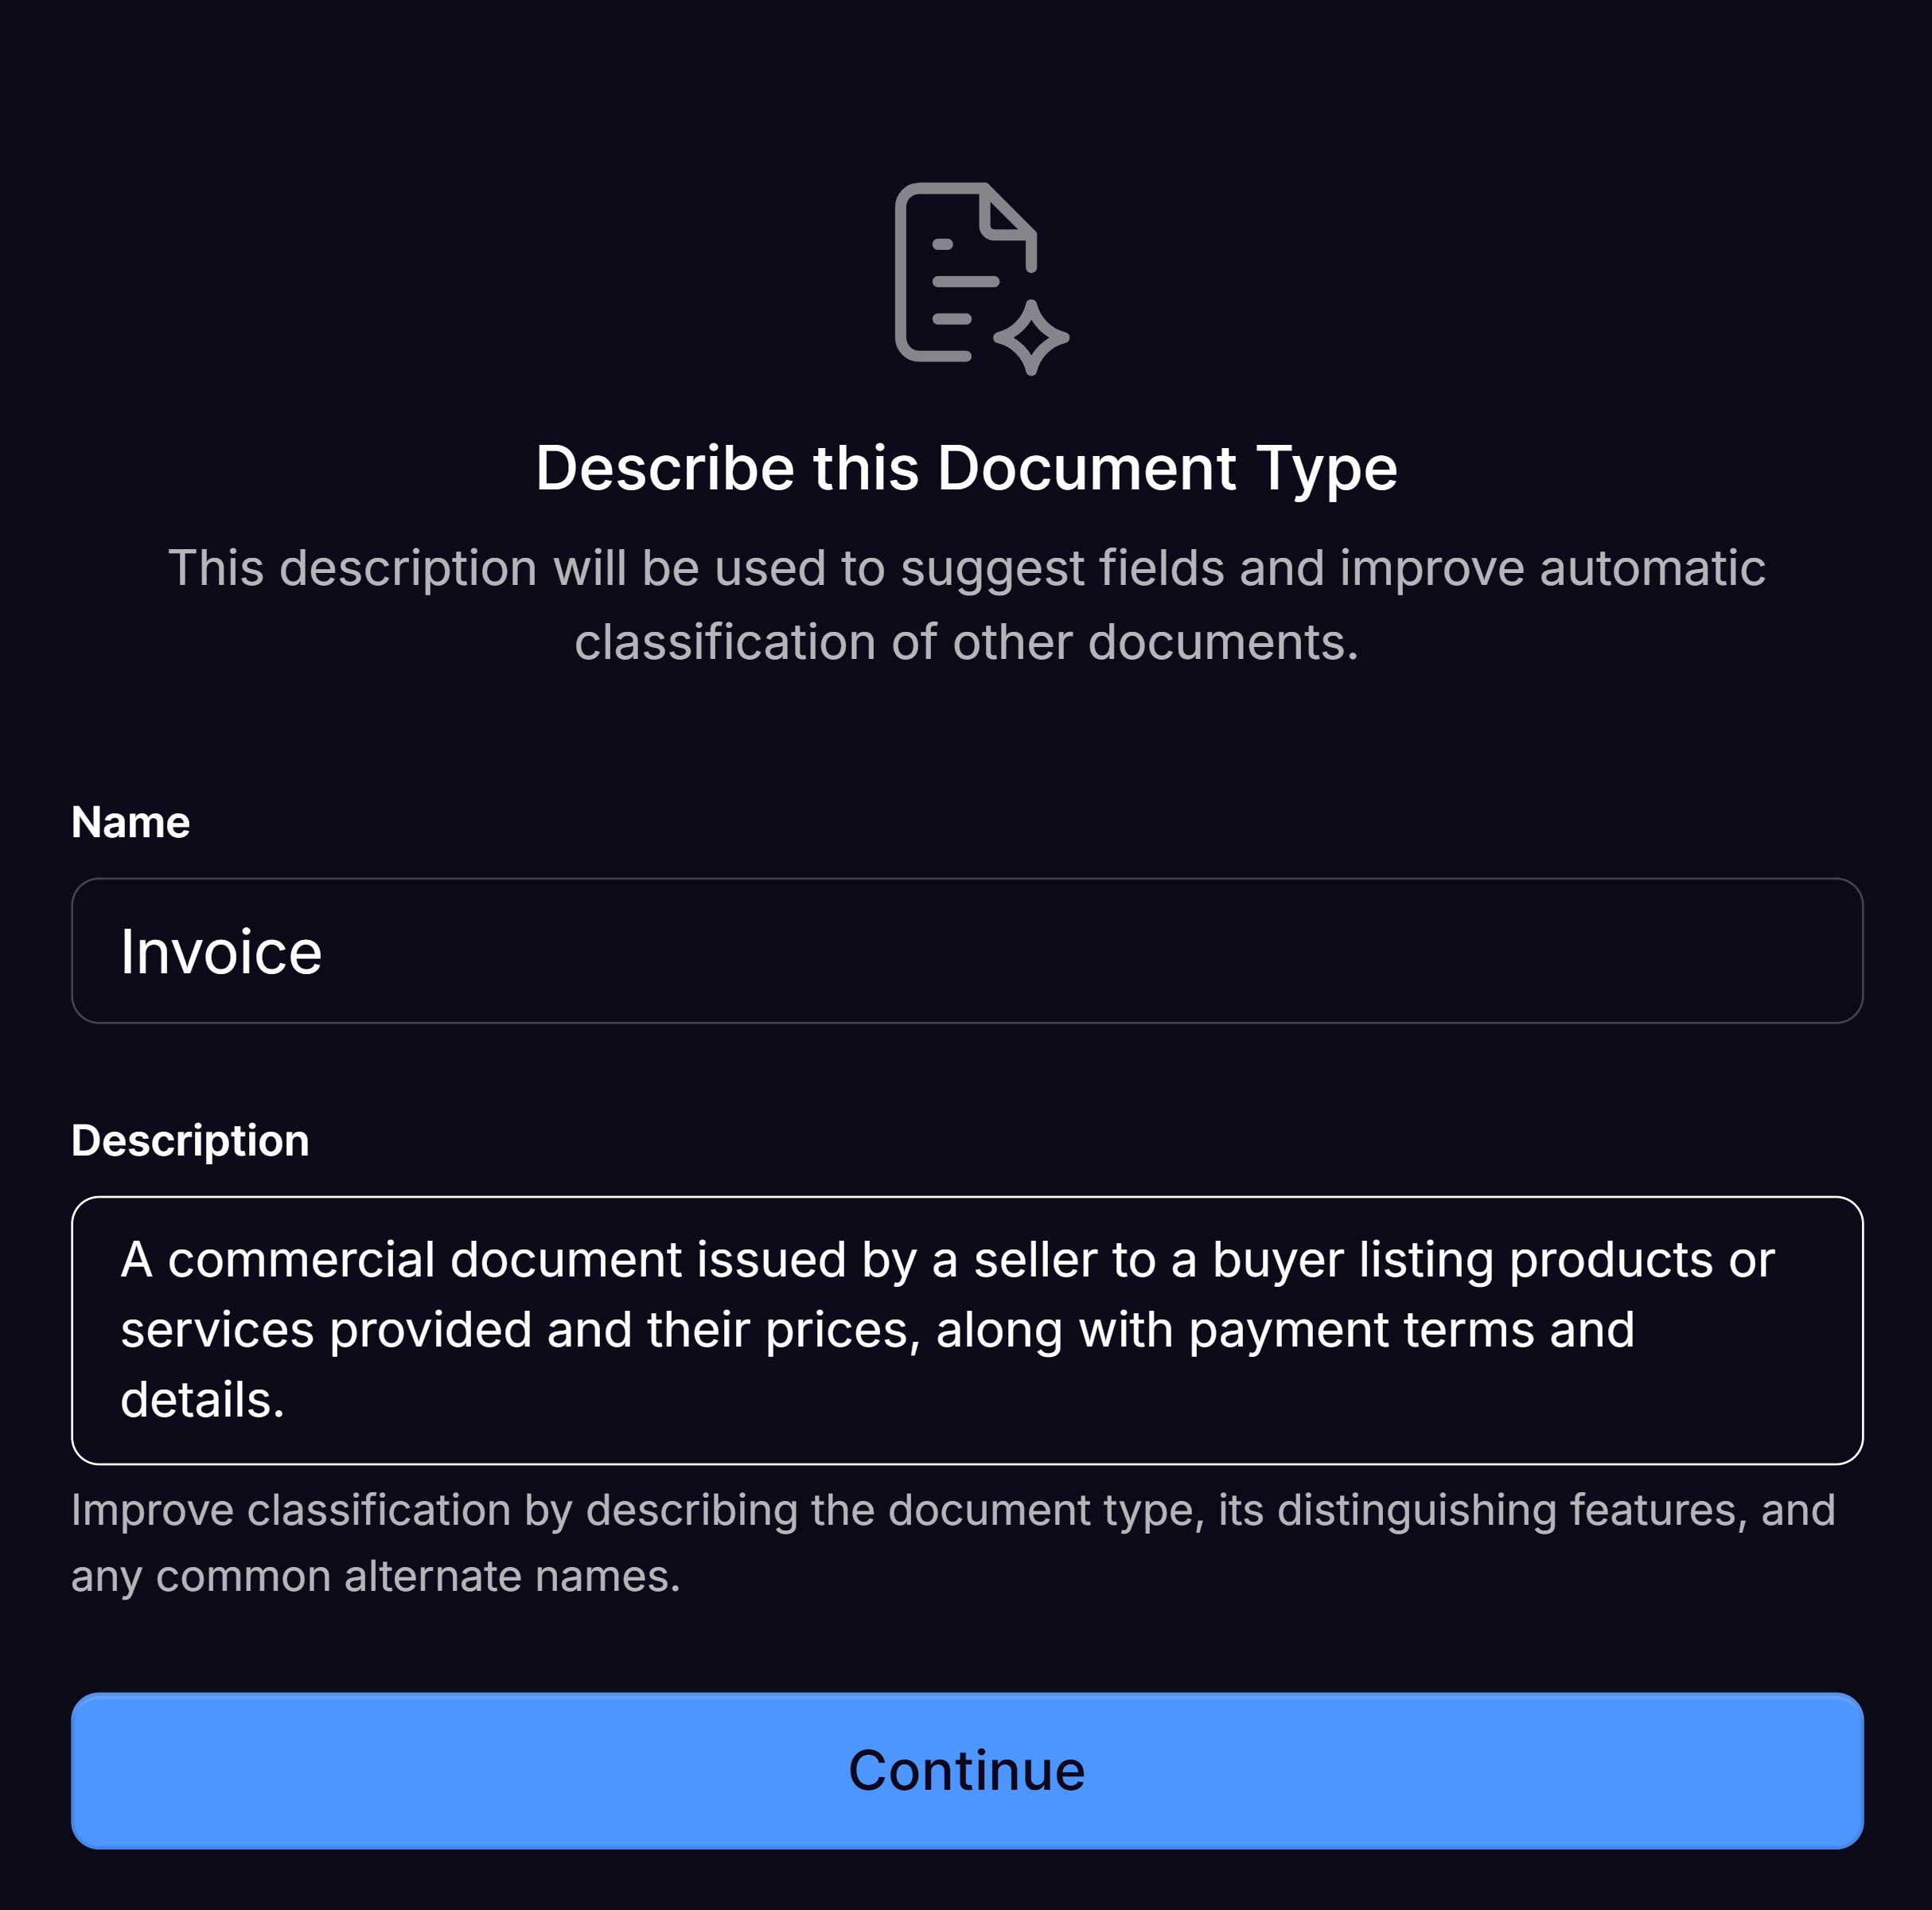
Our AI model will interpret the contents of your document and determine what type of document it is.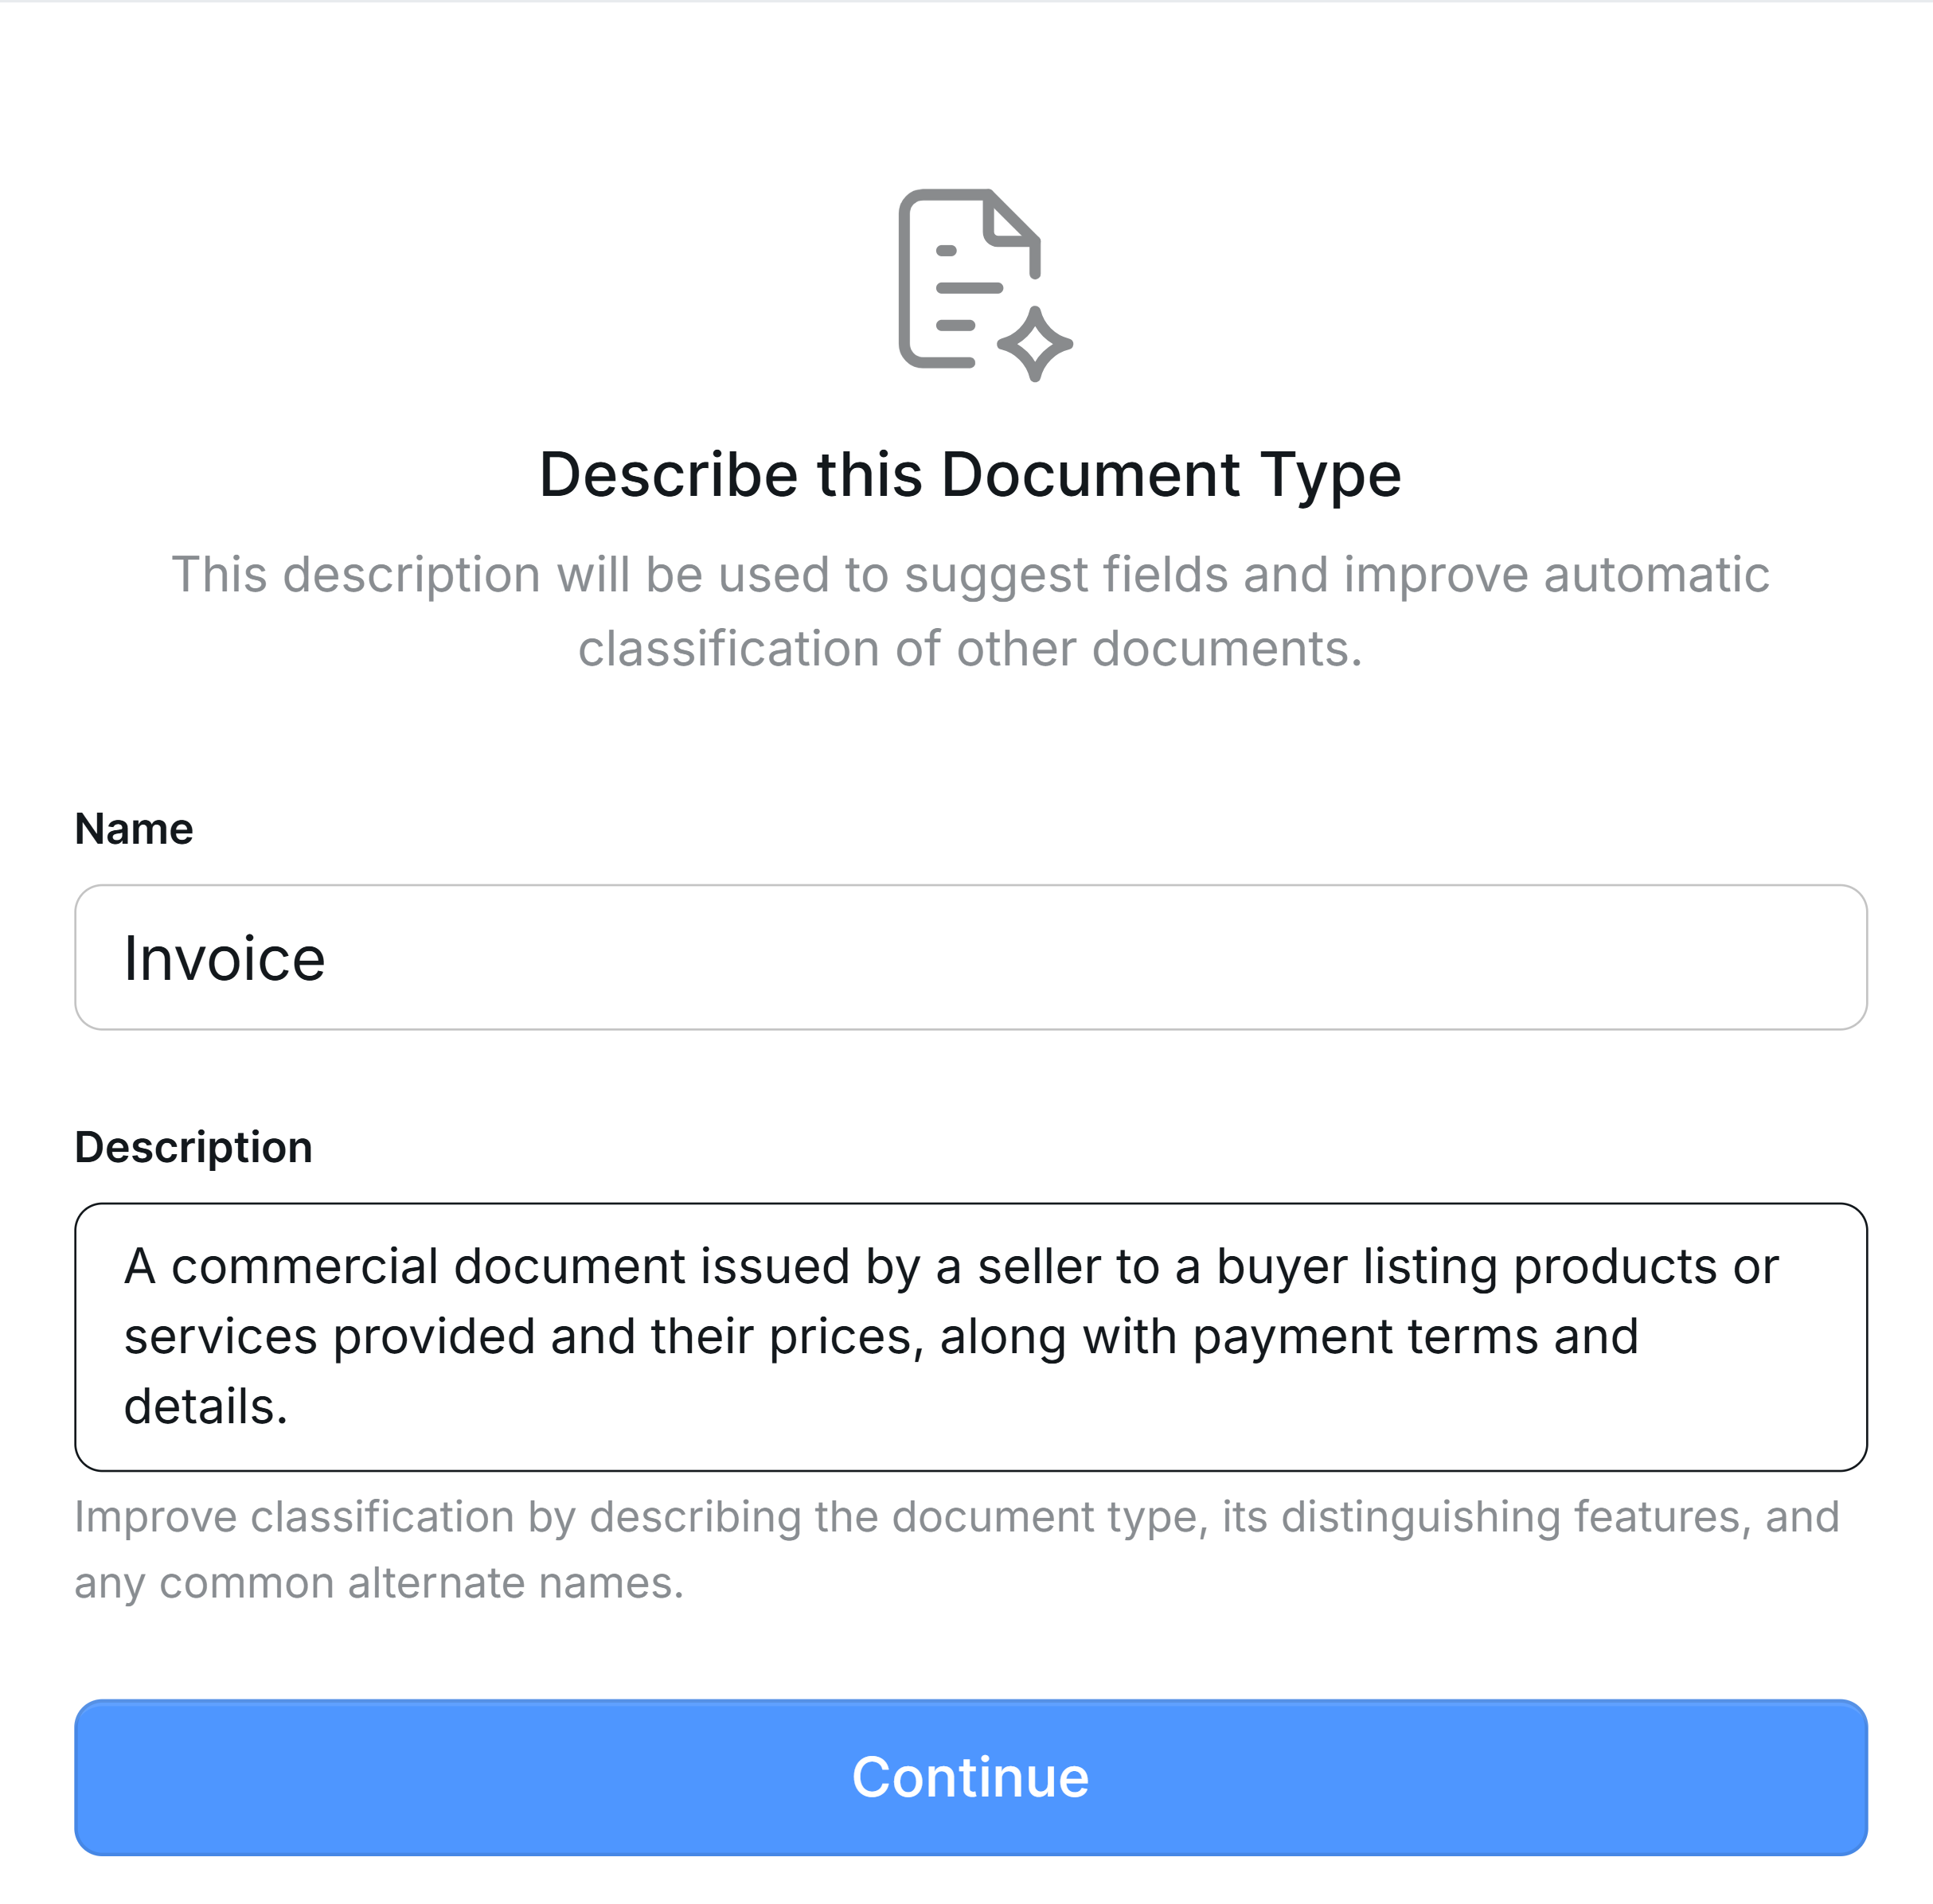
Field configuration
Once the initial fields have been set up, you will move to the Document Type Configuration View.Here, you can make add, delete or update fields to get to the exact configuration needed for your use case.
- Deleting Fields – To delete a field, select the red bin icon.
- Adding New Fields – Users can add fields from the bottom right-hand corner or by selecting the + icon next to a field heading. This will open the Edit Field view, where you can name your field, select the data type, and configure advanced settings. Once you name your new field, the model will predict it on your document.
- Editing Fields – Users can modify a field’s label, data type, or other settings as needed by clicking the pencil icon to open the Edit Field view.
- Organise your Fields – Create relevant headings and drag and drop to move your fields between headings. See the Advanced configuration guide to explore advanced options.
Validate documents
Now you have successfully created a new document type and extraction model.Users are now in the Document Validation interface, where the extracted data should be reviewed for accuracy. When the data is correct, users can click ‘Confirm Document’ and the document will be added to Model memory to improve performance.
4. Additional Resources
See the User Validation Tutorial for more information on validating data and the Improving Accuracy Guide for strategies to uplift the performance of your models if required.Should you need to delete a Document Type, navigate to Document Type > Settings.