Purpose
The Affinda platform automates the extraction of data from your documents into a structured and usable format. However, user review may be required to validate the model outputs. This tutorial will guide you through validating the data extracted from your documents in the Affinda Platform. This tutorial is aimed at users who are reviewing the outputs from the Affinda platform. This may be for:- Model improvement: Confirming documents when the data is correct will improve model performance over time by adding the documents to ‘model memory’
- Ongoing document processing: ‘Human in the loop’ review of documents processed as part of general processes
We recommend reading the Getting Started tutorial to understand some core components of the Affinda Platform before completing this tutorial.
Step-by-Step
Visual Learner? Follow along with our Video Tutorial:1
Open the document for review in the Affinda app
Start by opening the Document Validation Interface for a document you want to review.
2
Get familiar with the Validation Interface
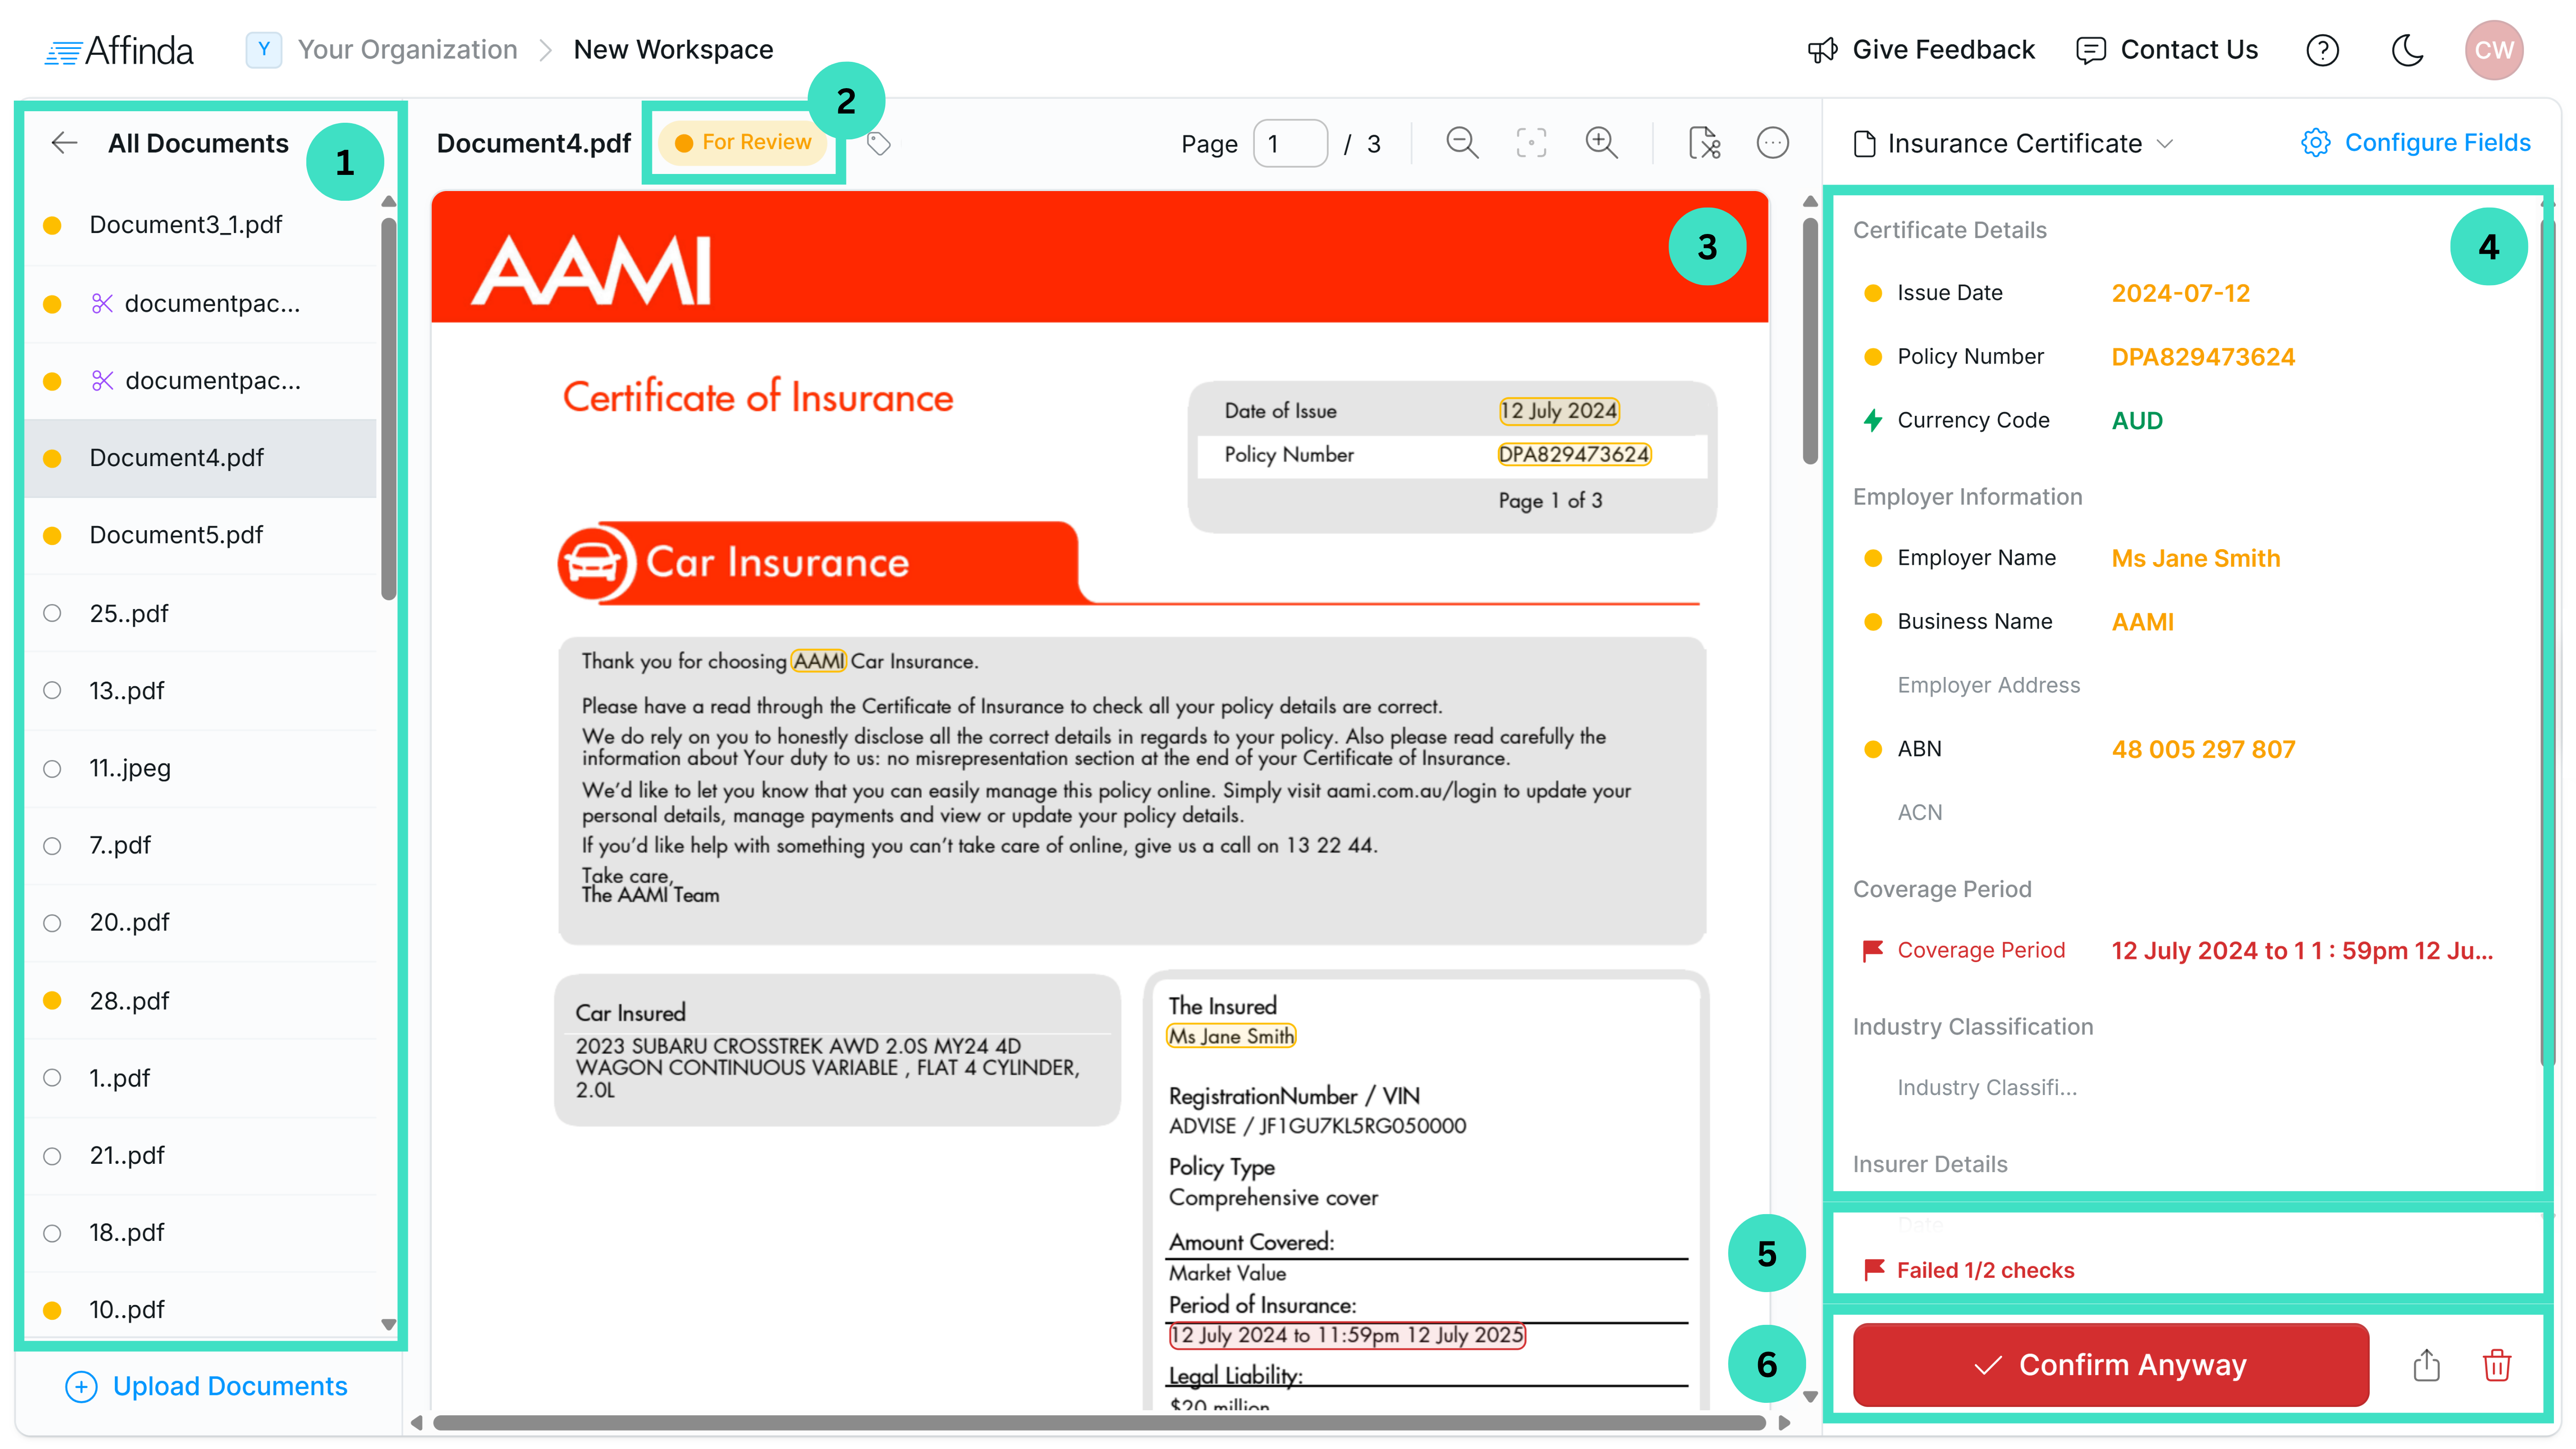

- The left-hand pane shows the list of documents for review. You can navigate between documents by clicking on their name,
- The status of the document is shown in the top pane above the document. For Validation, you should look at documents with “For Review” status. Documents that have already been reviewed will have “Confirmed” status.
- The document is displayed in the middle of the interface.
- The right-hand pane shows your fields and the value the model extracted from the document you have open.
- In the bottom right corner, you can see if any validation rules have failed on this document. If you hover your mouse over, you can see exactly which rules have passed and failed.
- At the bottom right corner is the “Confirm document” button. Confirming the document allows the model to learn and improve accuracy. However, only confirm a document once all extraction has been checked and corrected, to avoid the replication of errors.
3
Field status
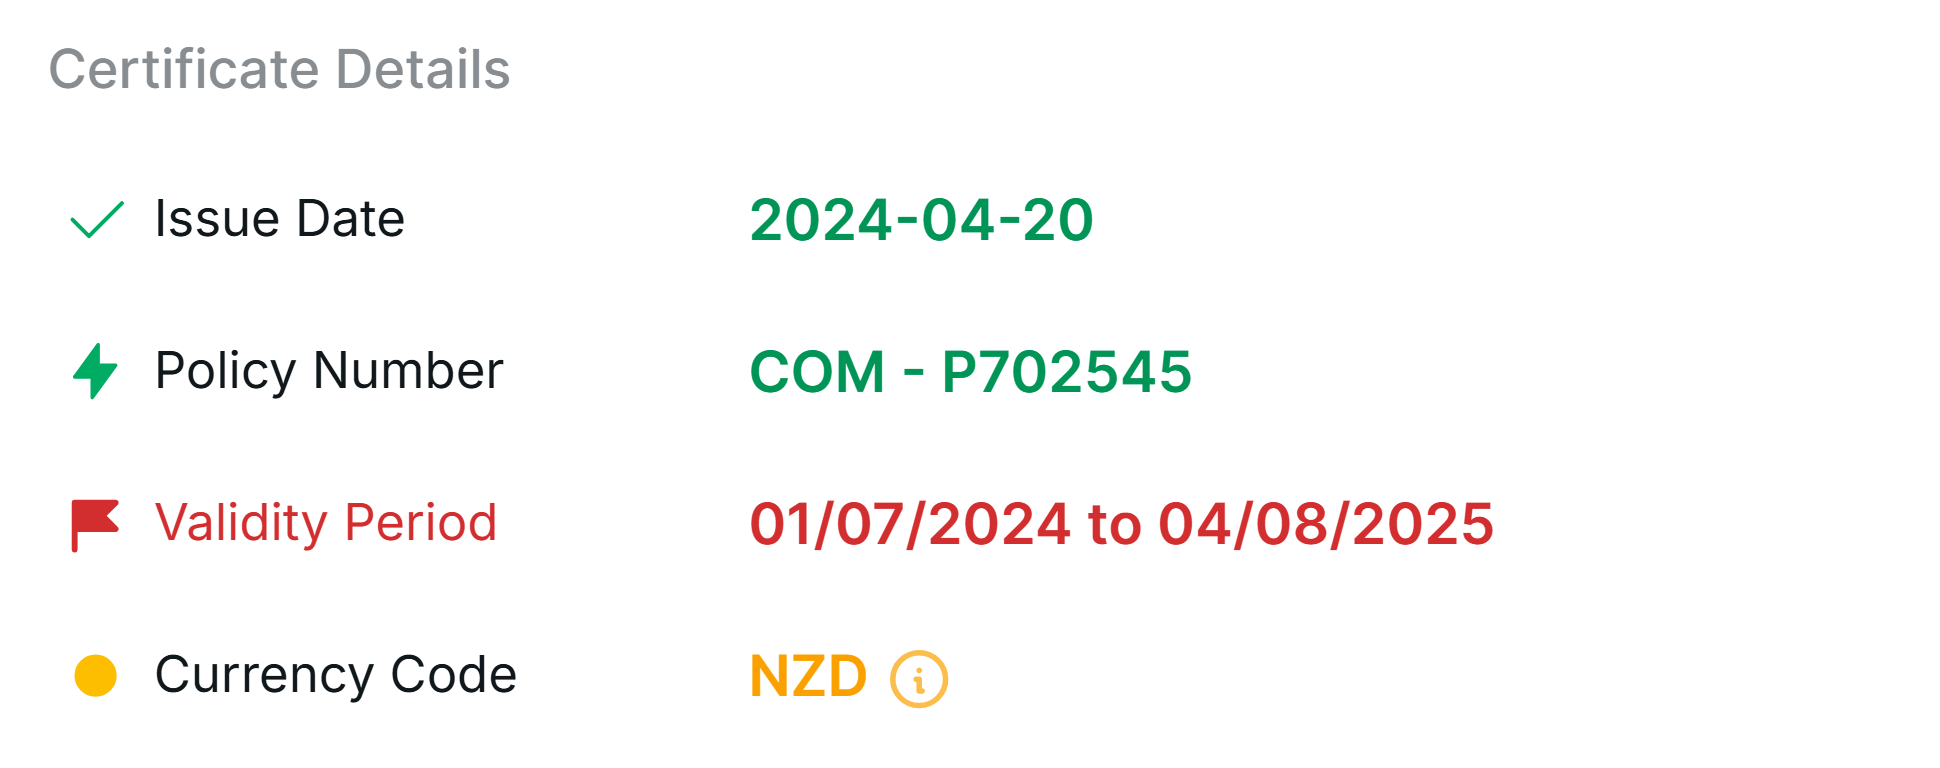

- Orange fields show the model’s predictions for that field on the document; they should be reviewed.
- Red fields indicate the data extracted from the document failed a validation rule; these should be checked.
- Green fields have been confirmed. The tick symbol indicates the field was manually confirmed, whilst the lightning bolt icon indicates the field was auto-confirmed as it passed validation rules.
4
Review field extraction
Check each field and validate that the data extracted by the model matches what’s on the document.Always check for fields that failed validation rules, and for any key fields that might be missing.
5
Correcting an incorrect field
If you notice a field has been missed or extracted in the wrong place, correct the annotation by adjusting or redrawing the box on the document where it should’ve been extracted. Make sure you have selected the correct field name in the drop-down, and press confirm.
Fields with multiple annotations
If the data for a single instance of a field requires multiple annotation boxes (e.g. the field crosses across page boundaries), you can create multiple rectanges.- Draw the first box.
- Click the + icon on the right-hand side of the box.
- Draw another rectangle.
6
Confirm Document
Once you are happy with all the fields and their extracted values match what’s on the document, click “Confirm Document”.Depending on your Validation Settings, you might not be able to confirm a document until all of your validation rules pass.Once the document is corrected and confirmed, the model can use it in its Model Memory. This allows the models to learn from your documents and improve performance on future documents.Clicking confirm will move you on to the next document in the “For Review” queue.
Additional actions
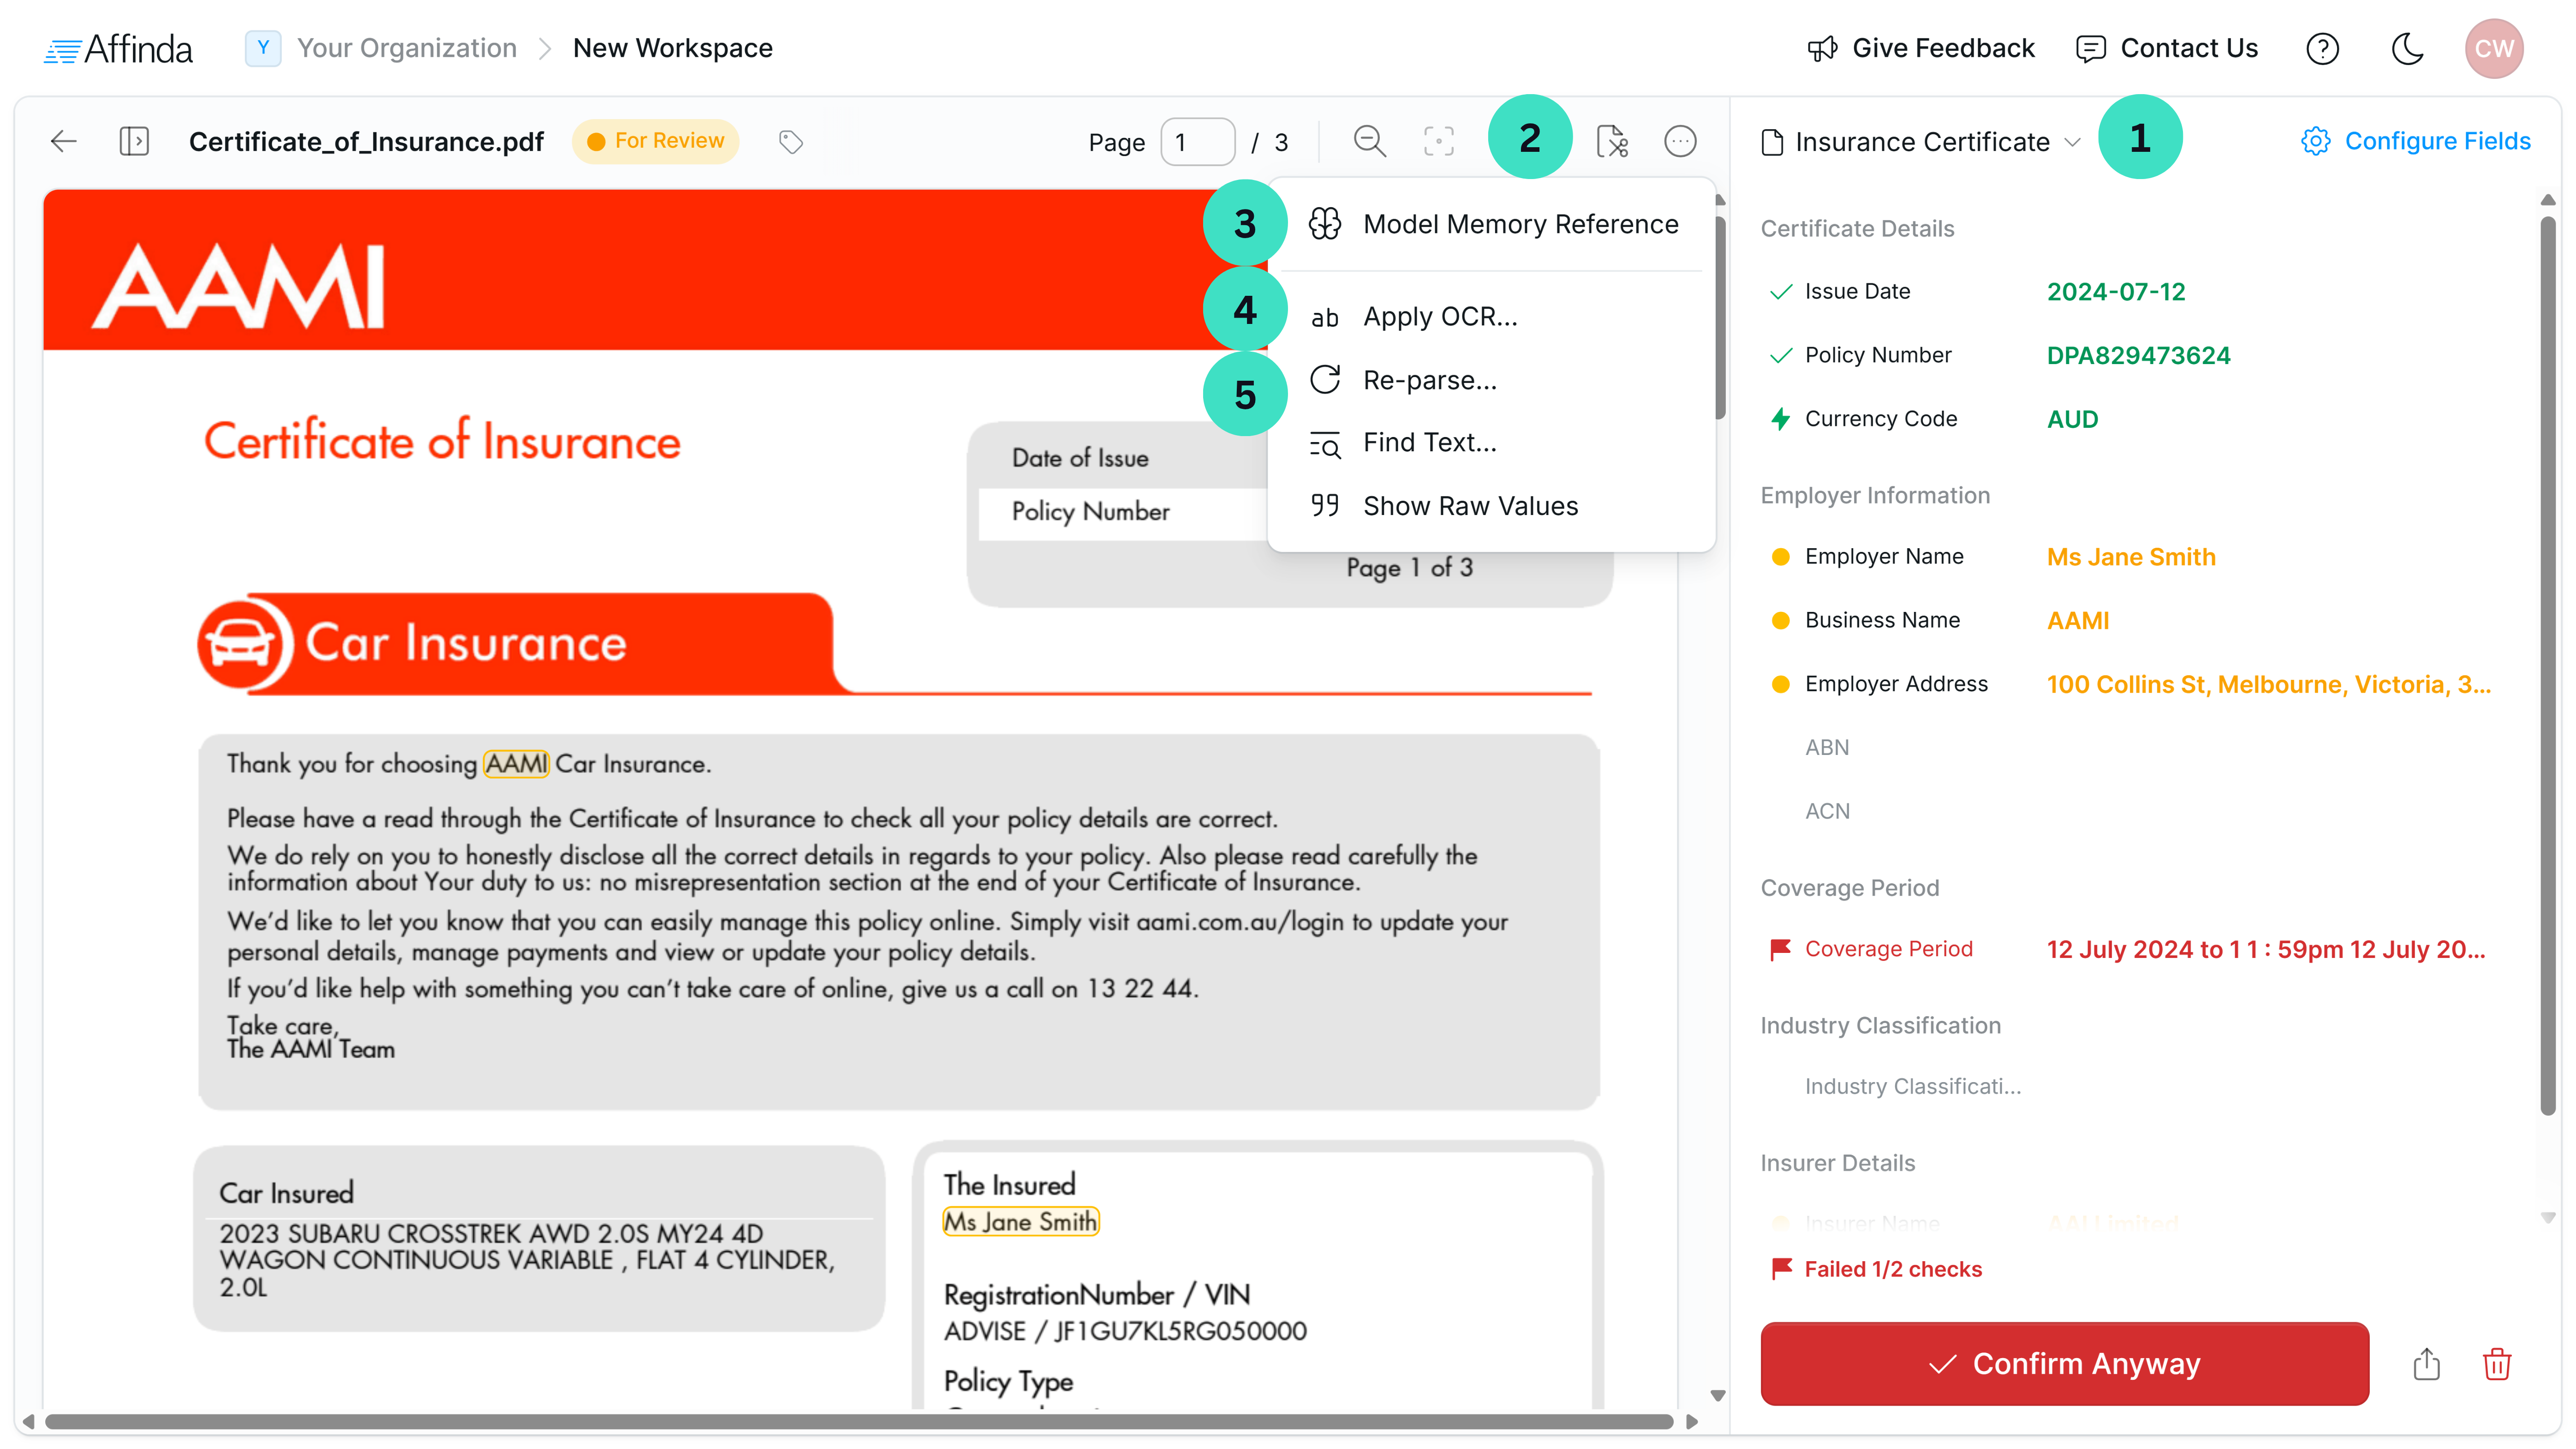
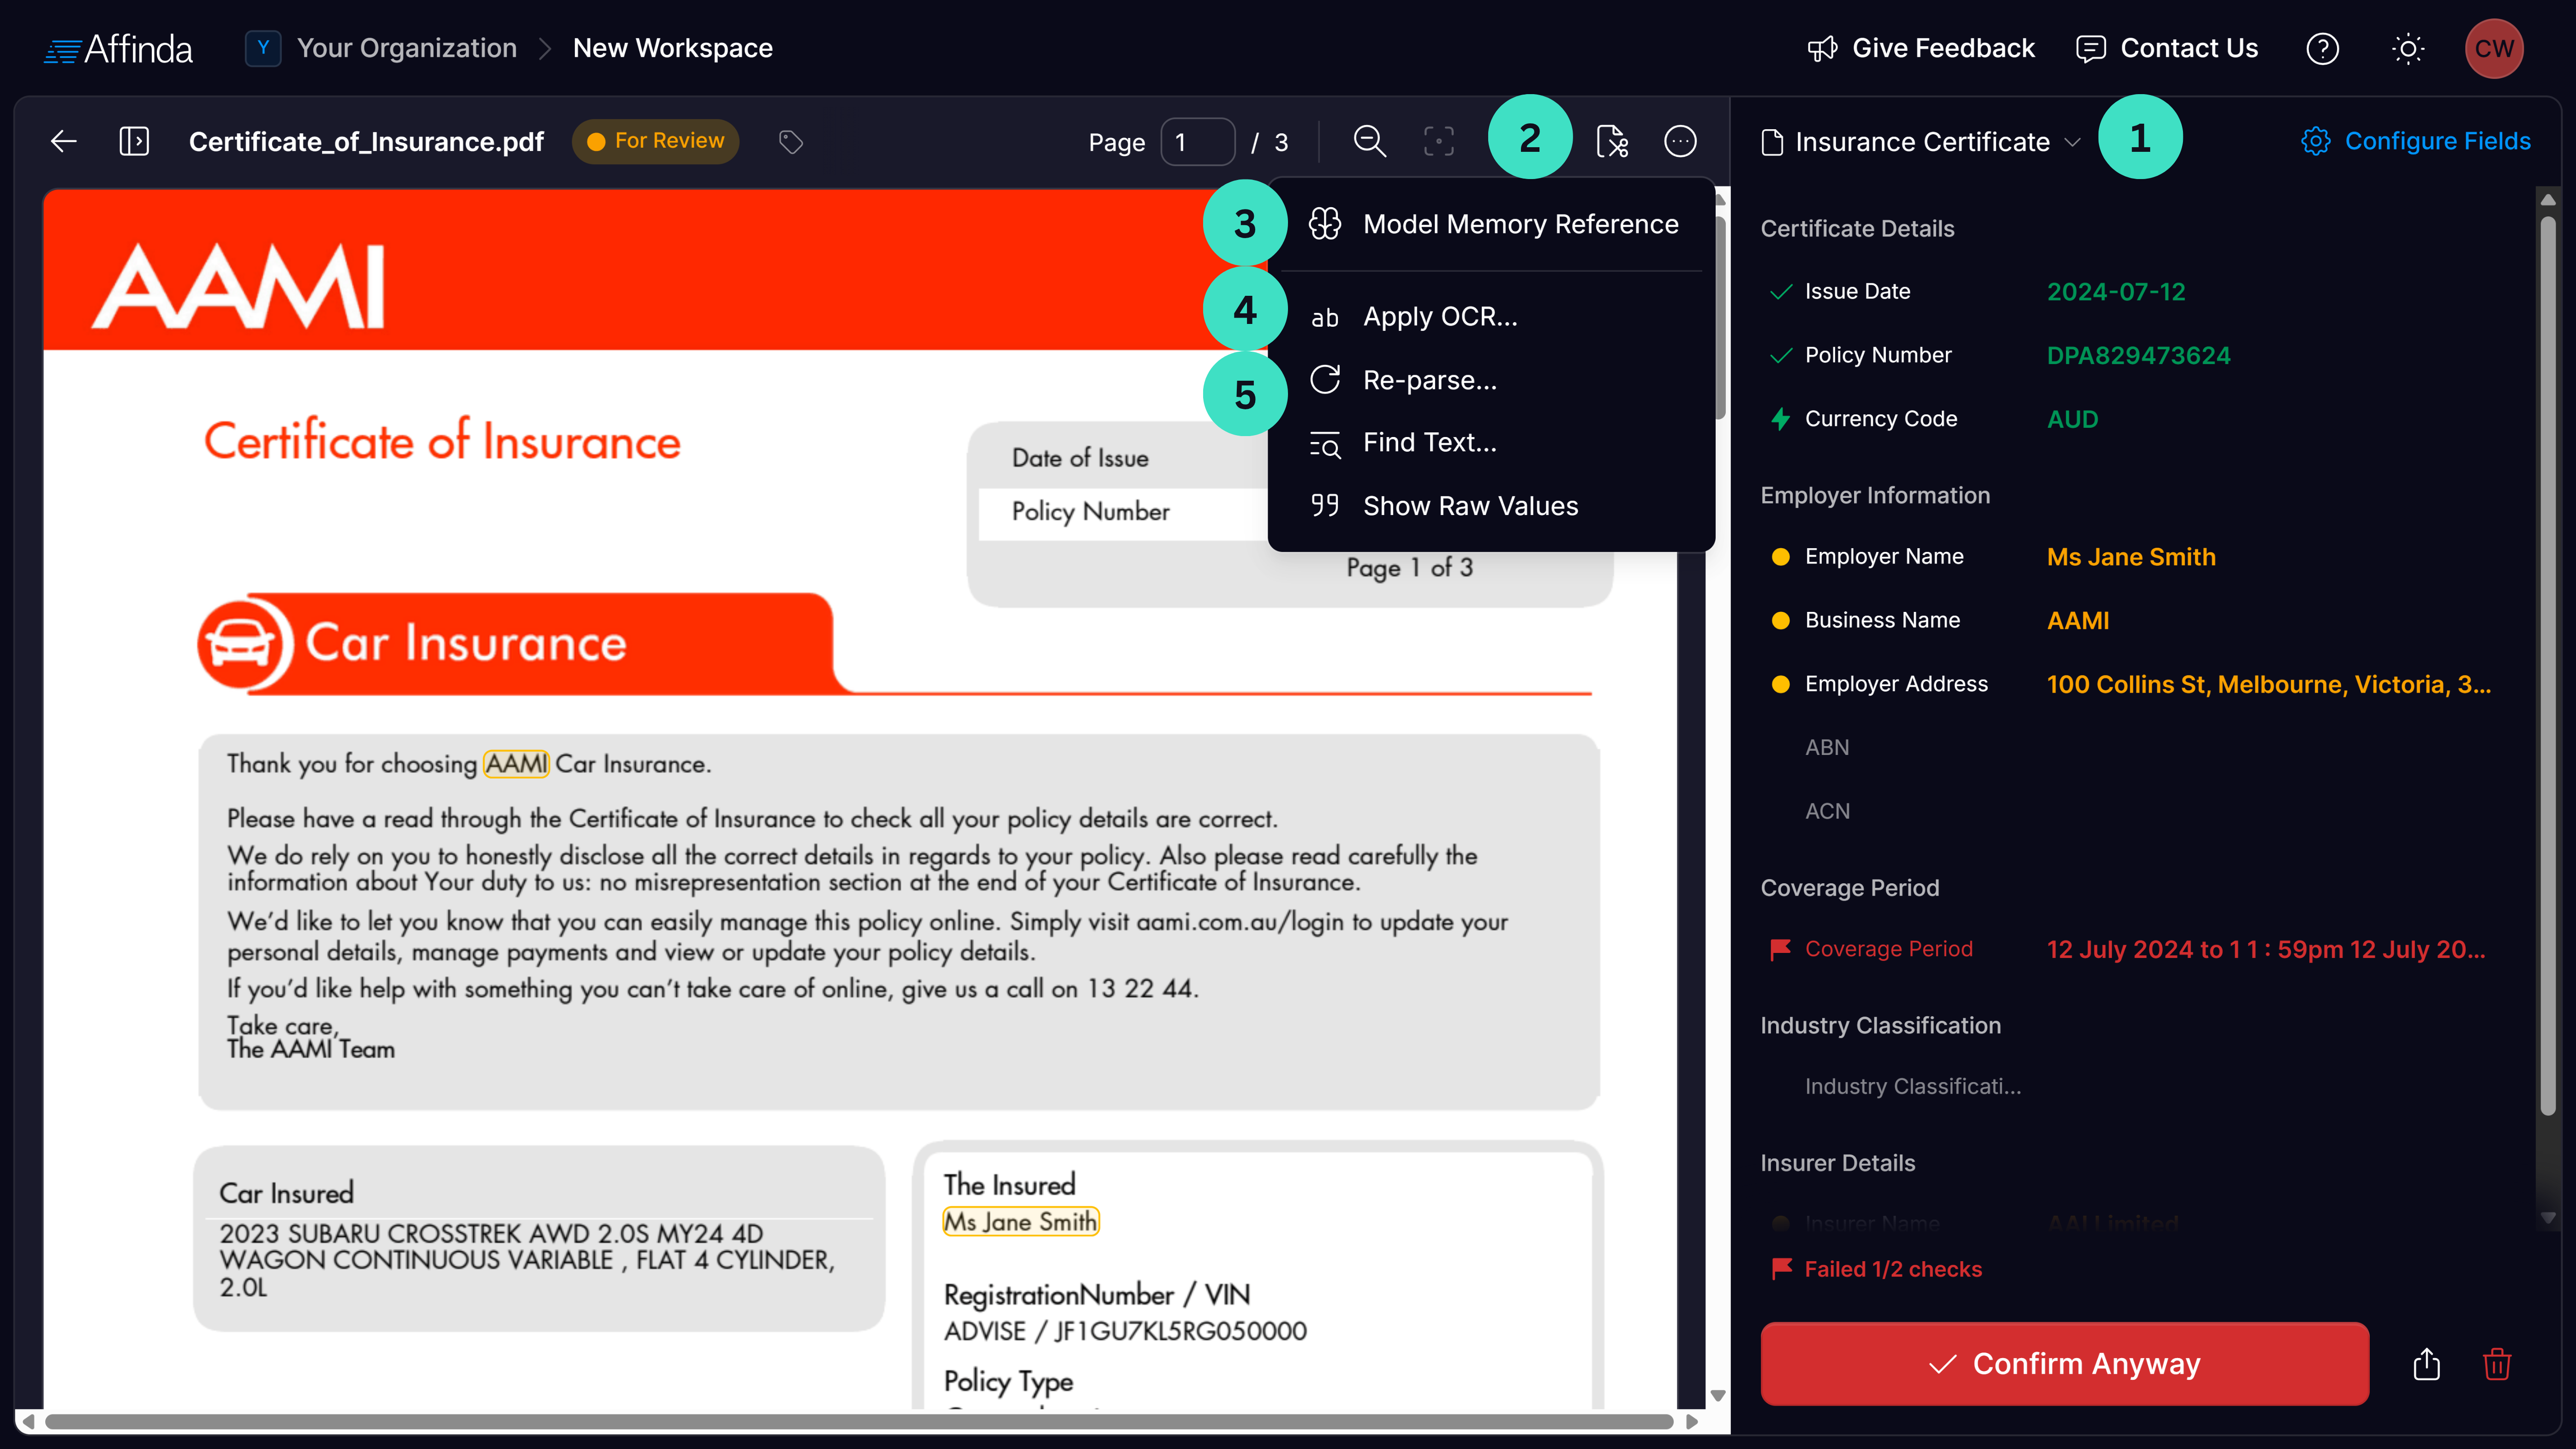
- Reclassification: Adjust or remove the document’s classification, which triggers the document to re-parse. See Splitting & Classification tutorial for more information.
- Edit Pages: Split documents into multiple files, rotate pages, or delete pages as needed. See Splitting & Classification tutorial for more information.
- Apply OCR: Apply Optical Character Recognition (OCR) to address text extraction issues and automatically reprocess the document.
- Model Memory Reference: Review the reference document used by the model for extraction. Useful for checking if a similar document format is already stored in Model Memory and identifying any annotation errors.
- Re-parse: Re-process the document using the latest model updates.