Purpose
The Affinda platform automates the splitting and classification of documents. However, user review may be required to validate the model outputs. This tutorial will walk you through how to validate the splitting and classification of your documents in the Affinda Platform. This tutorial is aimed at any users who are reviewing the outputs from the Affinda platform. This may be for:- Model improvement: Confirming documents when the data is correct will improve model performance over time by adding the documents to ‘model memory’
- Ongoing document processing: ‘Human in the loop’ review of documents processed as part of general processes
Definitions
Firstly, let’s get across what splitting and classification mean in your automated document workflow.Splitting
Splitting in Affinda refers to the platform’s ability to identify individual documents in a multi-document file. Our models will split these into individual files. This allows them to be classified and sent to the correct extraction model.
Classification
Classification is Affinda’s ability to identify what type of document it has received. This is beneficial in two ways:
- It gives you visibility on the type of documents you’ve received
- It allows these documents to be sent to the correct workflow and extraction model
How to validate document splitting and classification
1
Open the document for review in the Affinda app
Start by opening the Document Validation Interface for a document you want to review.
2
Validate Splitting
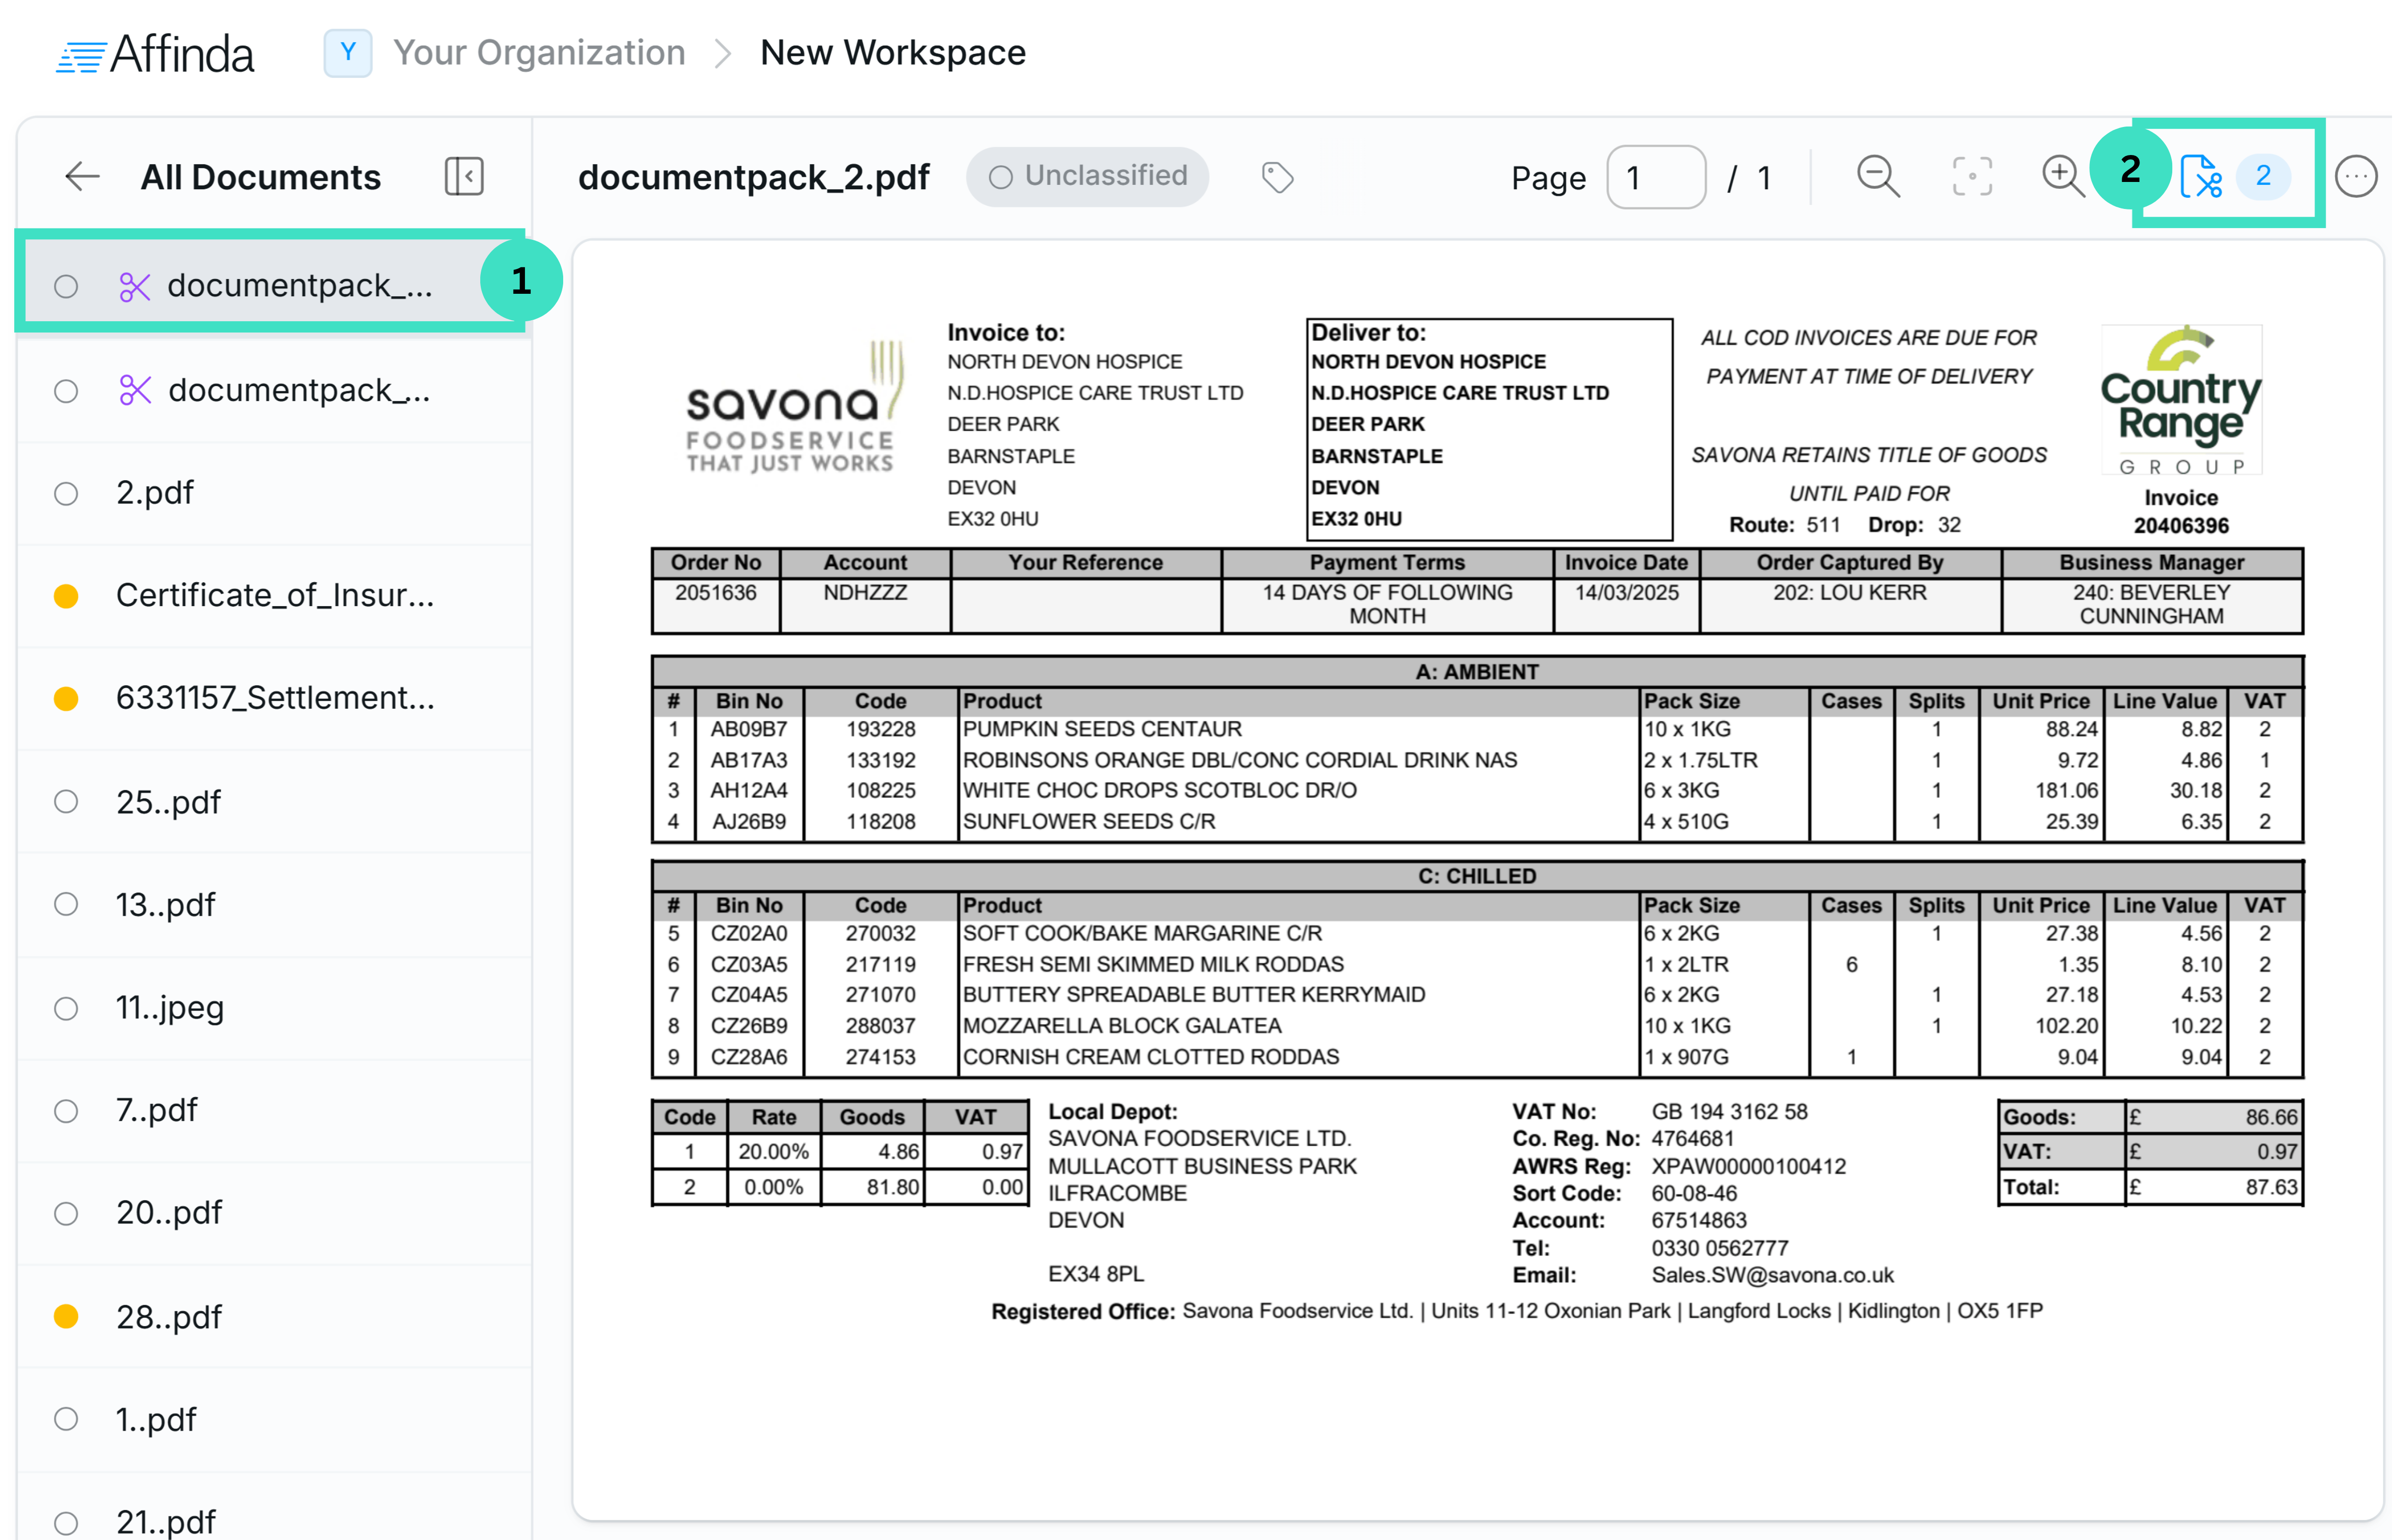
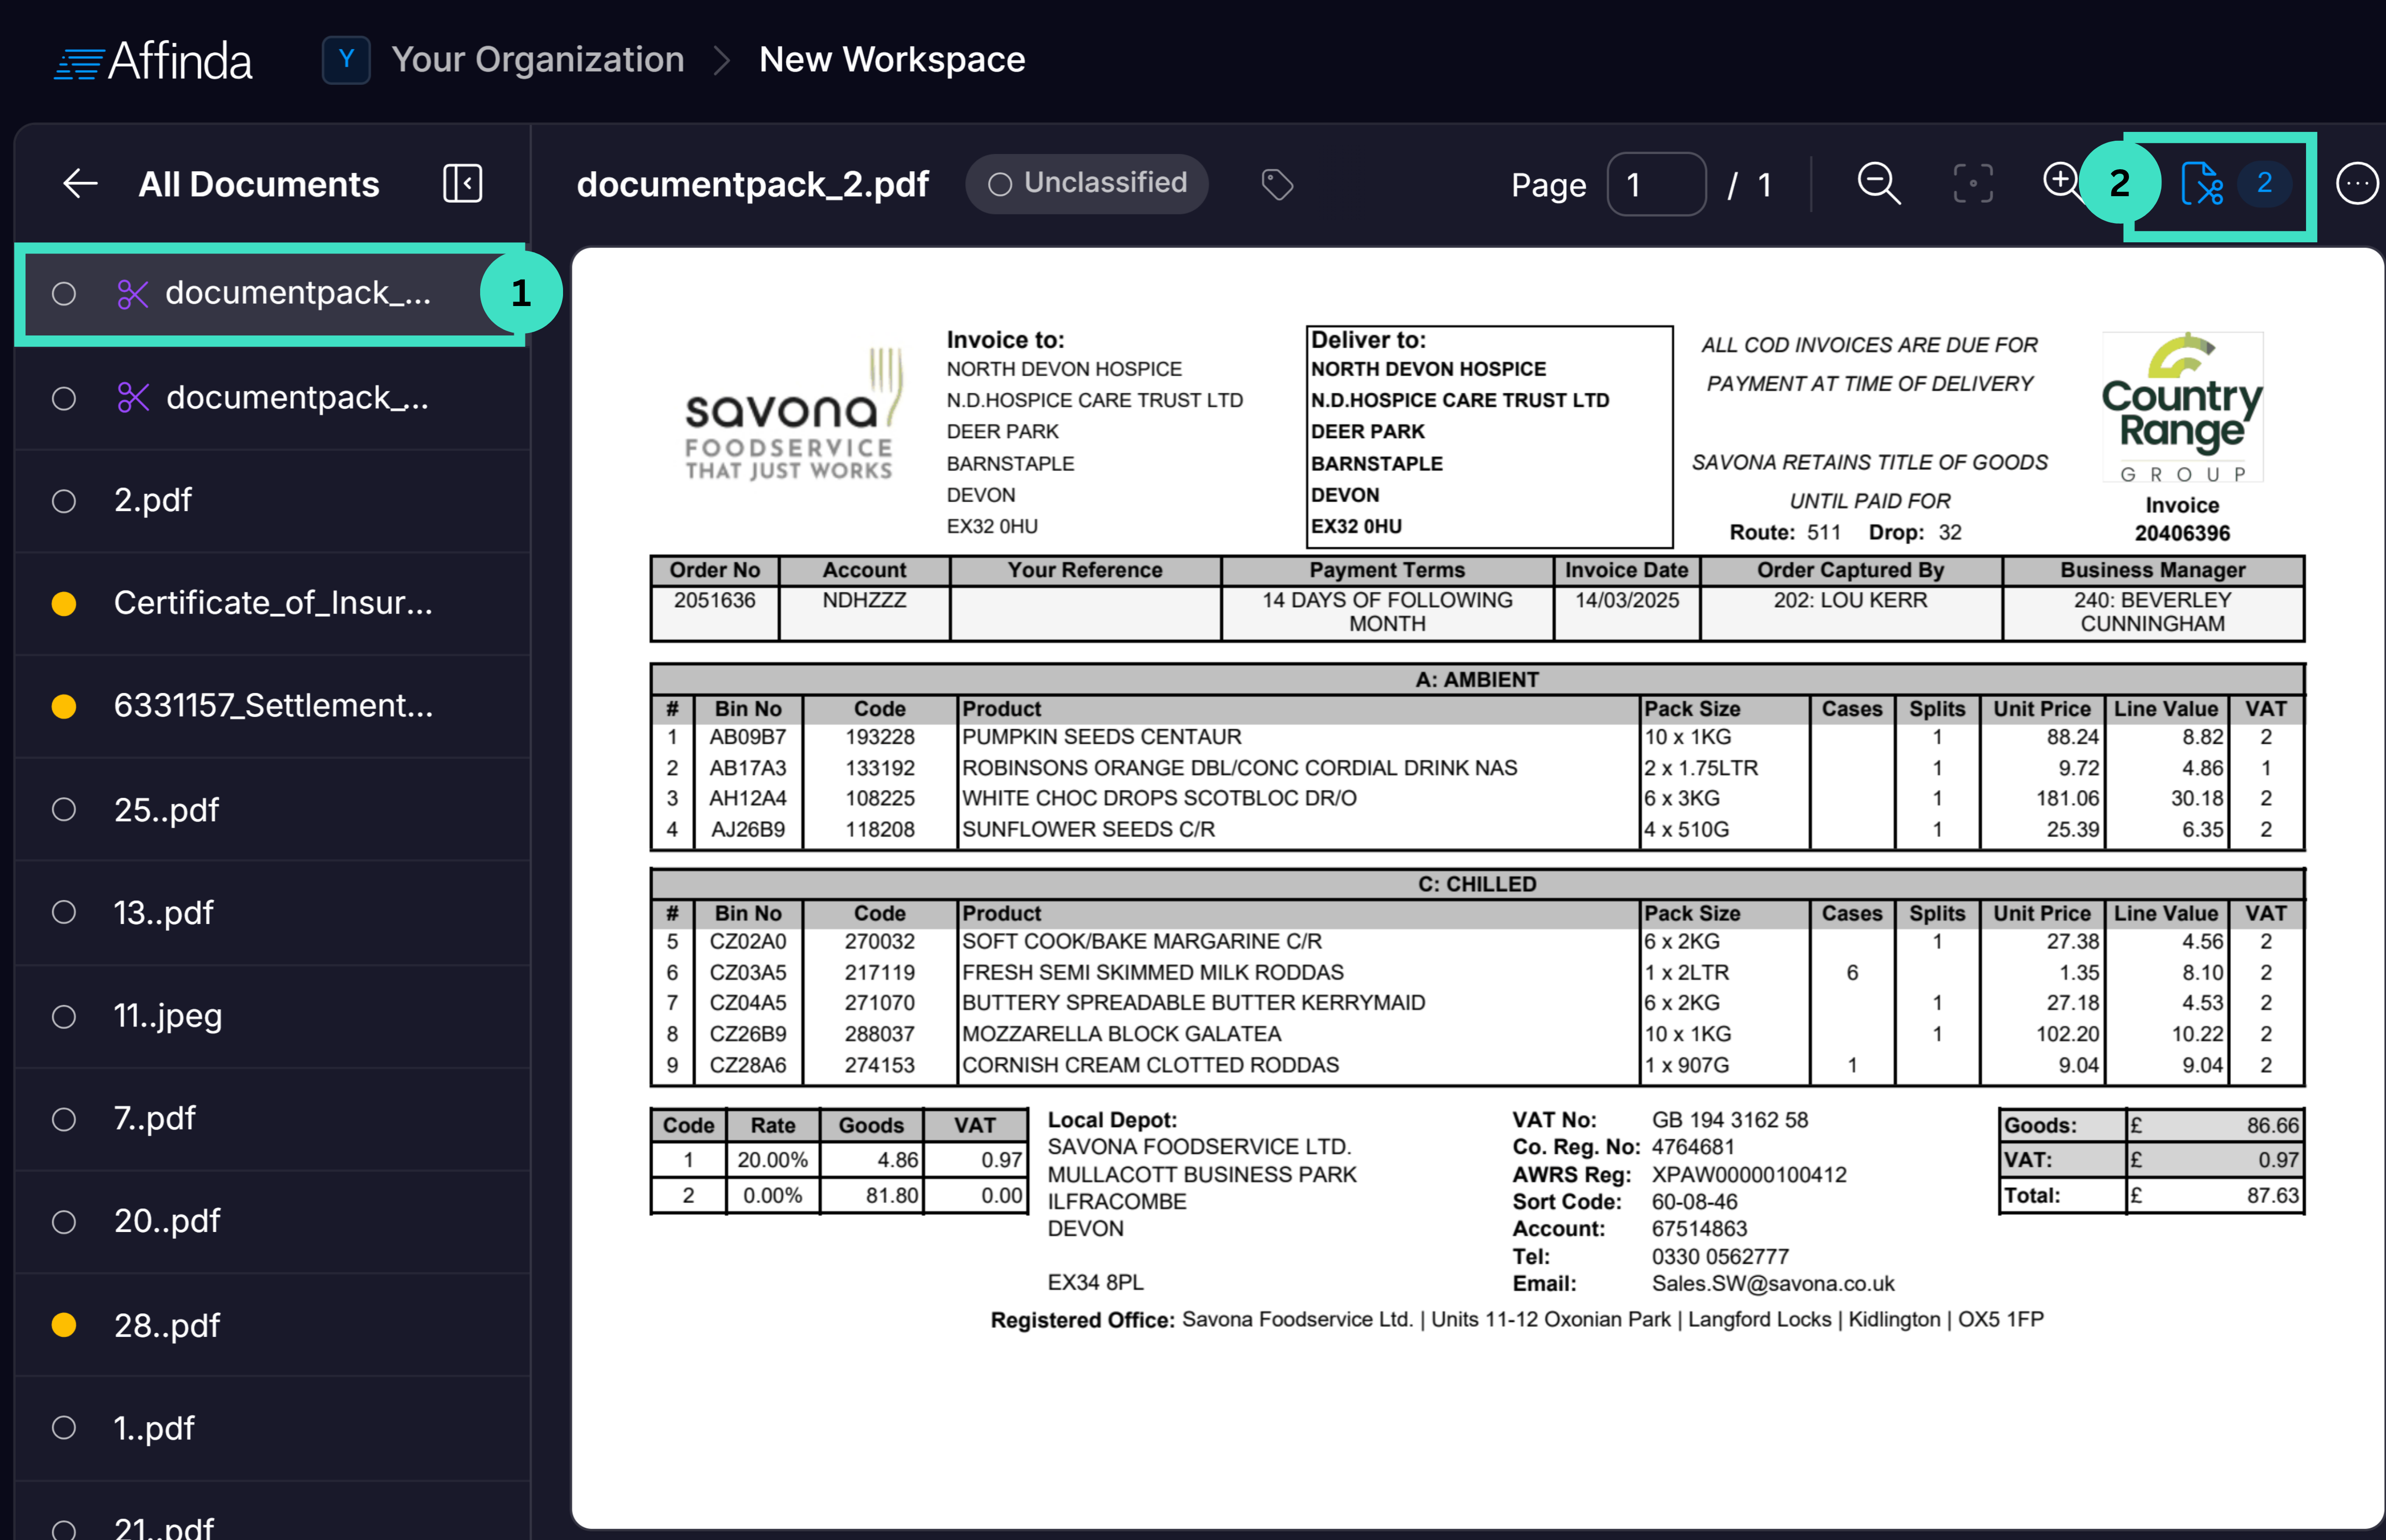
- The purple scissors icon will appear next to the document’s name on the right-hand panel
- The “Edit Pages” button in the top right corner will be blue.
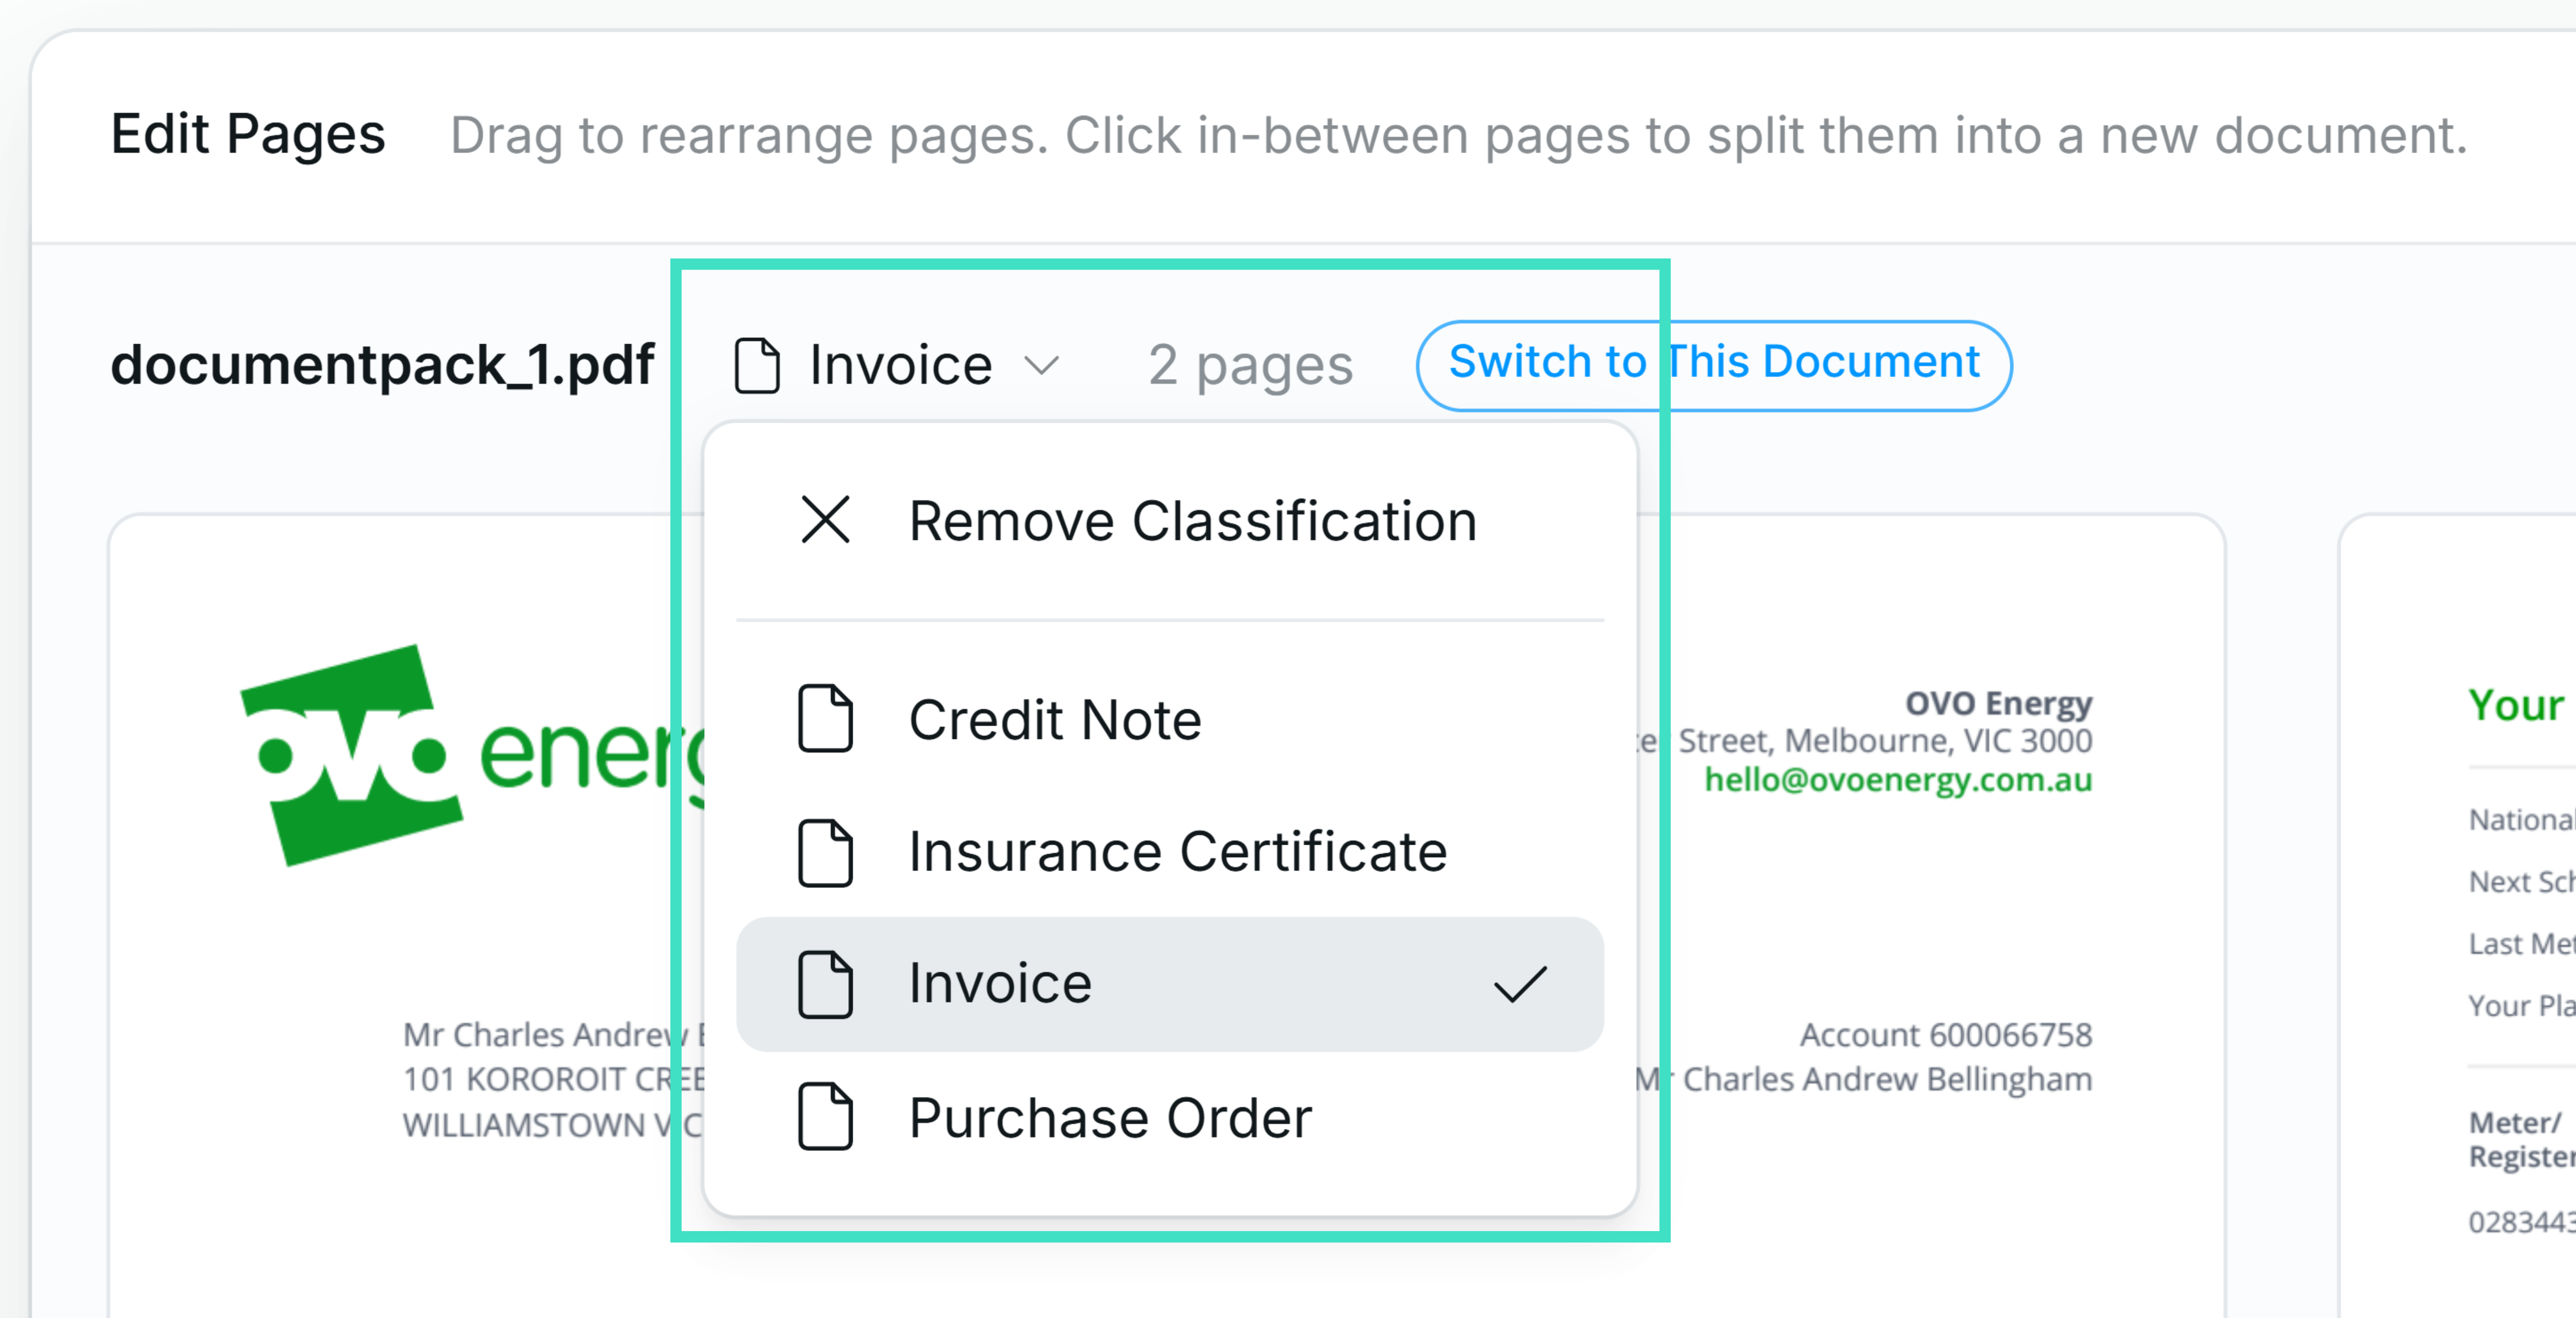
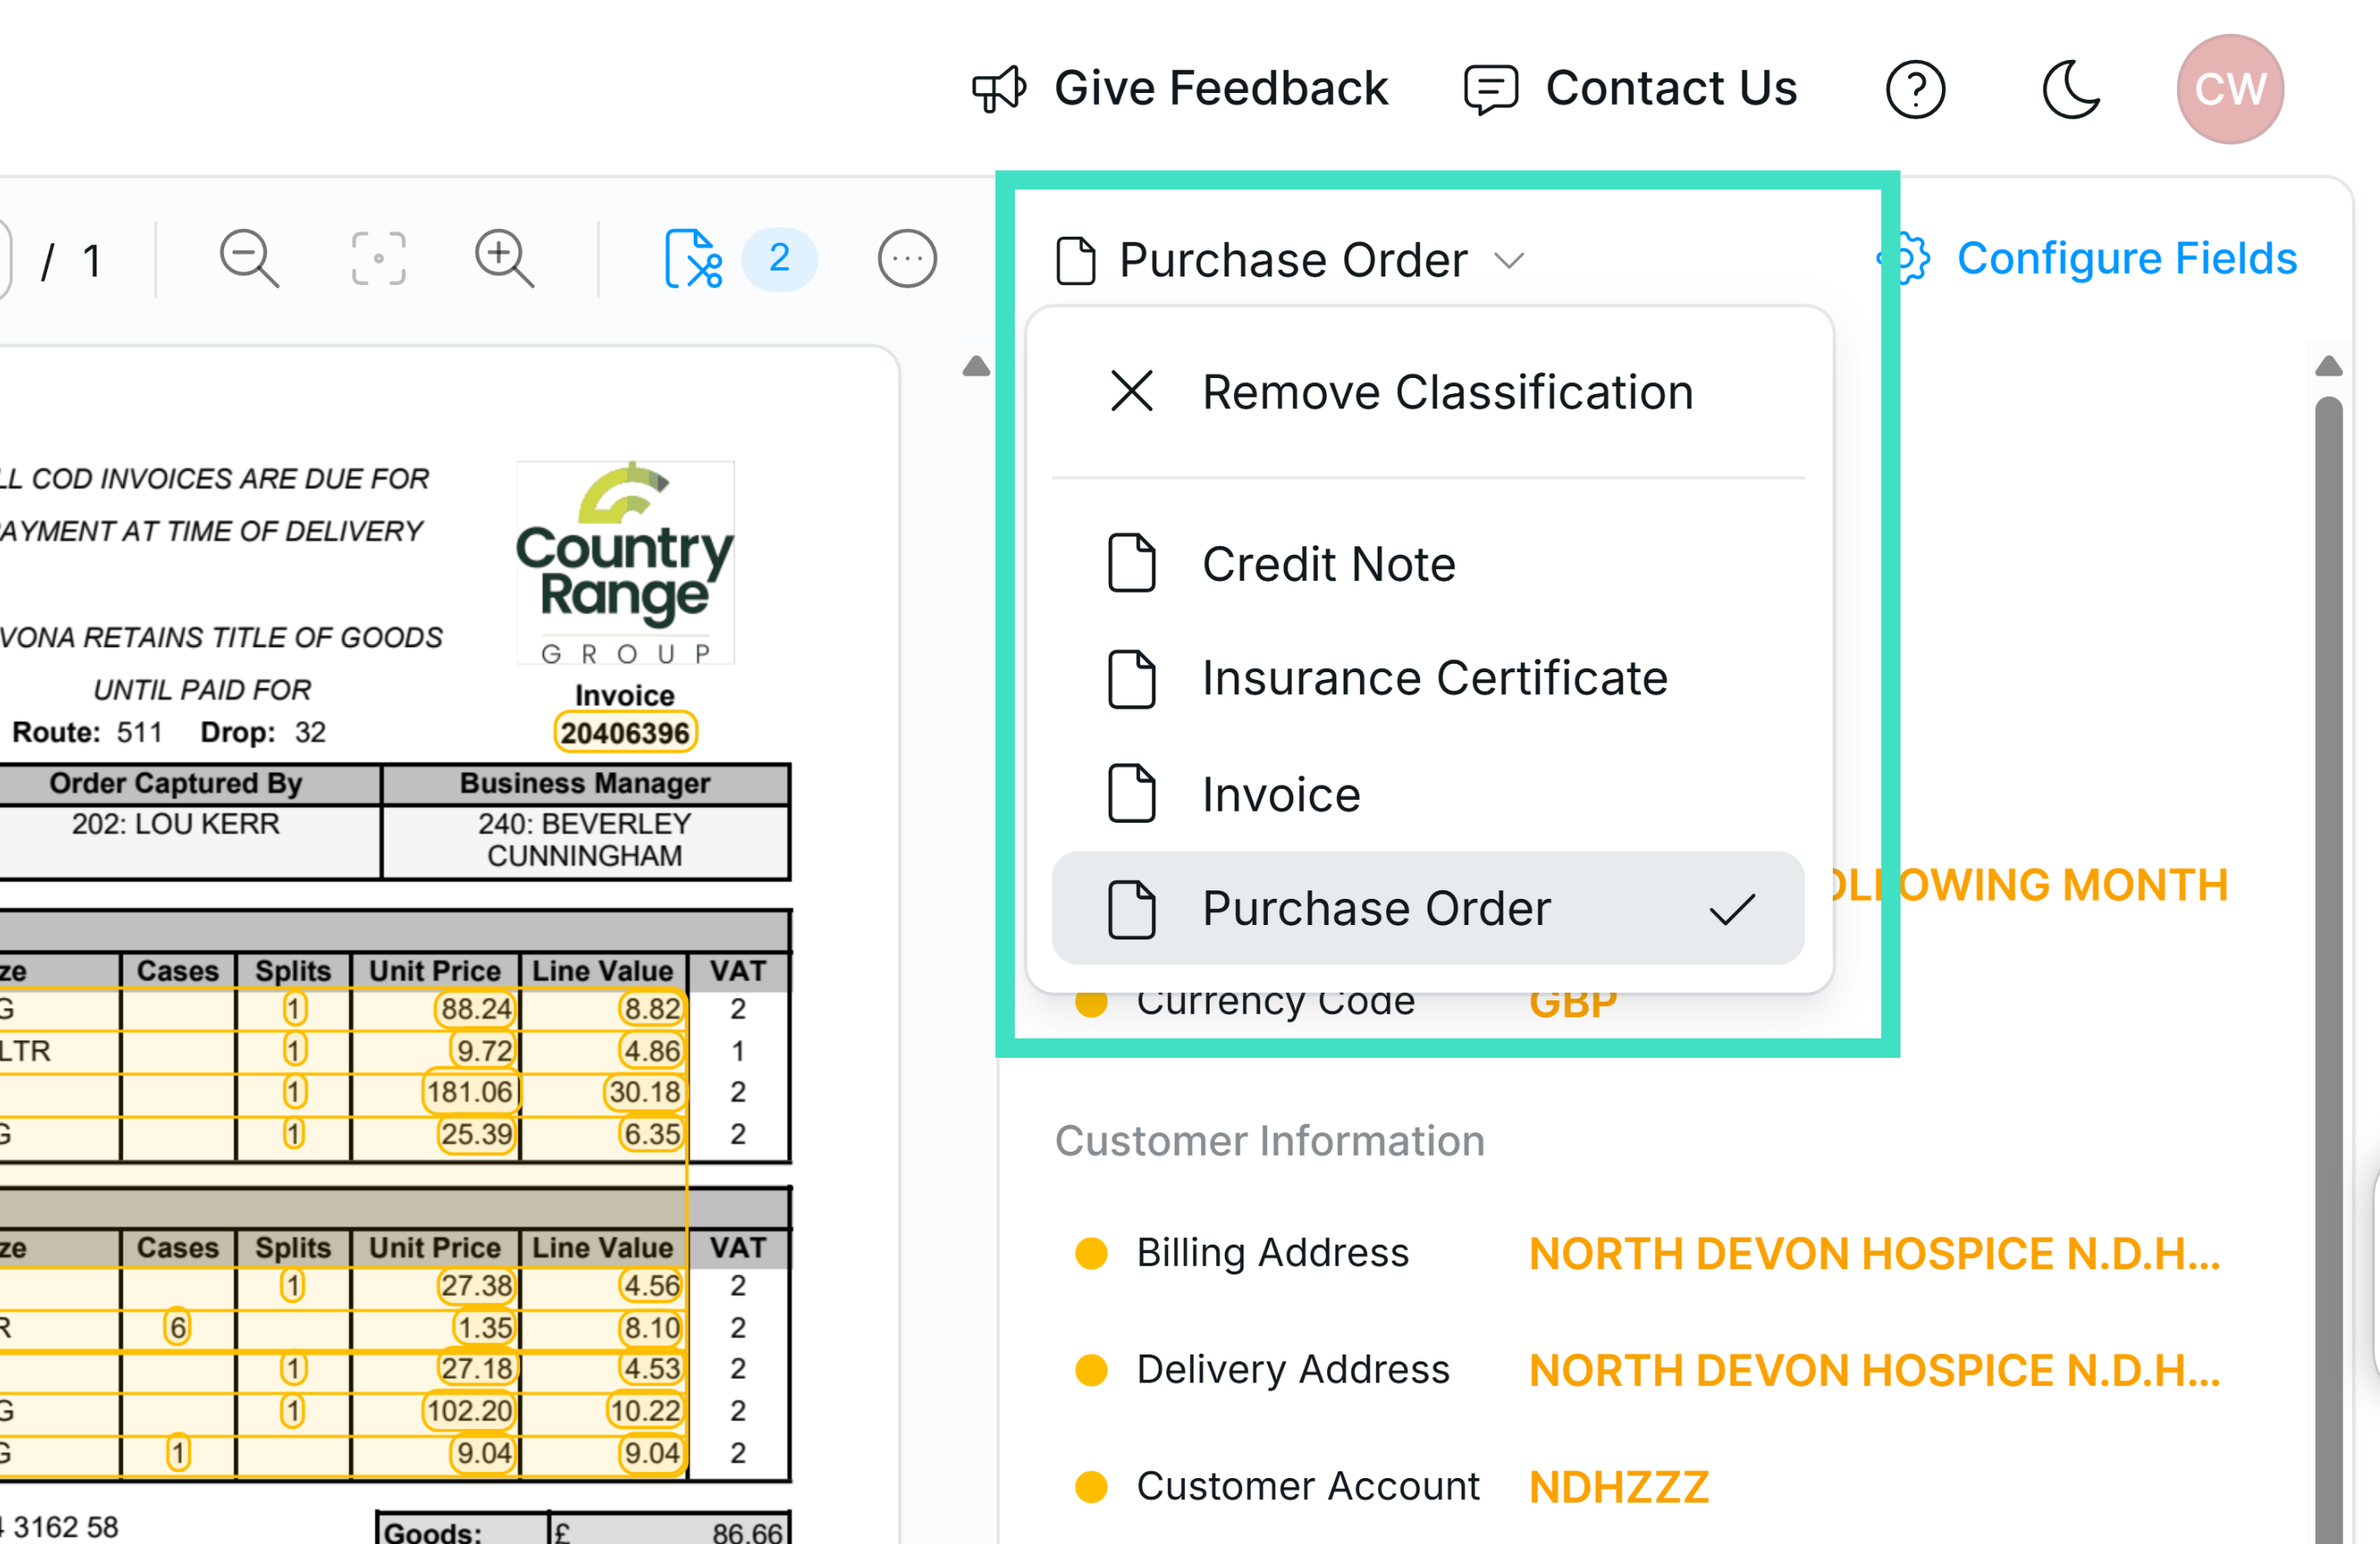
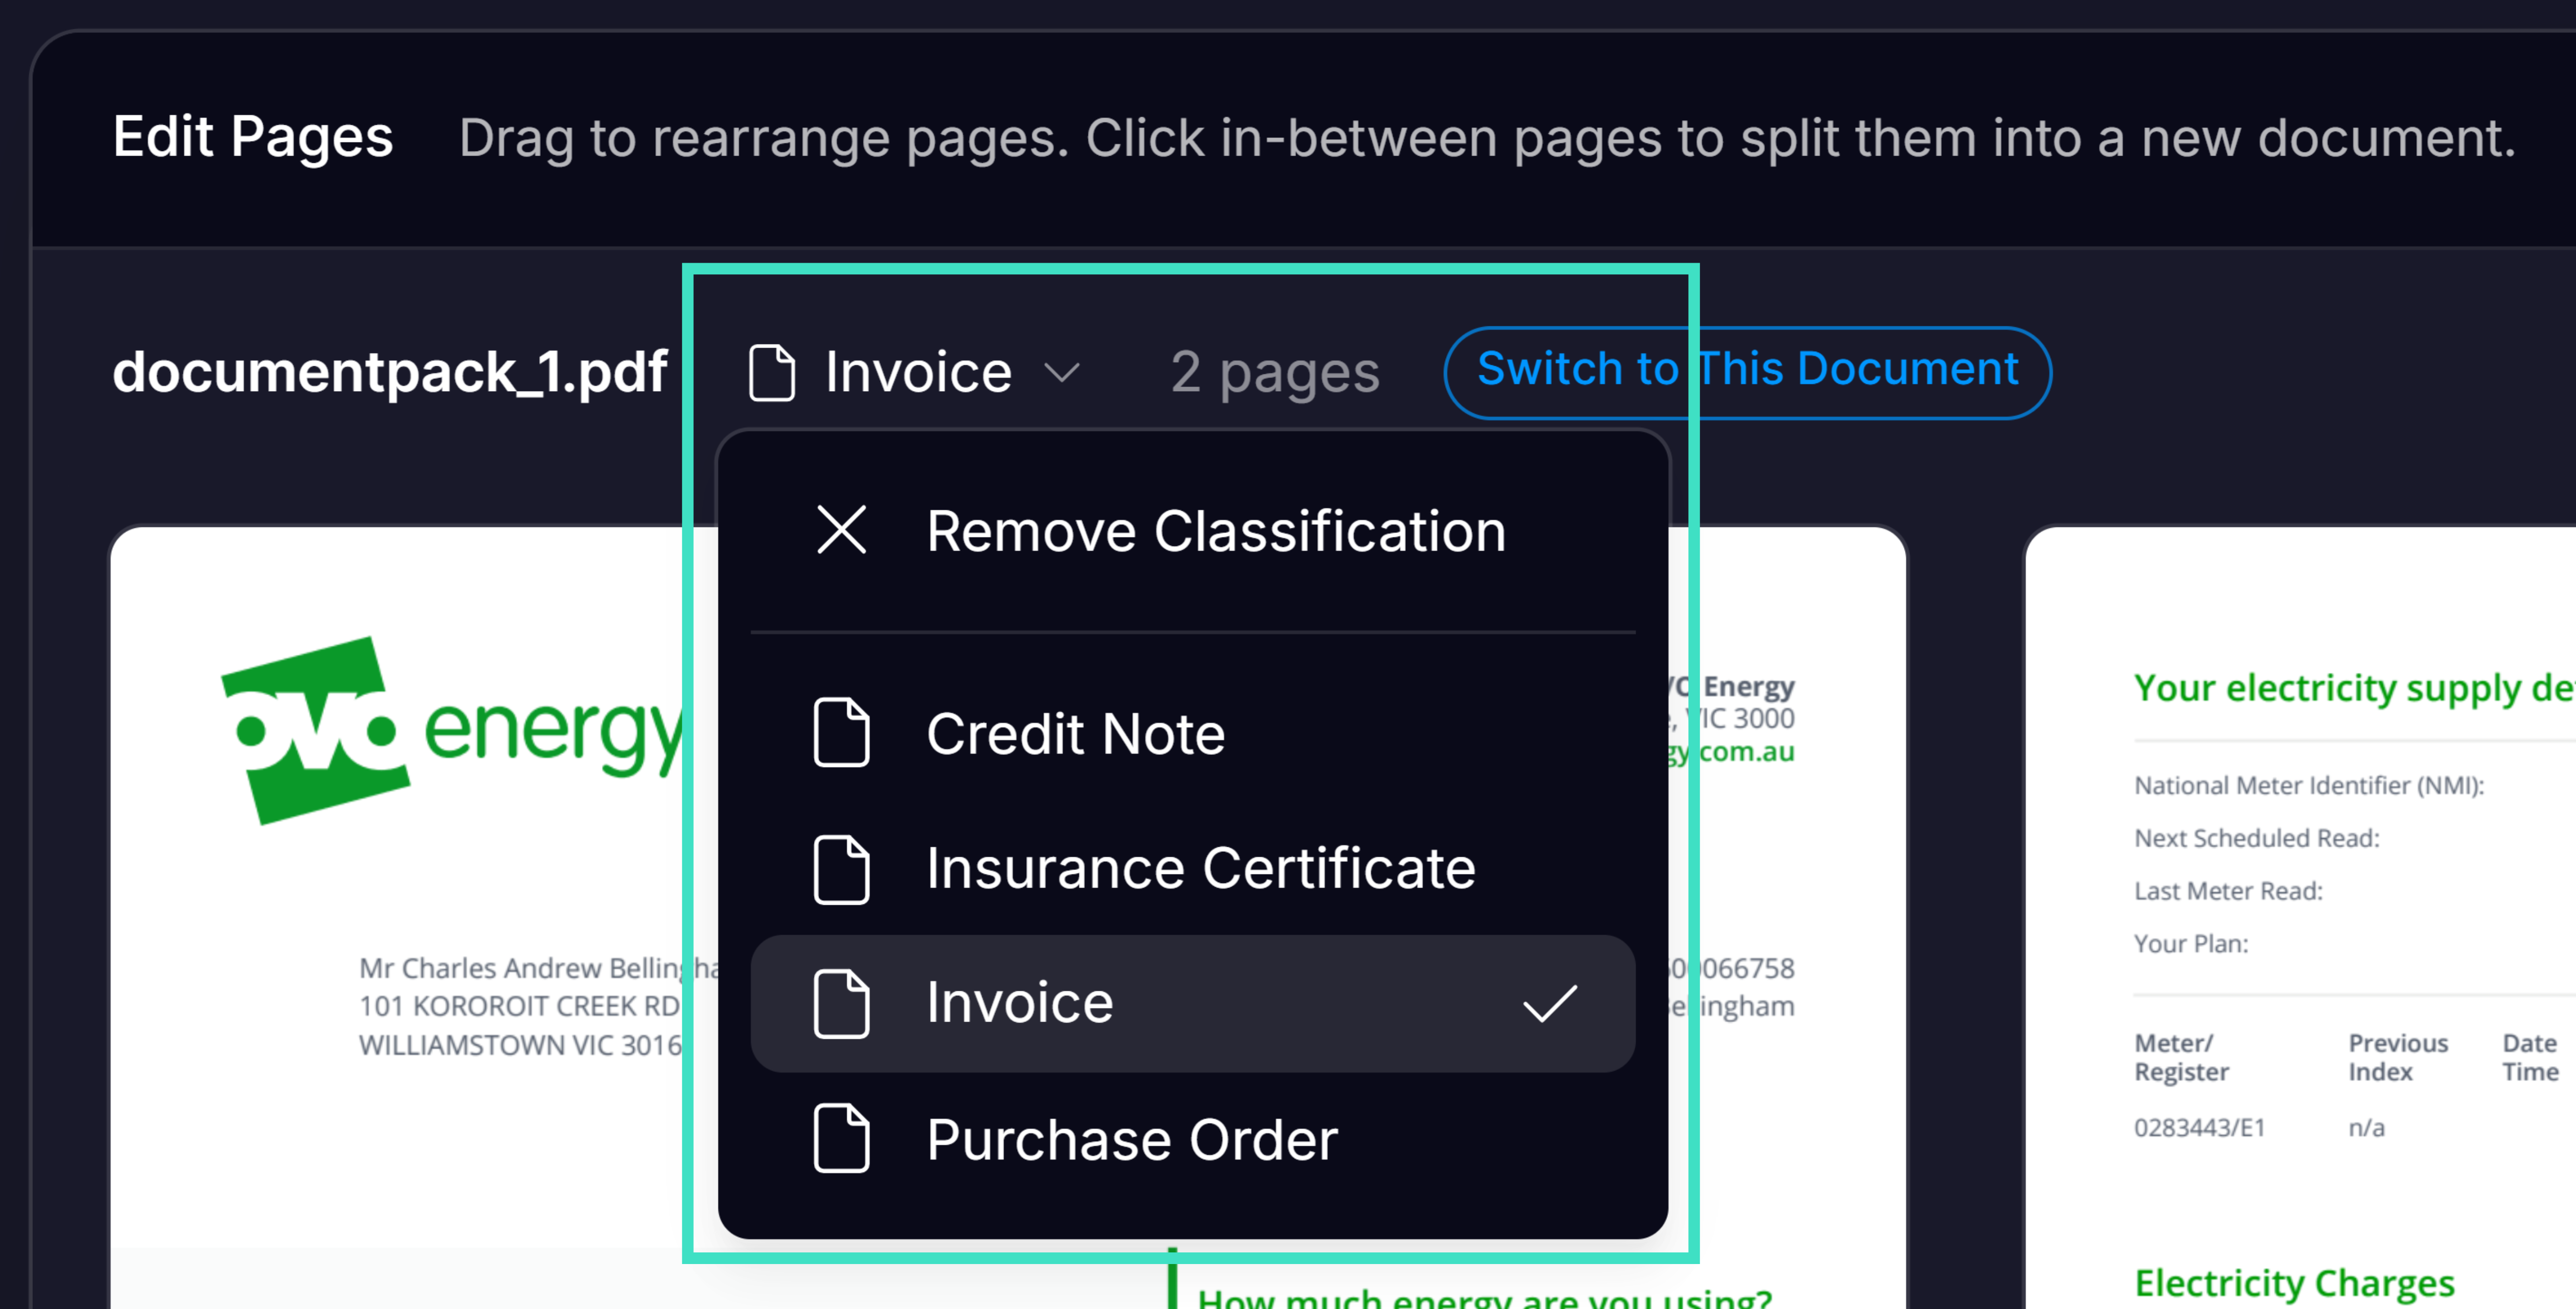
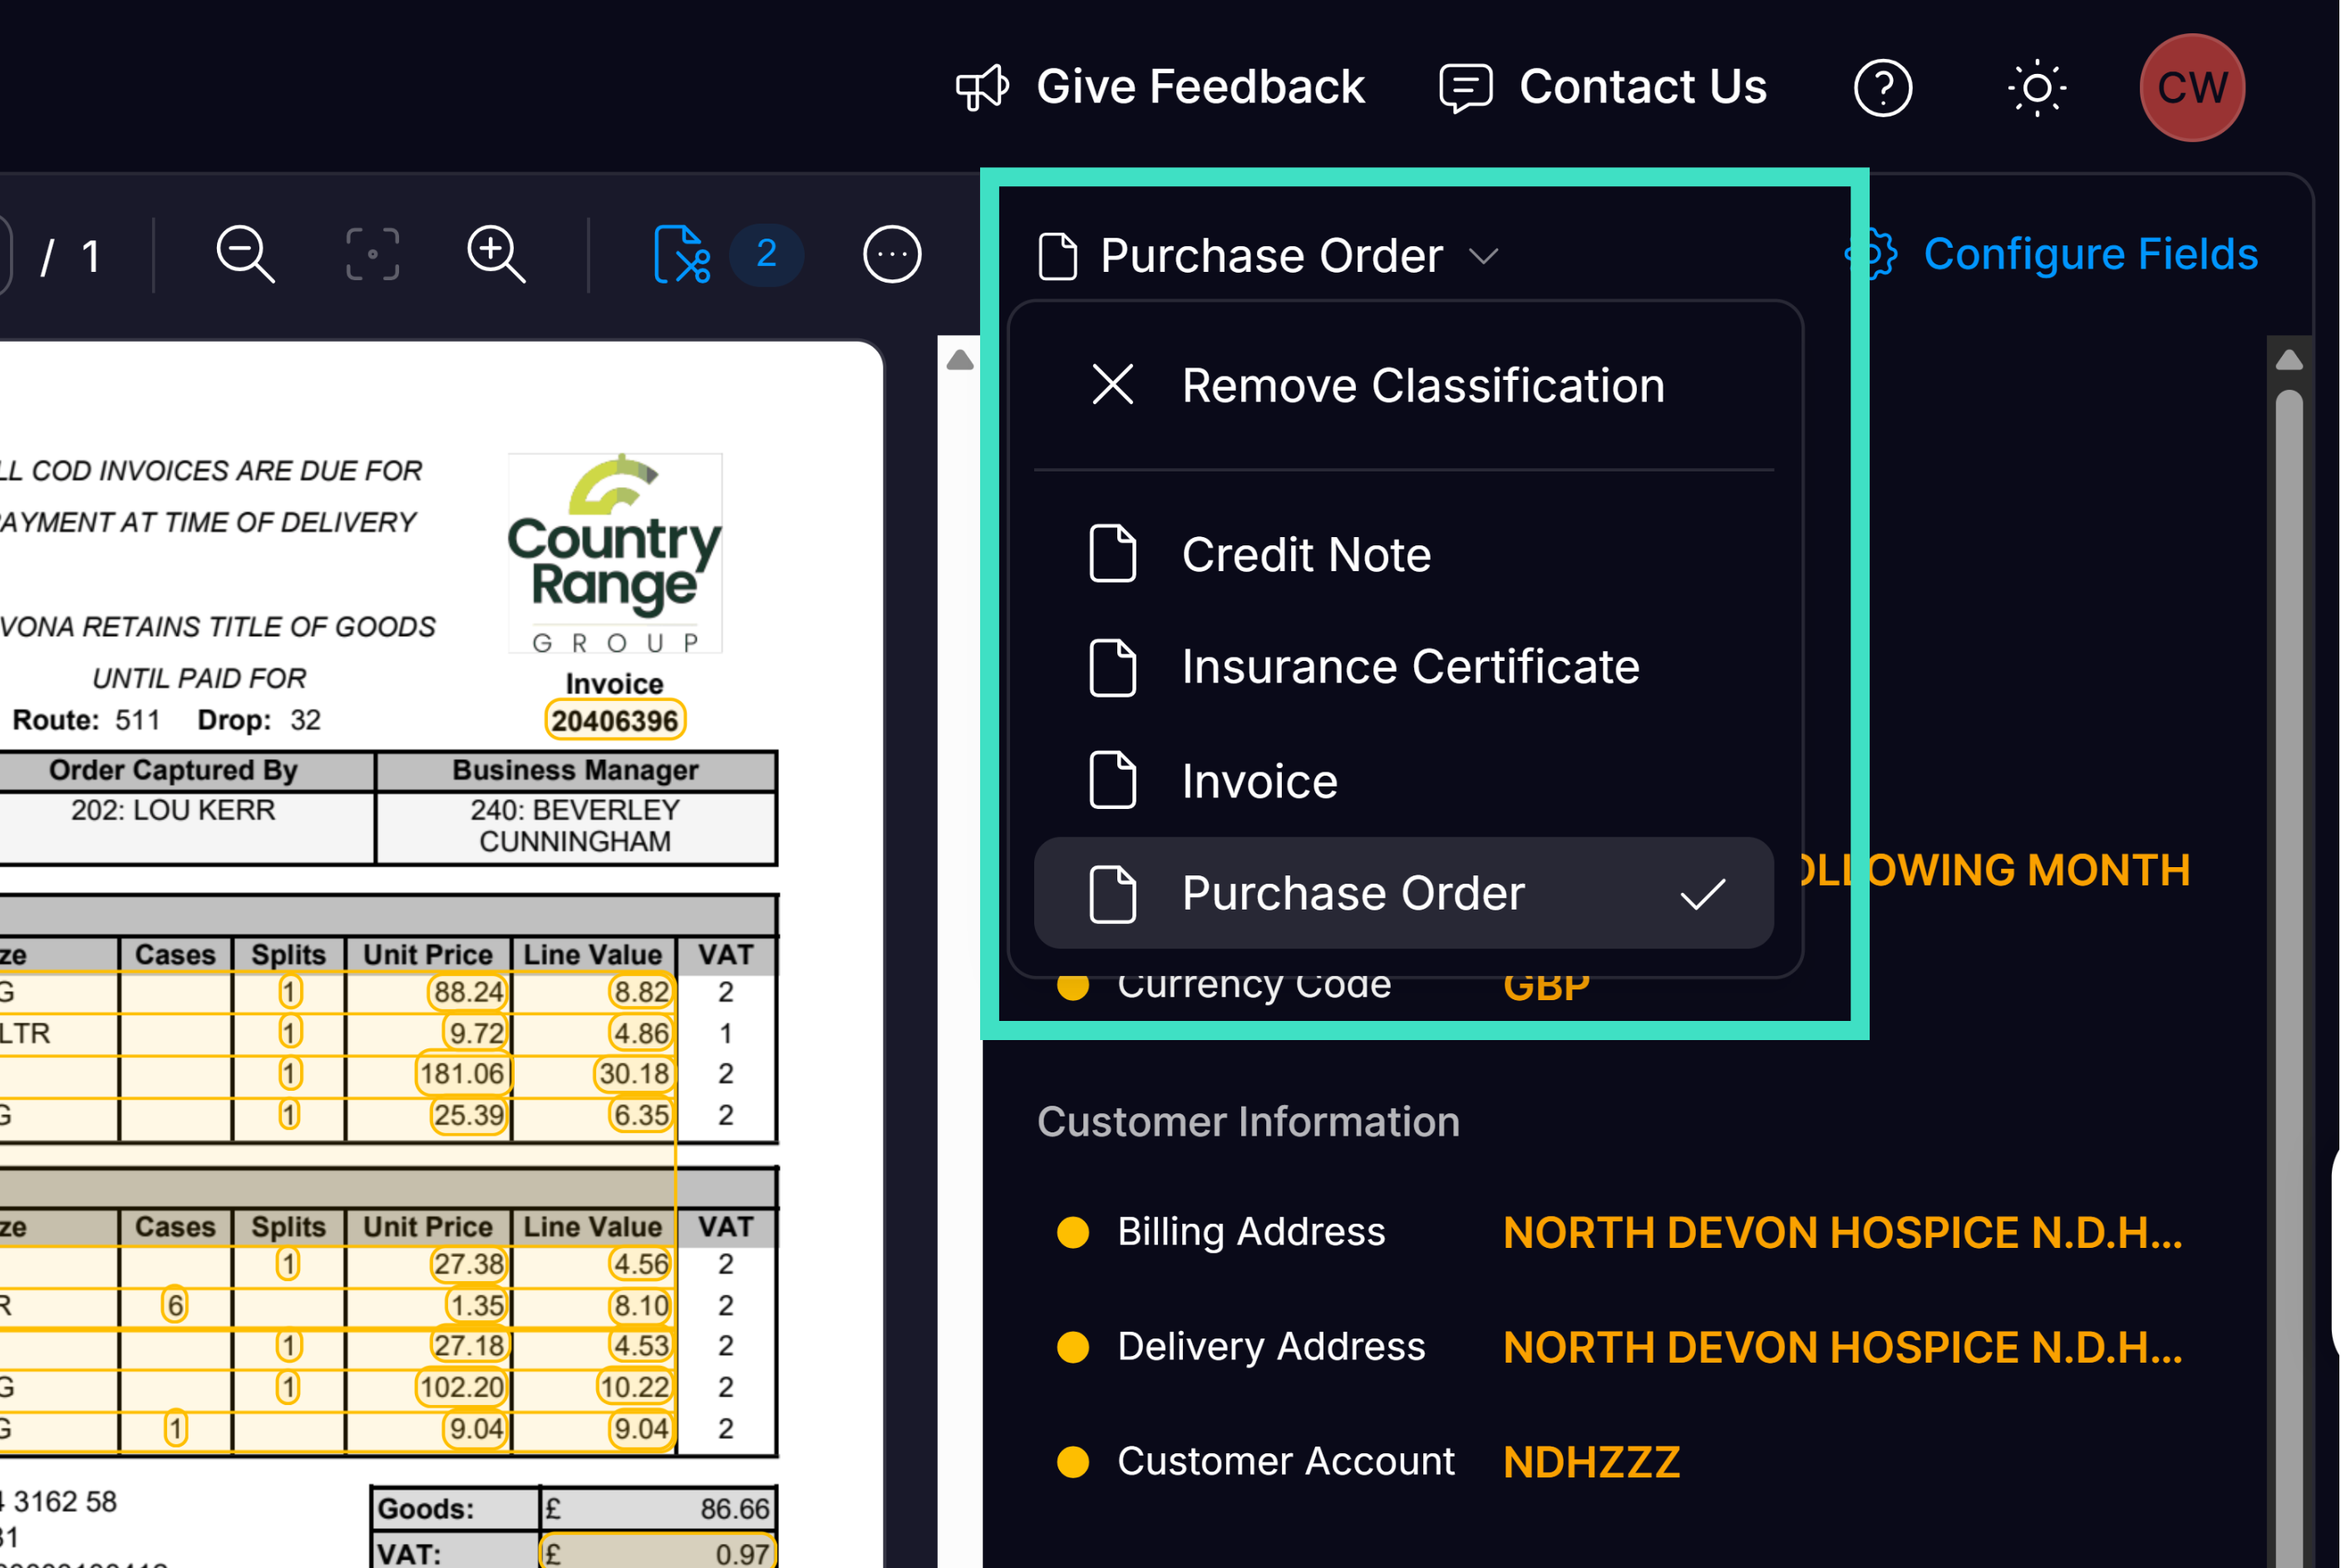
3
Validate Classification
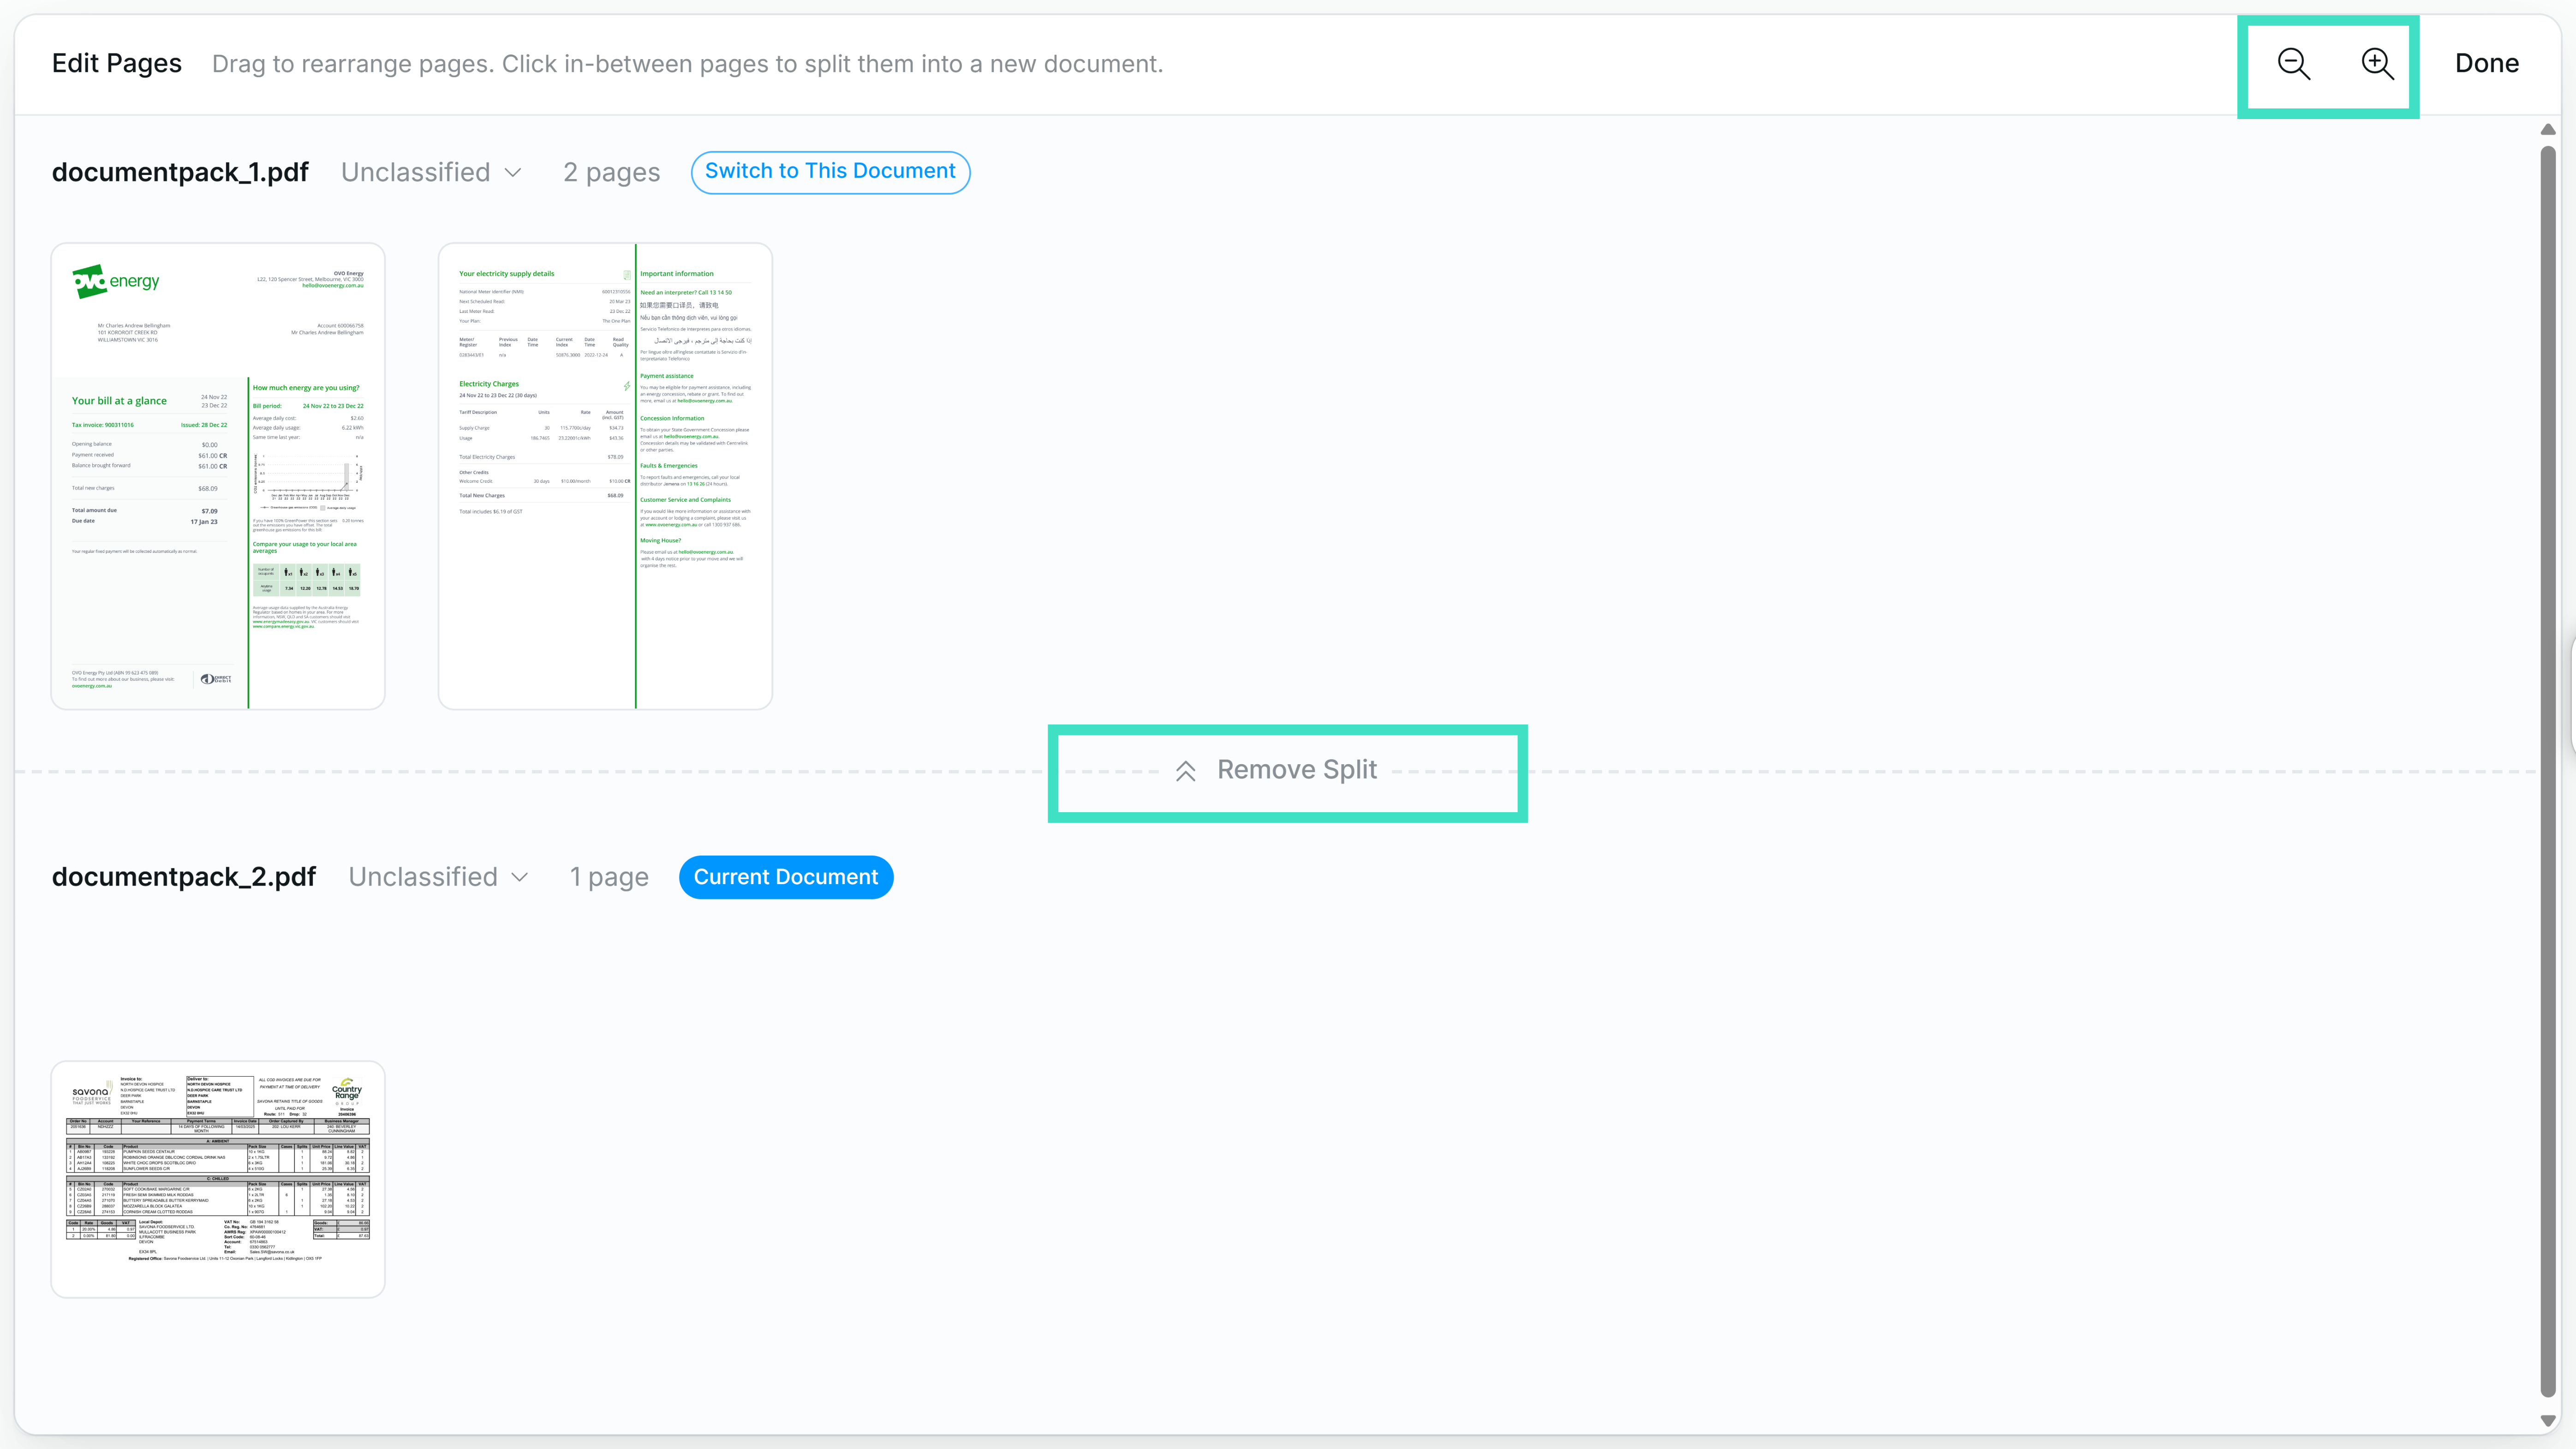
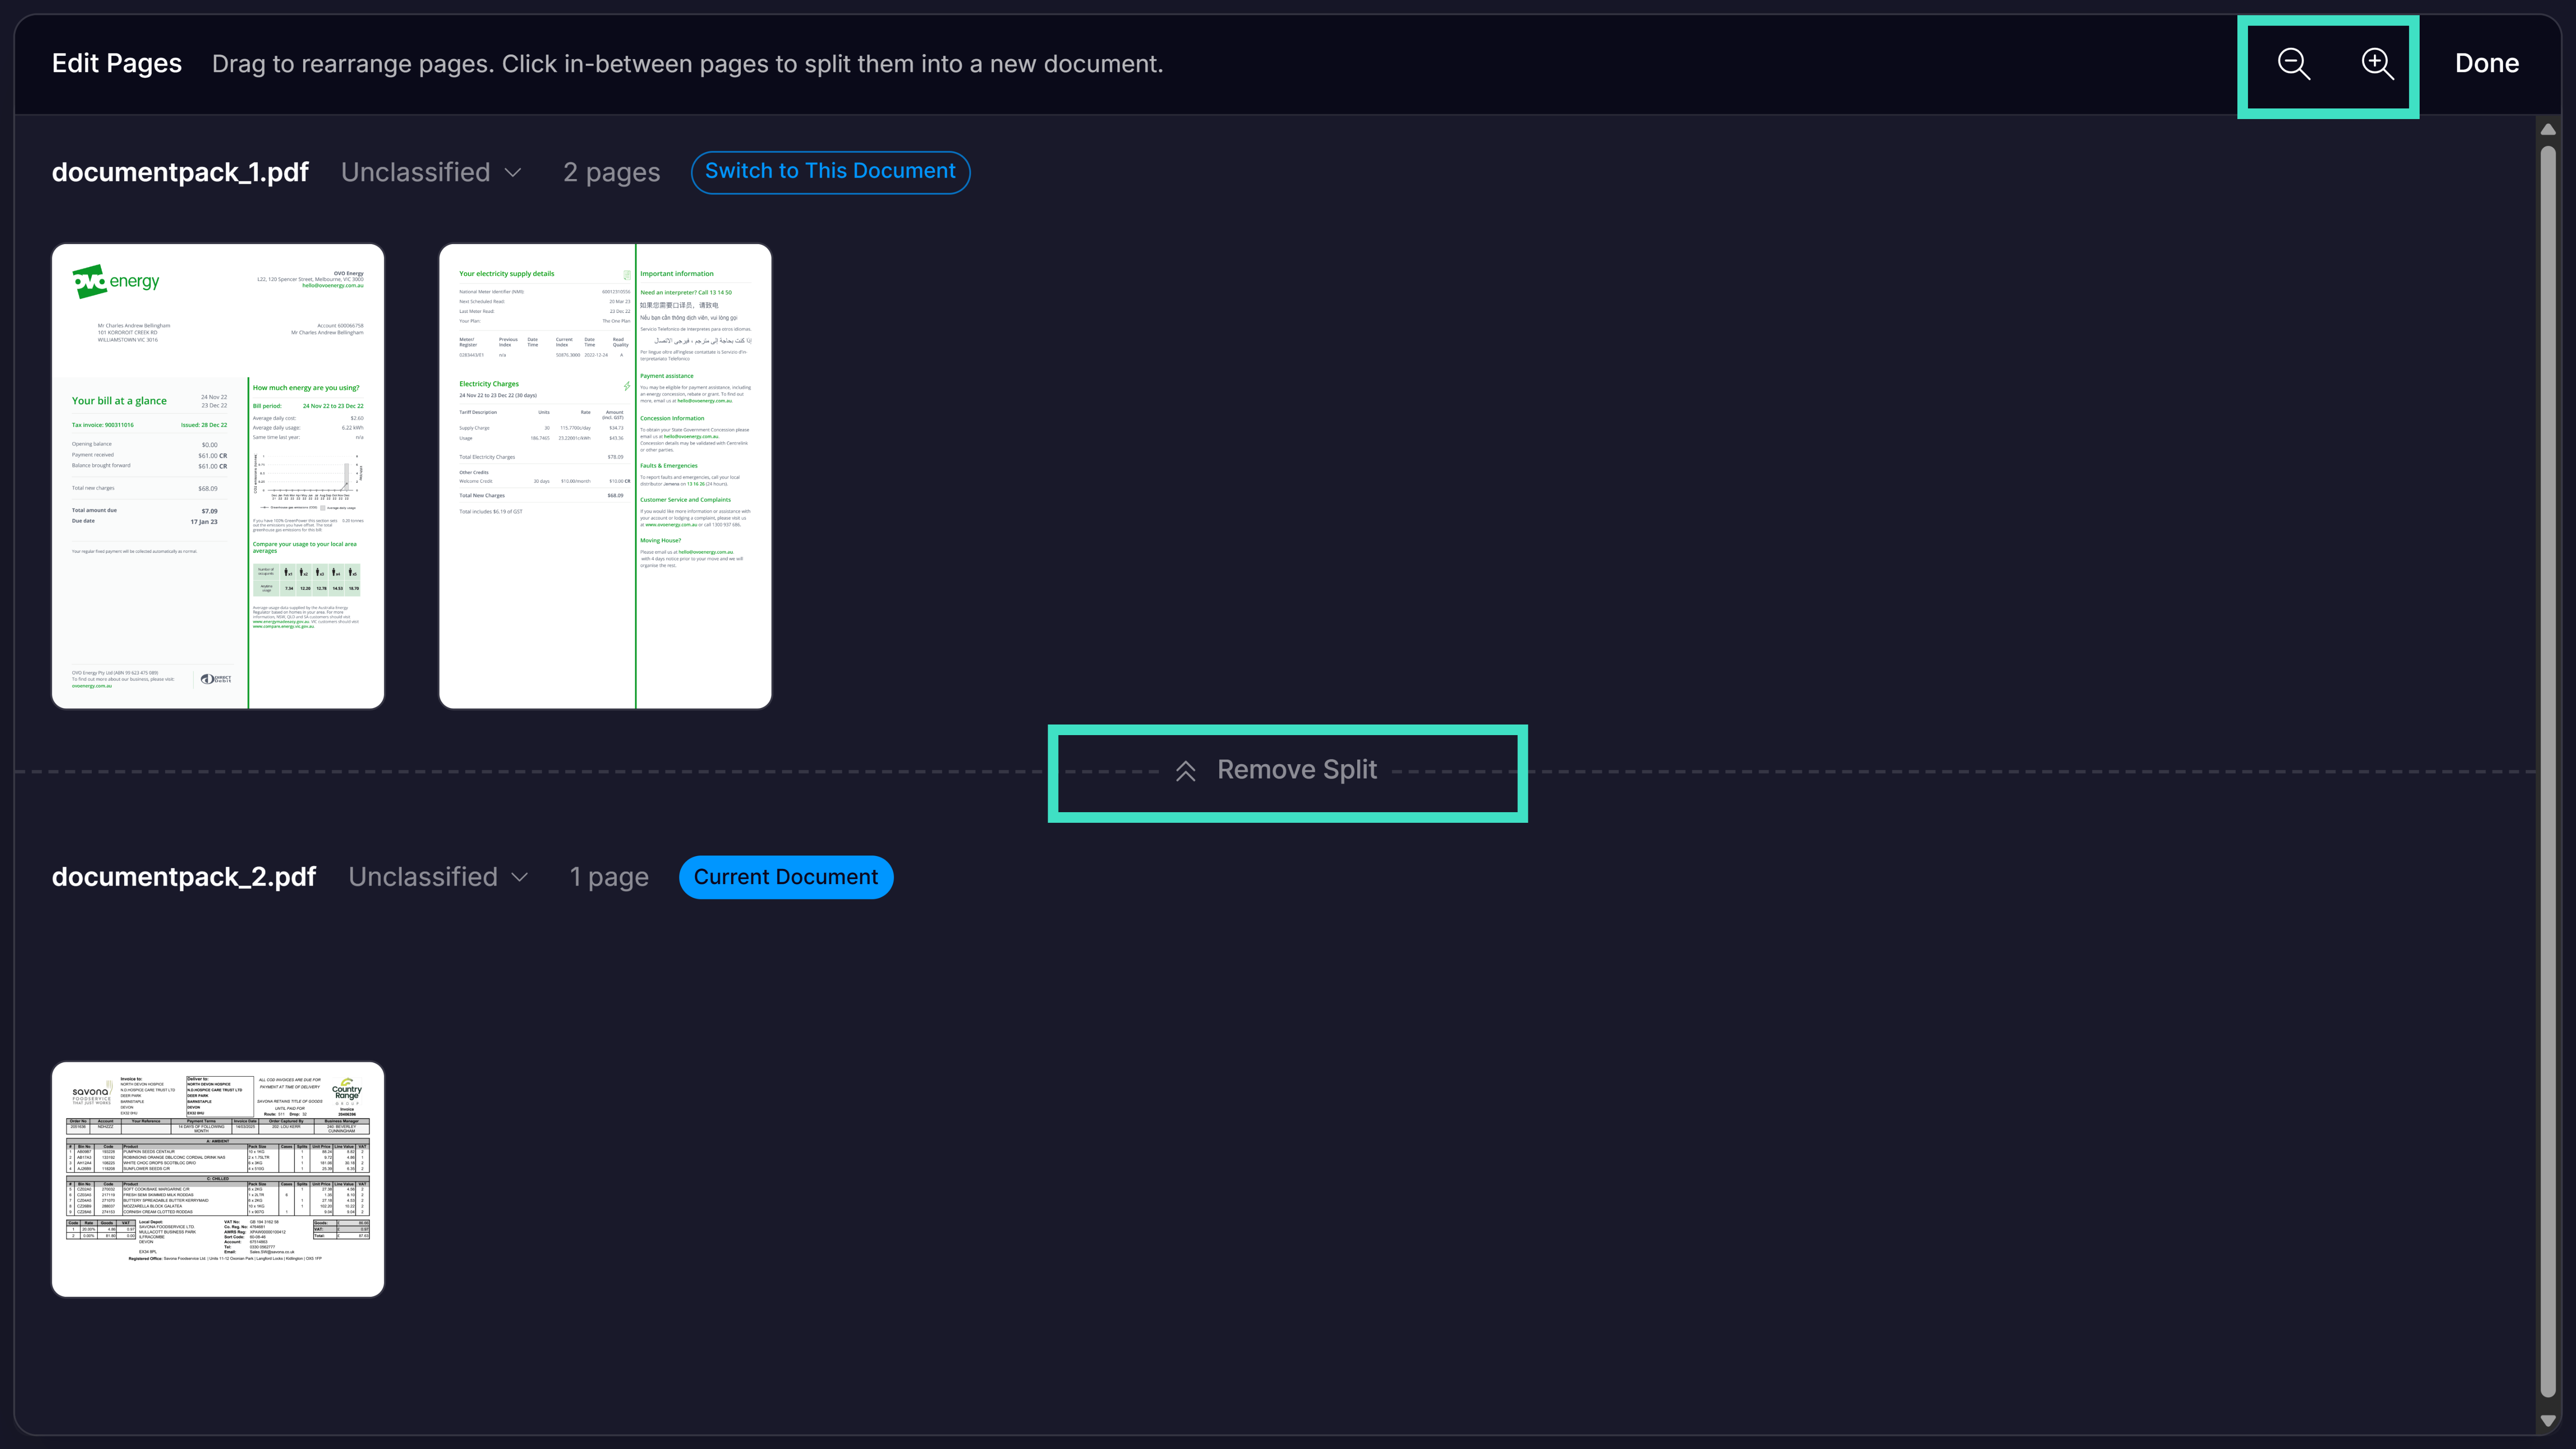
In Edit Pages Interface: