Purpose
This tutorial guides users on how they can achieve full document automation with straight-through-processing in Affinda. Stacking validation rules, data mapping, and correctly configuring your validation settings in Affinda allows documents to pass through without the need for human intervention.This guide is designed for advanced users in Affinda looking to achieve straight-through processing. To complete this guide, Users should already have their Document Type(s) configured and hold an Owner or Admin role in Affinda.
What is straight-through processing?
Straight-through-processing in the context of Affinda refers to a fully automated, end-to-end workflow in which documents that enter the system can be:- Parsed and classified
- Key data fields extracted and validated
- Enriched or transformed as needed All without the need for human intervention at any stage.
Straight-through processing in Affinda
Straight-through processing allows documents to be automatically processed without manual intervention. This can be achieved in Affinda by using three features together:- Data Mapping: To specify how extracted data should be formatted
- Validation Rules: To define what makes a document valid or invalid
- Validation Settings: To control how documents are processed based on their validation status
Data Mapping
What is Data Mapping?
Data mapping is a powerful capability that enhances the accuracy of data extraction. With data mapping configured, the extracted data from a document can be mapped against a list of known options from your knowledge base to validate that it meets expected values. This enables correct values to bypass review, whilst only incorrect values are flagged.
Create your Data Source Field
First, start by creating your Data Source field. Navigate to the Configure document type menu, and create a new field with data type “Data Source”.
Select existing or add a new Data Source file in Affinda
Data Sources act as **lightweight master-data tables **that you can manage from within Affinda.Select ”+ New Data Source” and upload your data source file. Affinda supports CSV, XLSX, or JSON files as data sources.Or create via API:
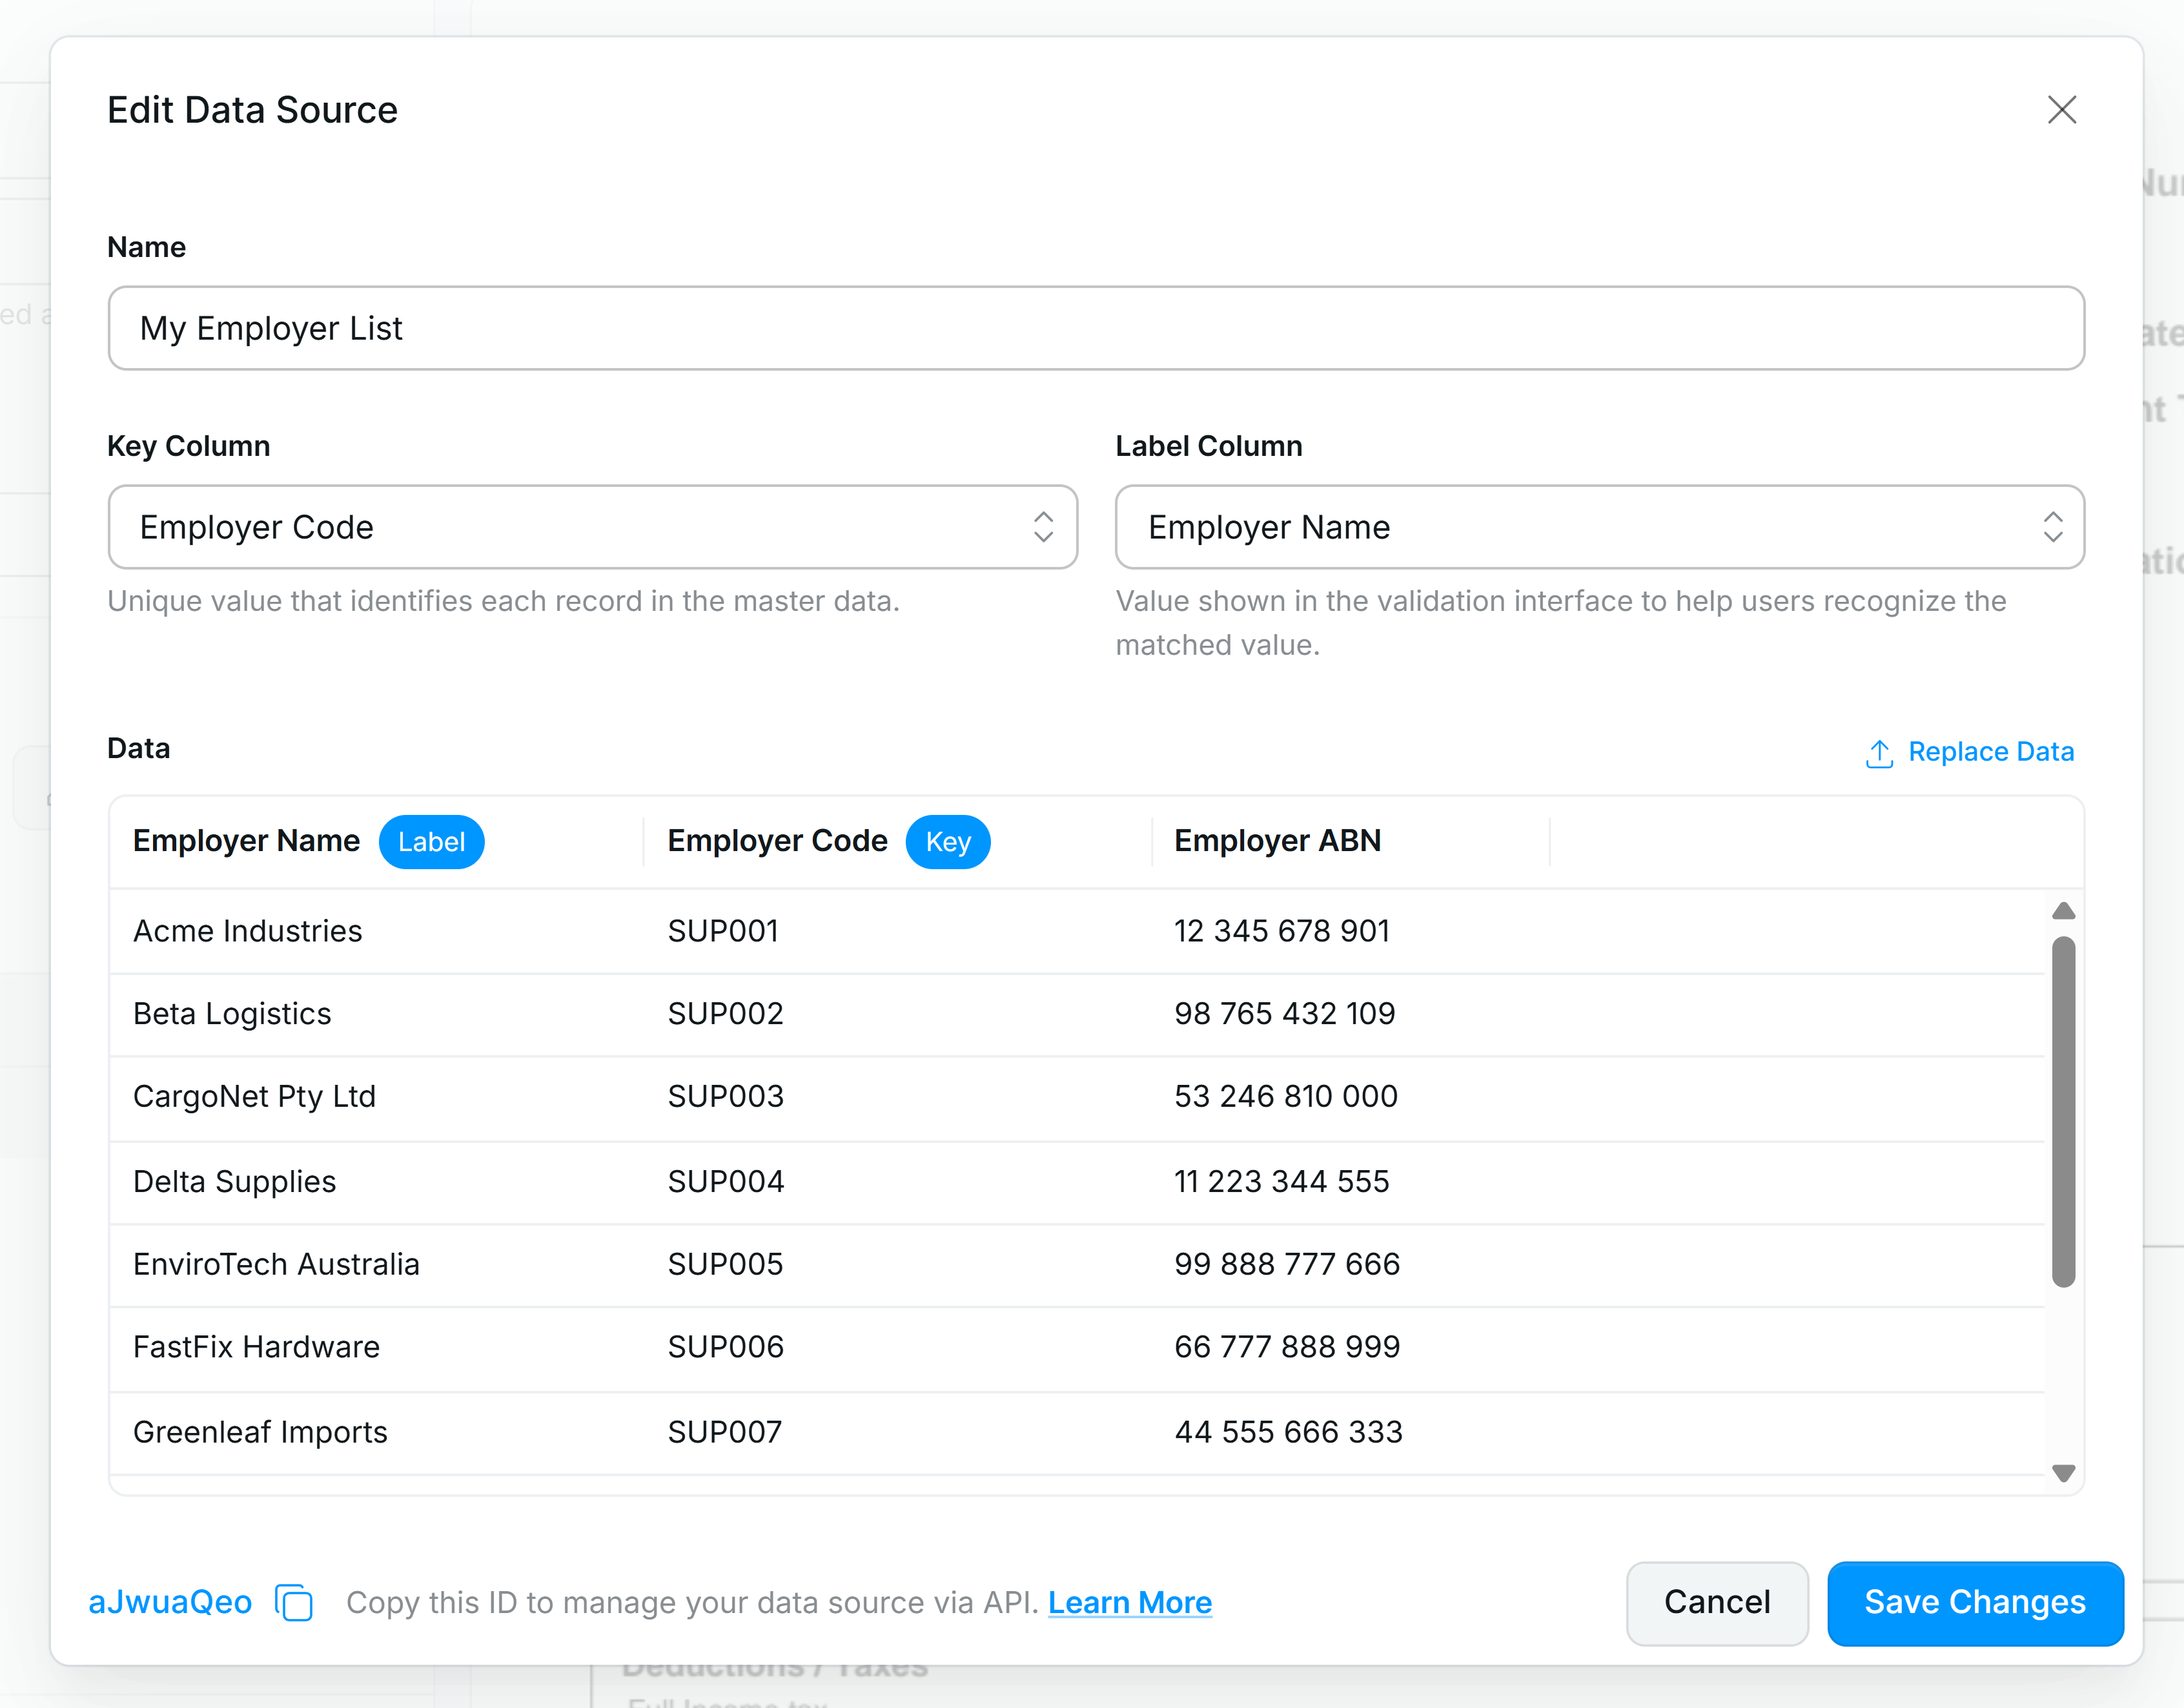
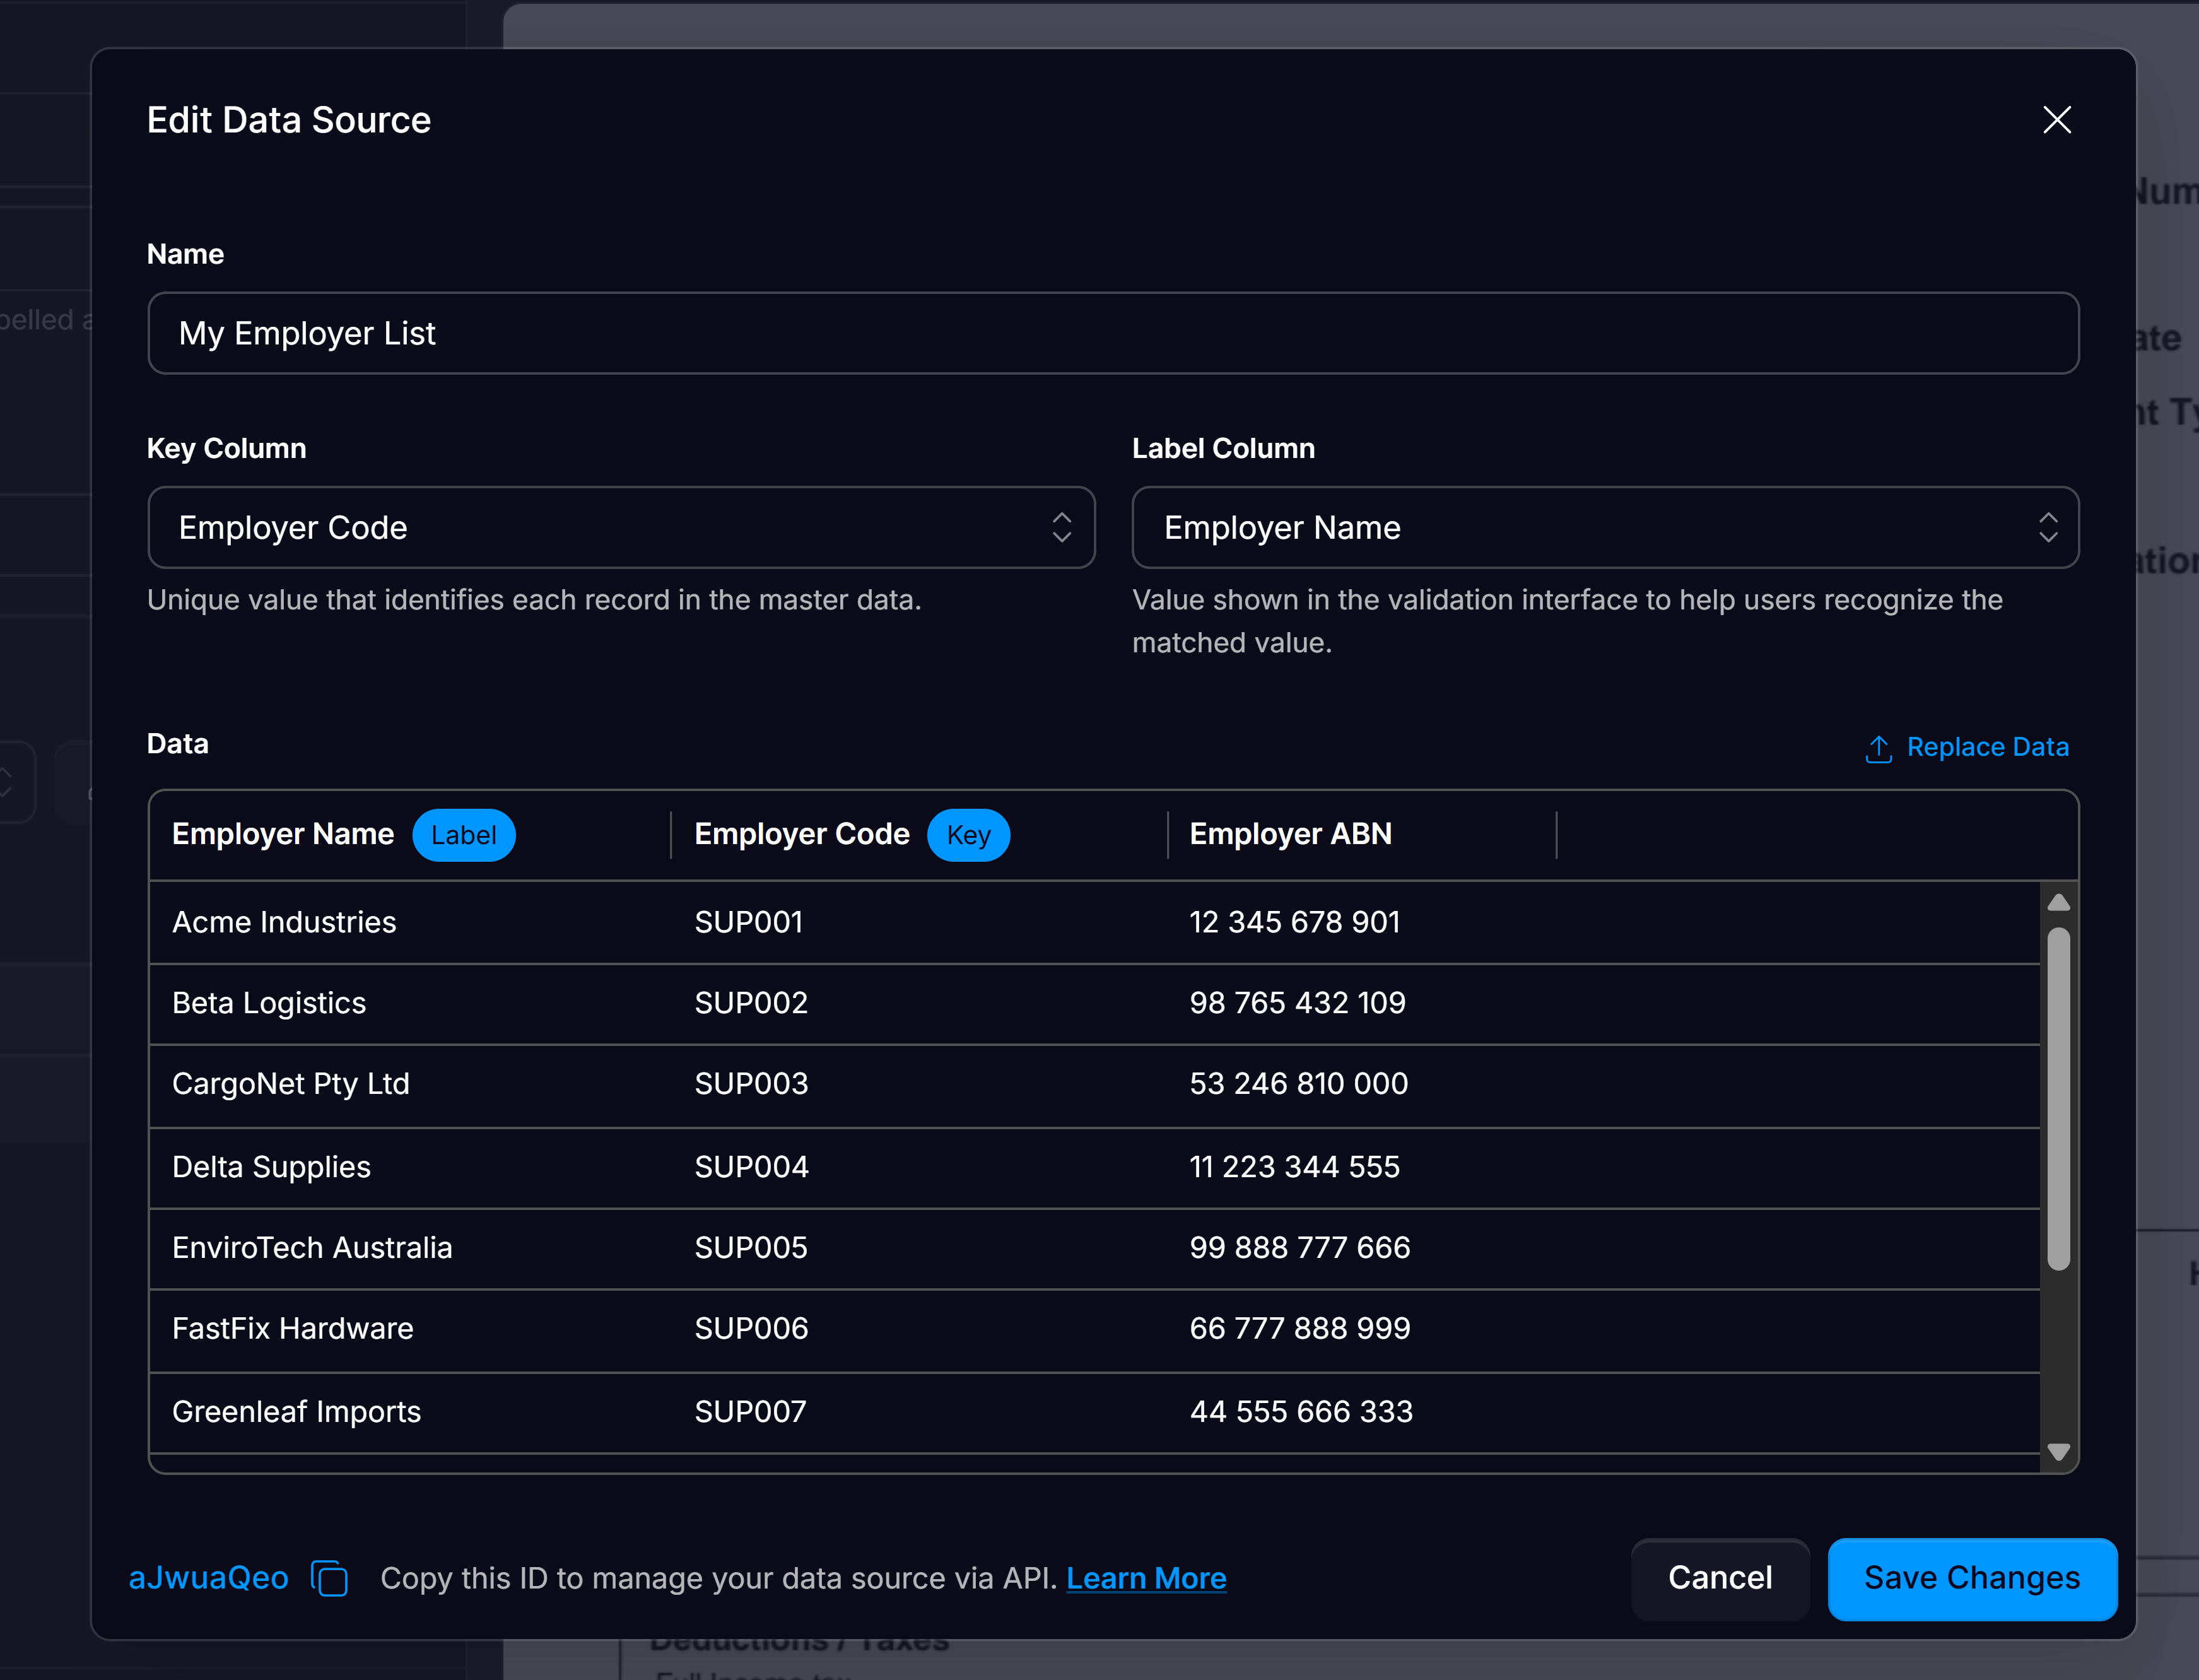
Select the Key Column
A key column is the single field in your source table whose values are guaranteed to be unique; it is used by Affinda to reliably identify each record unambiguously.
Pick the Label Column
The label is the human-readable name stored for each record in a Mapping Data Source; it’s what users will see in the validation UI and drop-downs.
Configure Mapping Criteria
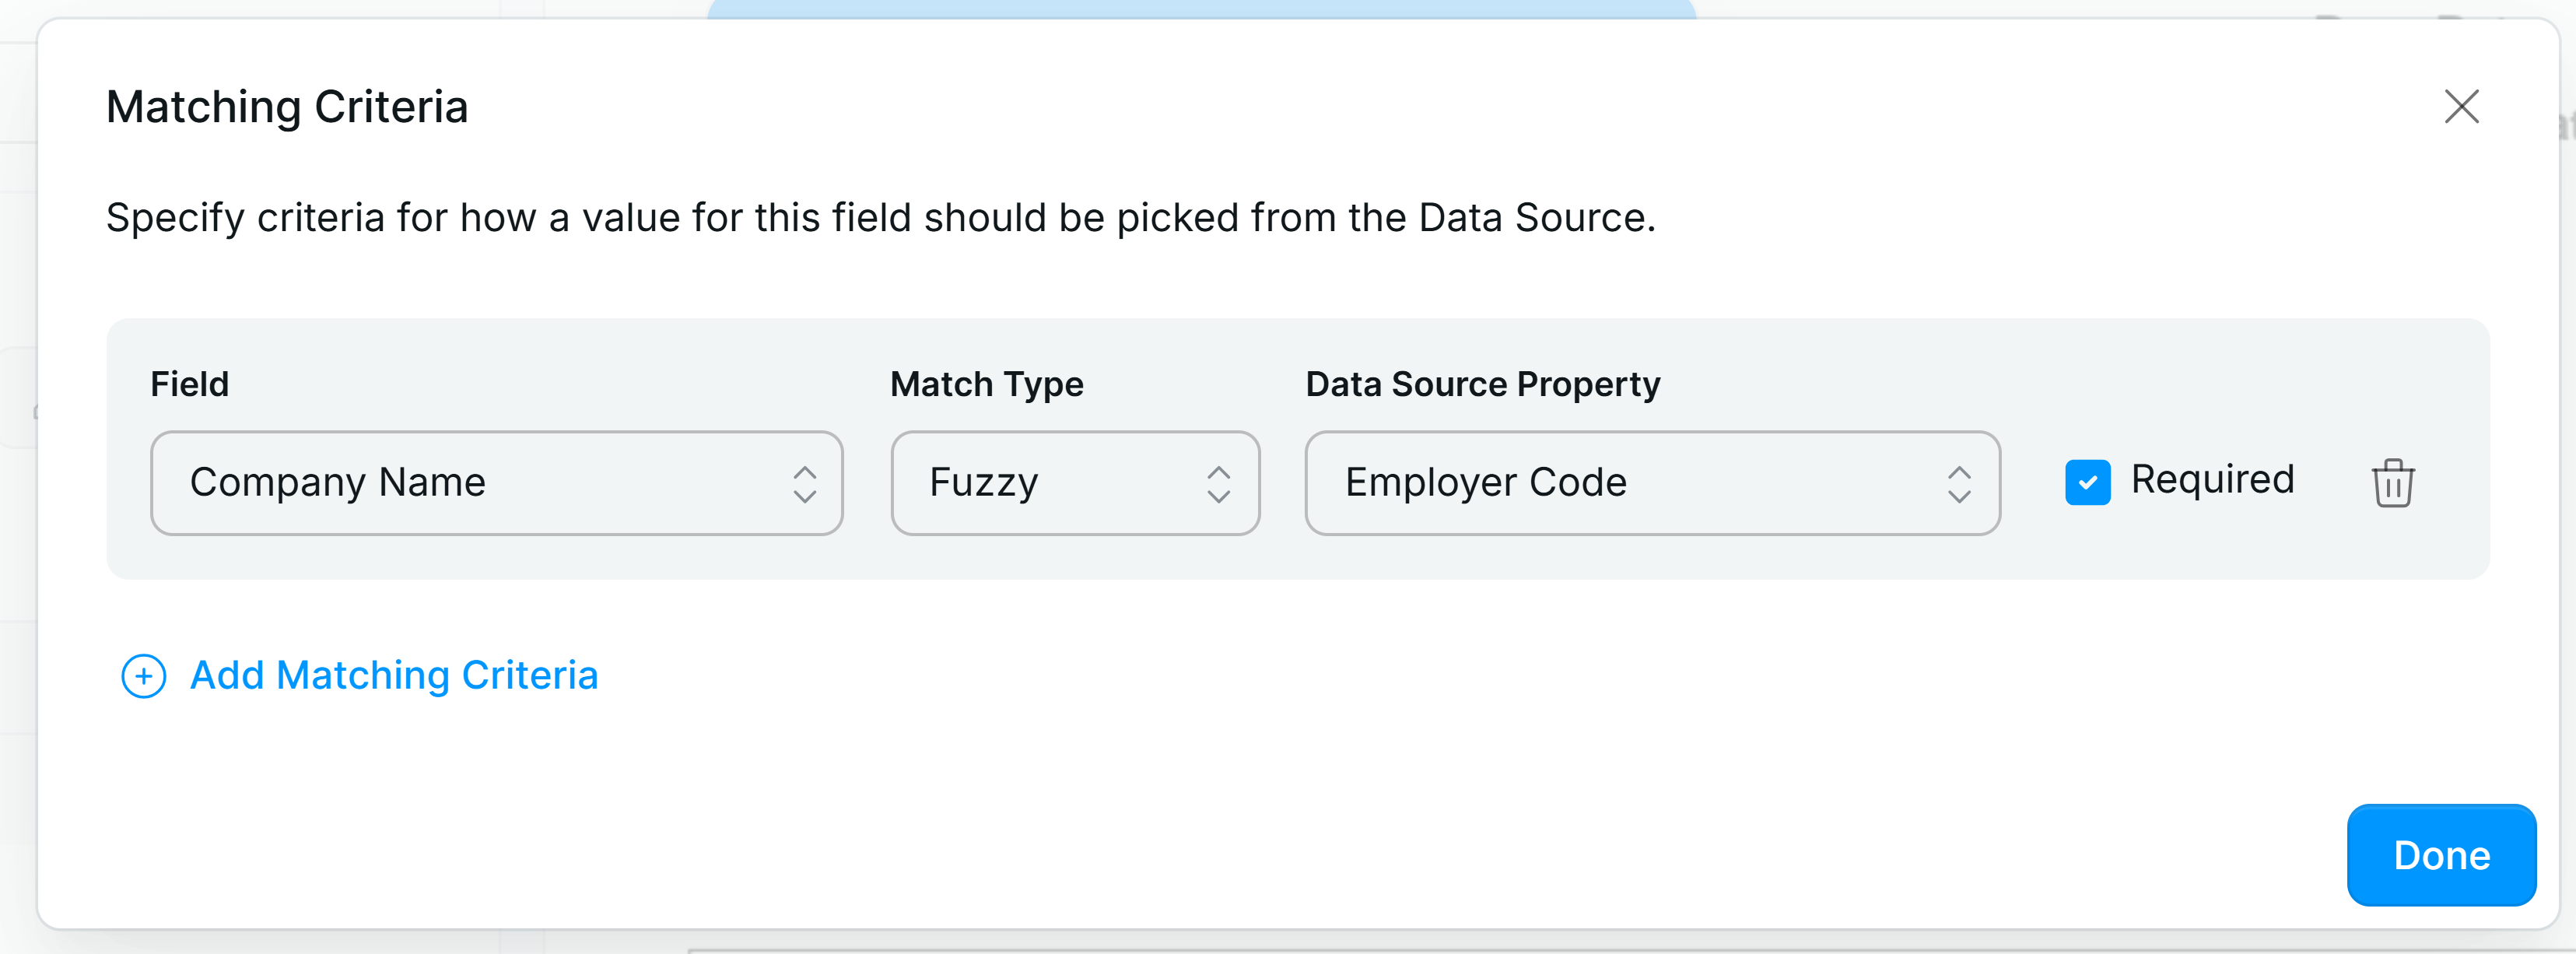
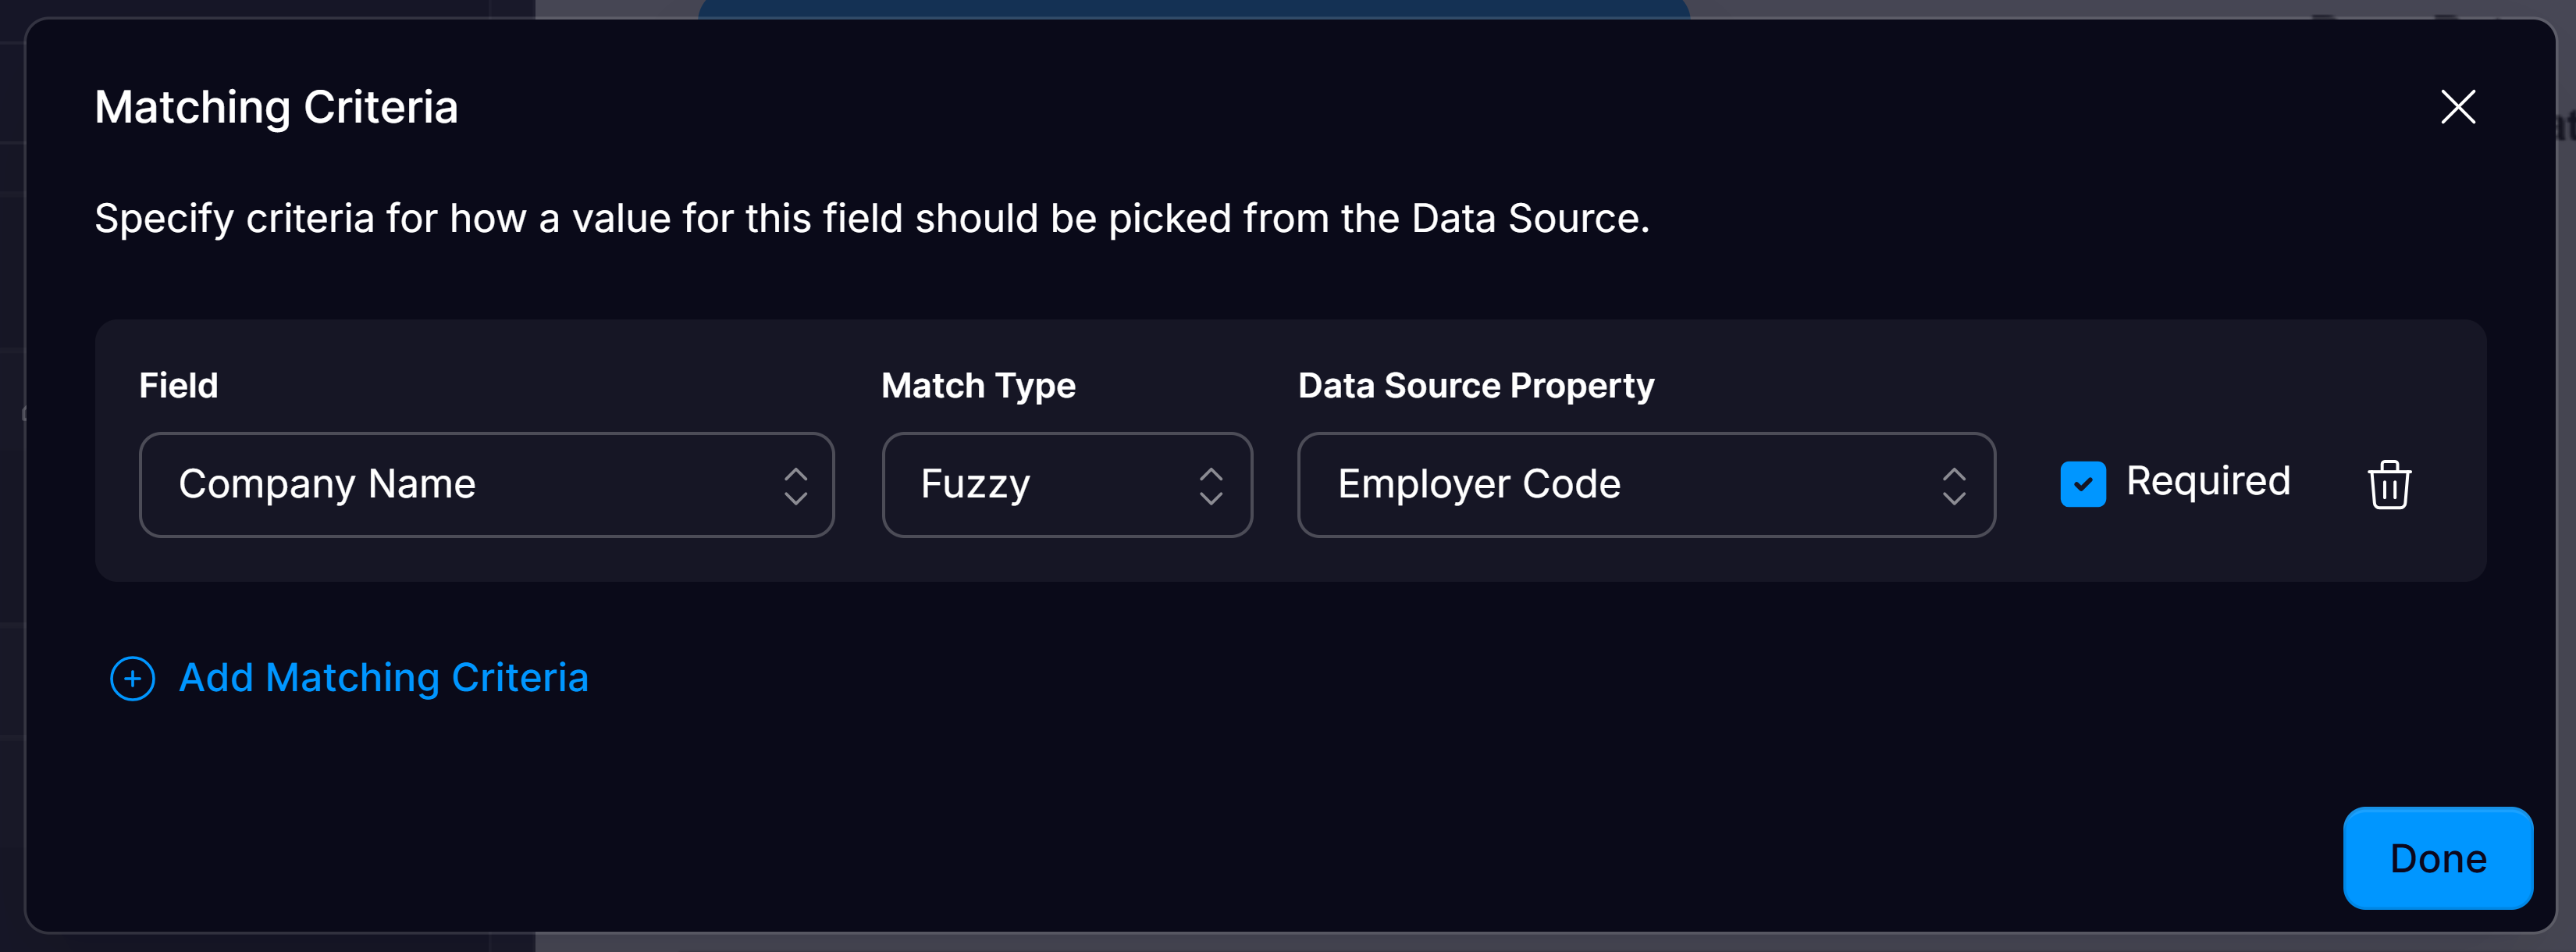
- Exact - strings must be identical.
- Partial - succeeds when the extracted string appears anywhere in the candidate.
- Fuzzy - uses edit-distance logic to allow minor typos to still be matched.
Tick Required
Tick “Required” if validation should fail when nothing matches for this criterion. Enabling this will flag documents that have failed the matching criteria against your data source, flagging them for review. Documents that have passed the matching criteria won’t be flagged and can continue to your downstream workflows with the confidence that their fields were extracted correctly.
Validation rules
What are Validation Rules?
Within the Affinda platform, validation rules can be configured to automatically check whether extracted data meets predefined business logic. When these rules pass, the data is considered valid and does not require user review, enabling straight-through processing for compliant documents. Validation rules help identify documents that fail to meet business rules, prompting review.
Open Document Type Configuration Interface
Navigate to the Document Type Configuration interface of the document type that contains the field you want to apply a text transformation to.
Edit field or click the Validation tab
Click the pencil icon next to the field of your choice to open up the Field Settings.Open the “Validation Rule” drop-down.Or go to the validation tab, and click “Add Validation Rule”.
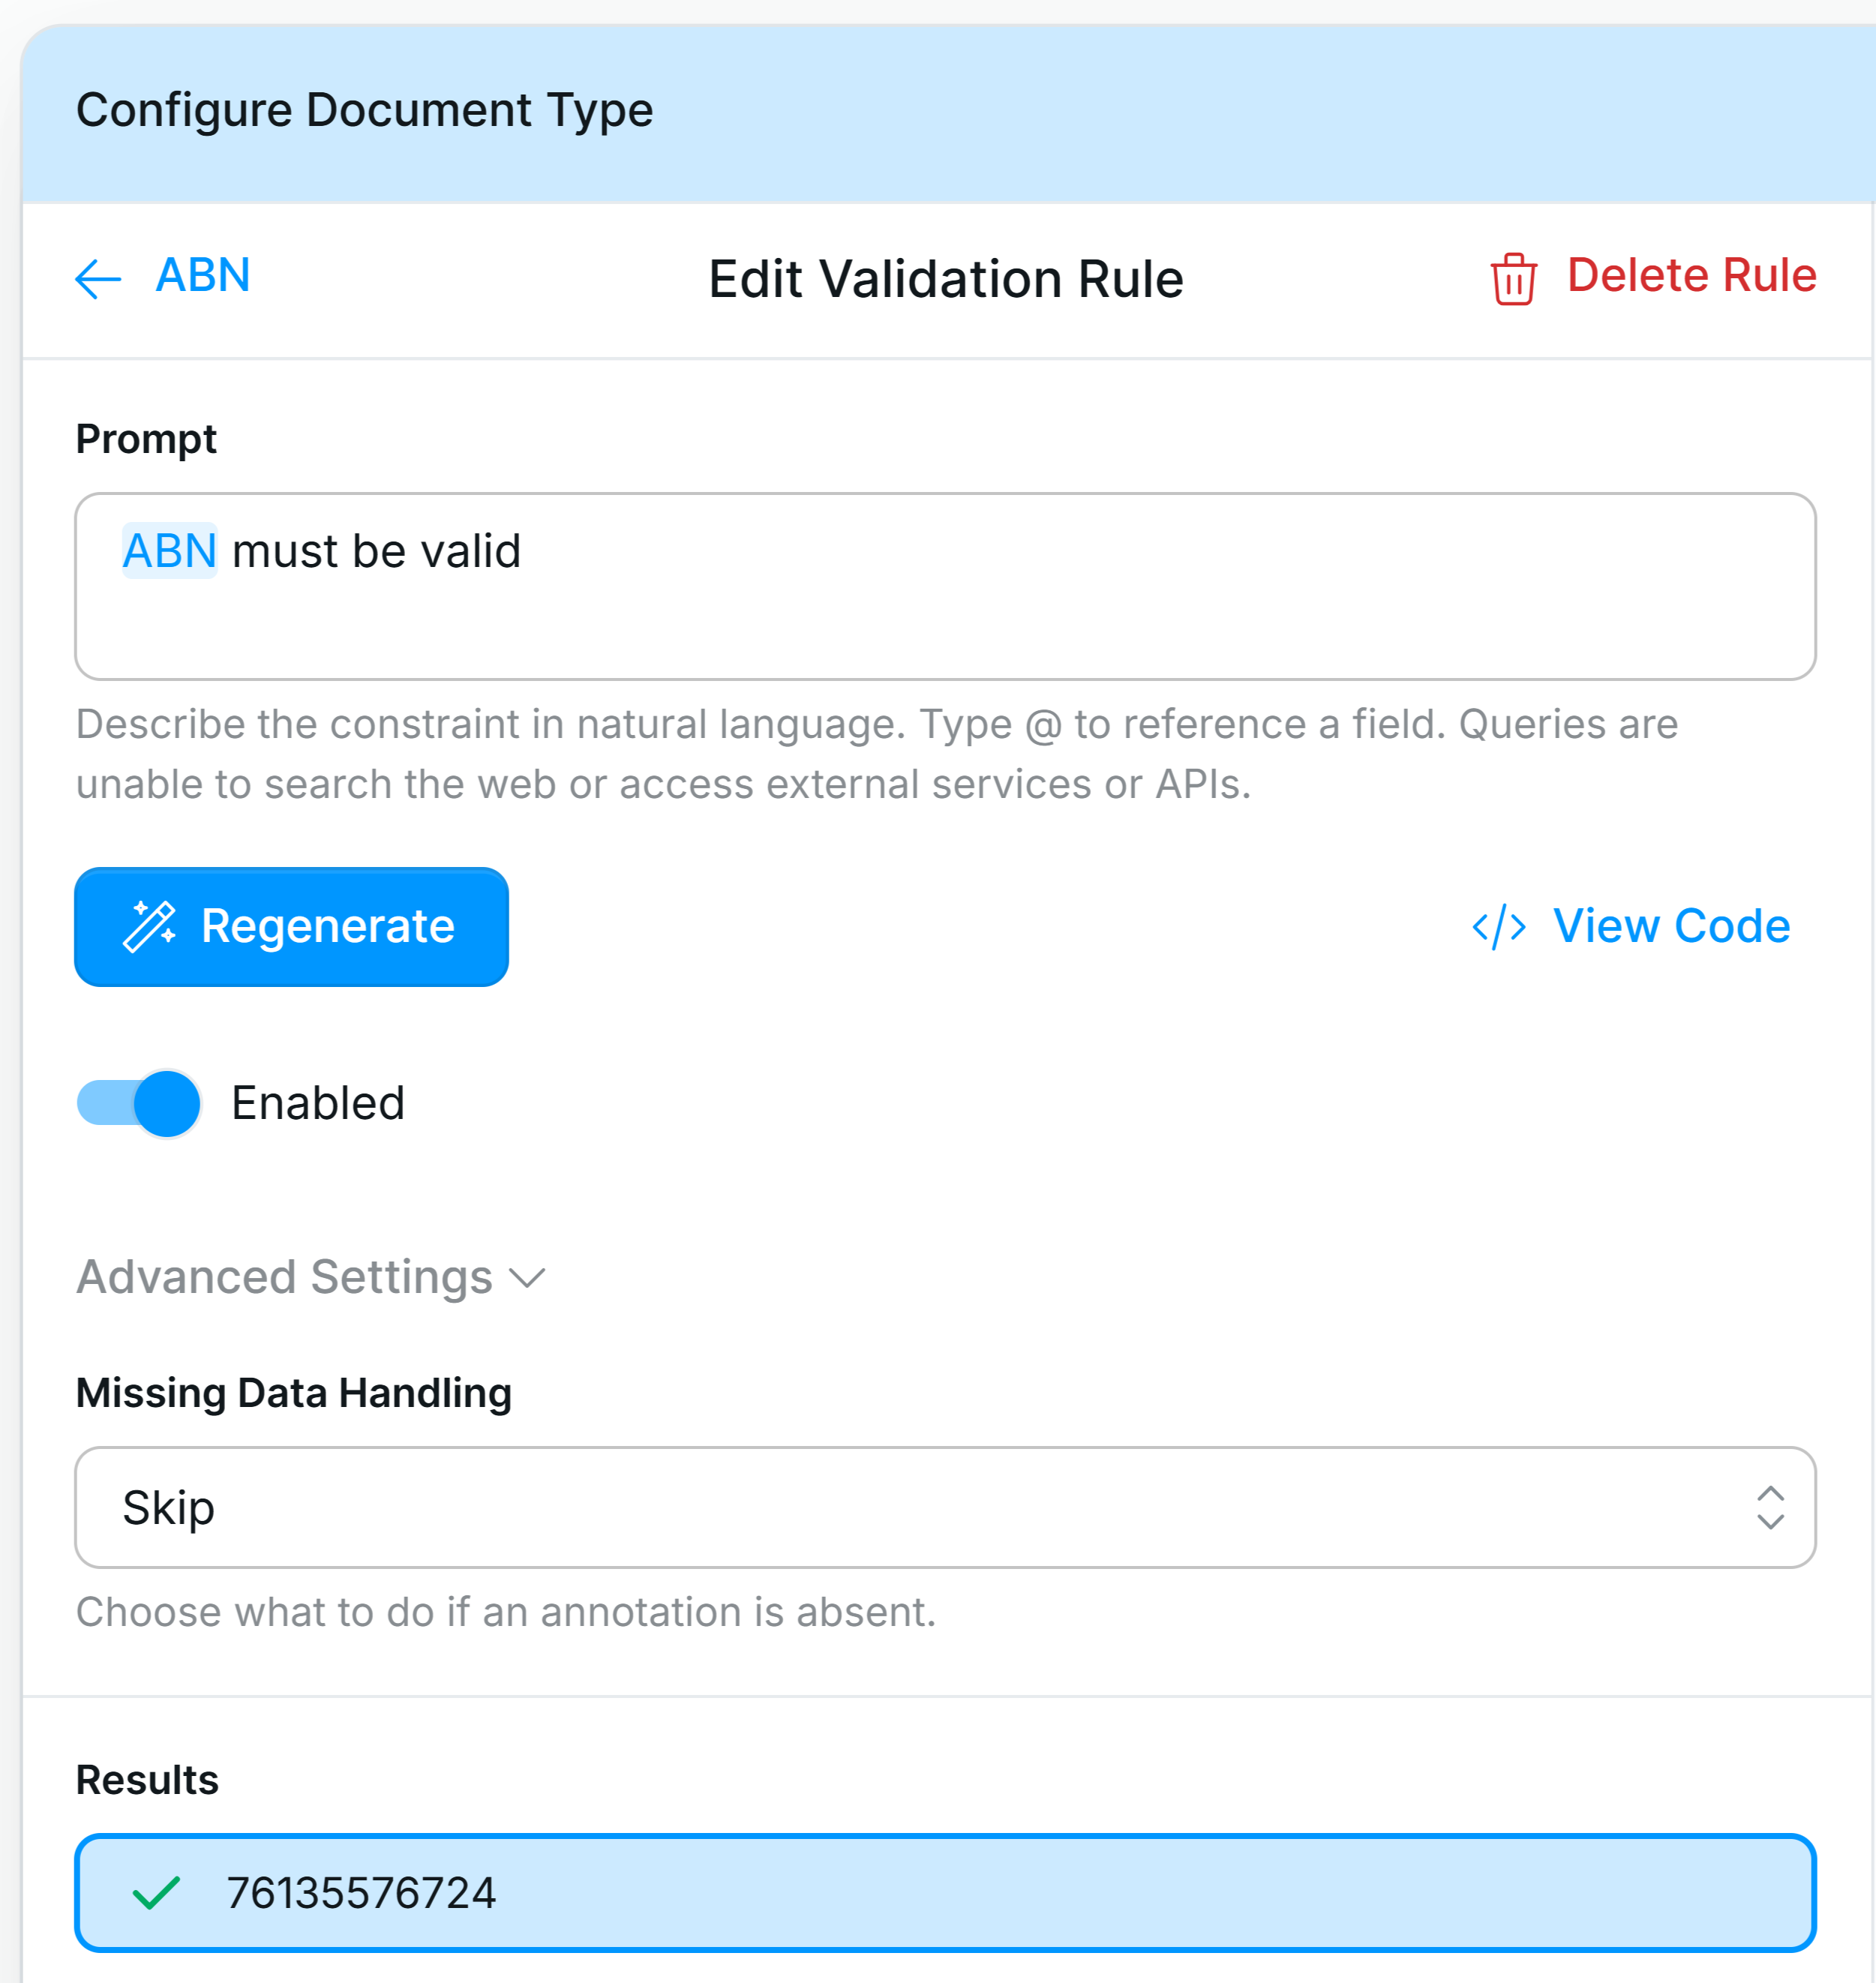
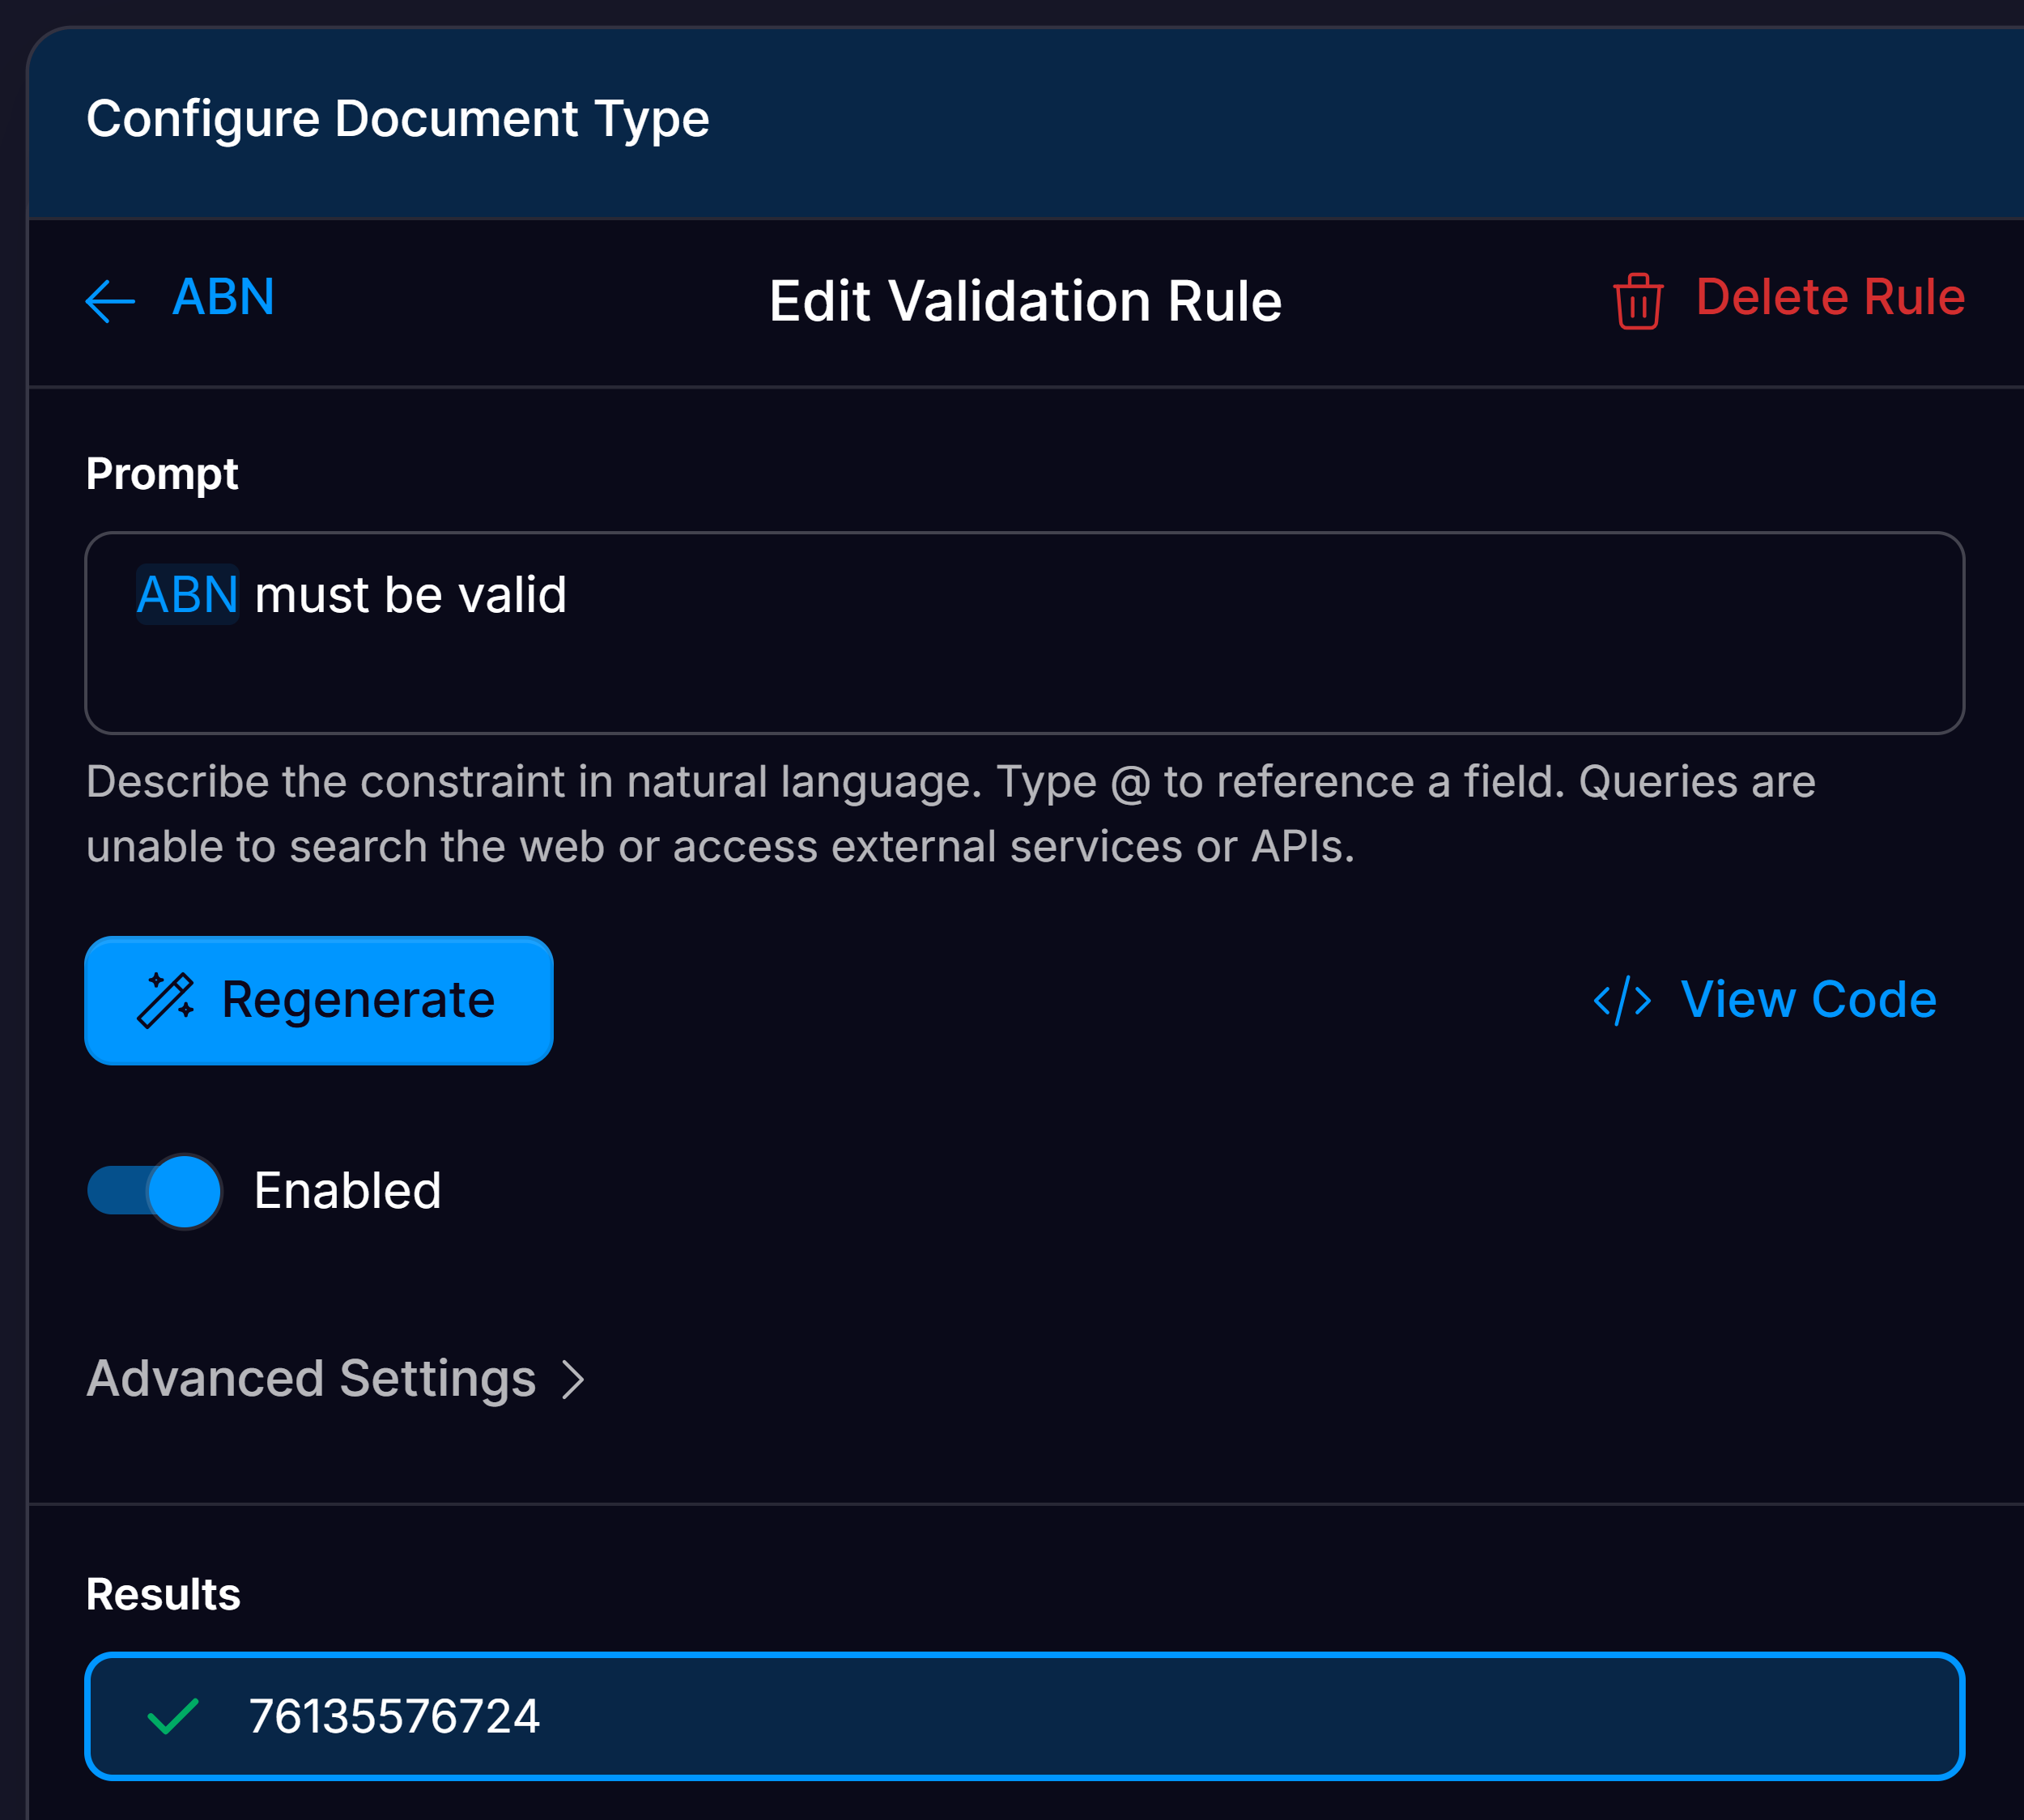
Write Valdation Rule
Validation rules can be created on just one or multiple extracted fields. Type “@fieldname” to reference a field. Write the rule in natural language and press generate to apply.
Some example validation rules you might use for inspiration are:
- “Check @SupplierVAT is a valid VAT”
- “Check @CustomerAddress has a valid postcode”
- “Check the sum of the @subtotals = @totalamount”
- “@purchaseorder is 7 digits long”
Assign missing data handling for rule
In the advanced settings of your validation rule, you can configure how the rule should act in the case of missing data.Available Options:
- Skip -The rule is skipped entirely—no pass or fail outcome is recorded.
- Fail - The rule automatically fails if any required field is missing.
- Pass - The rule is marked as passed, regardless of missing fields.
- Ignore - The rule runs by treating missing fields as neutral, attempting to return a valid result based on available data.
- For example, useful in cases like subtotal + freight + tax = total, where freight is occasionally absent.
Check Validation Result
You can see how your document performs against your new validation rule and make changes accordingly.You can also click ‘View Code’ to see the code generated for the rule.It’s best to check your validation rules across different documents to ensure they perform as desired. Test both documents that should pass and fail the rule.
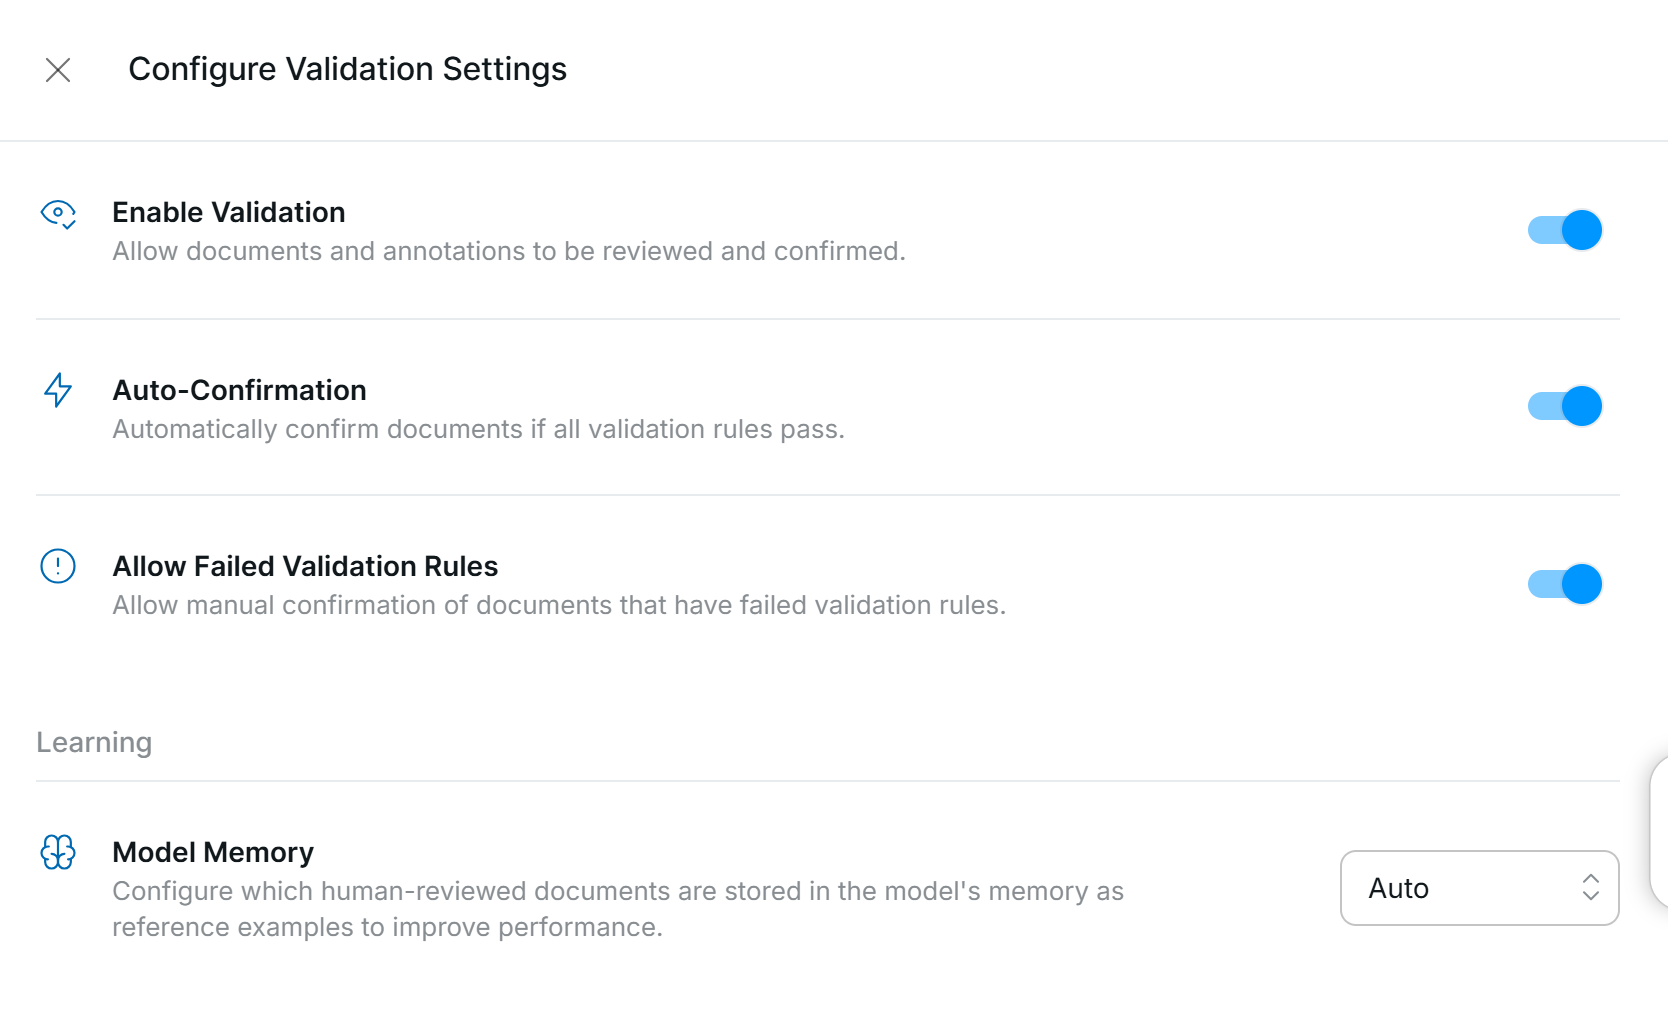
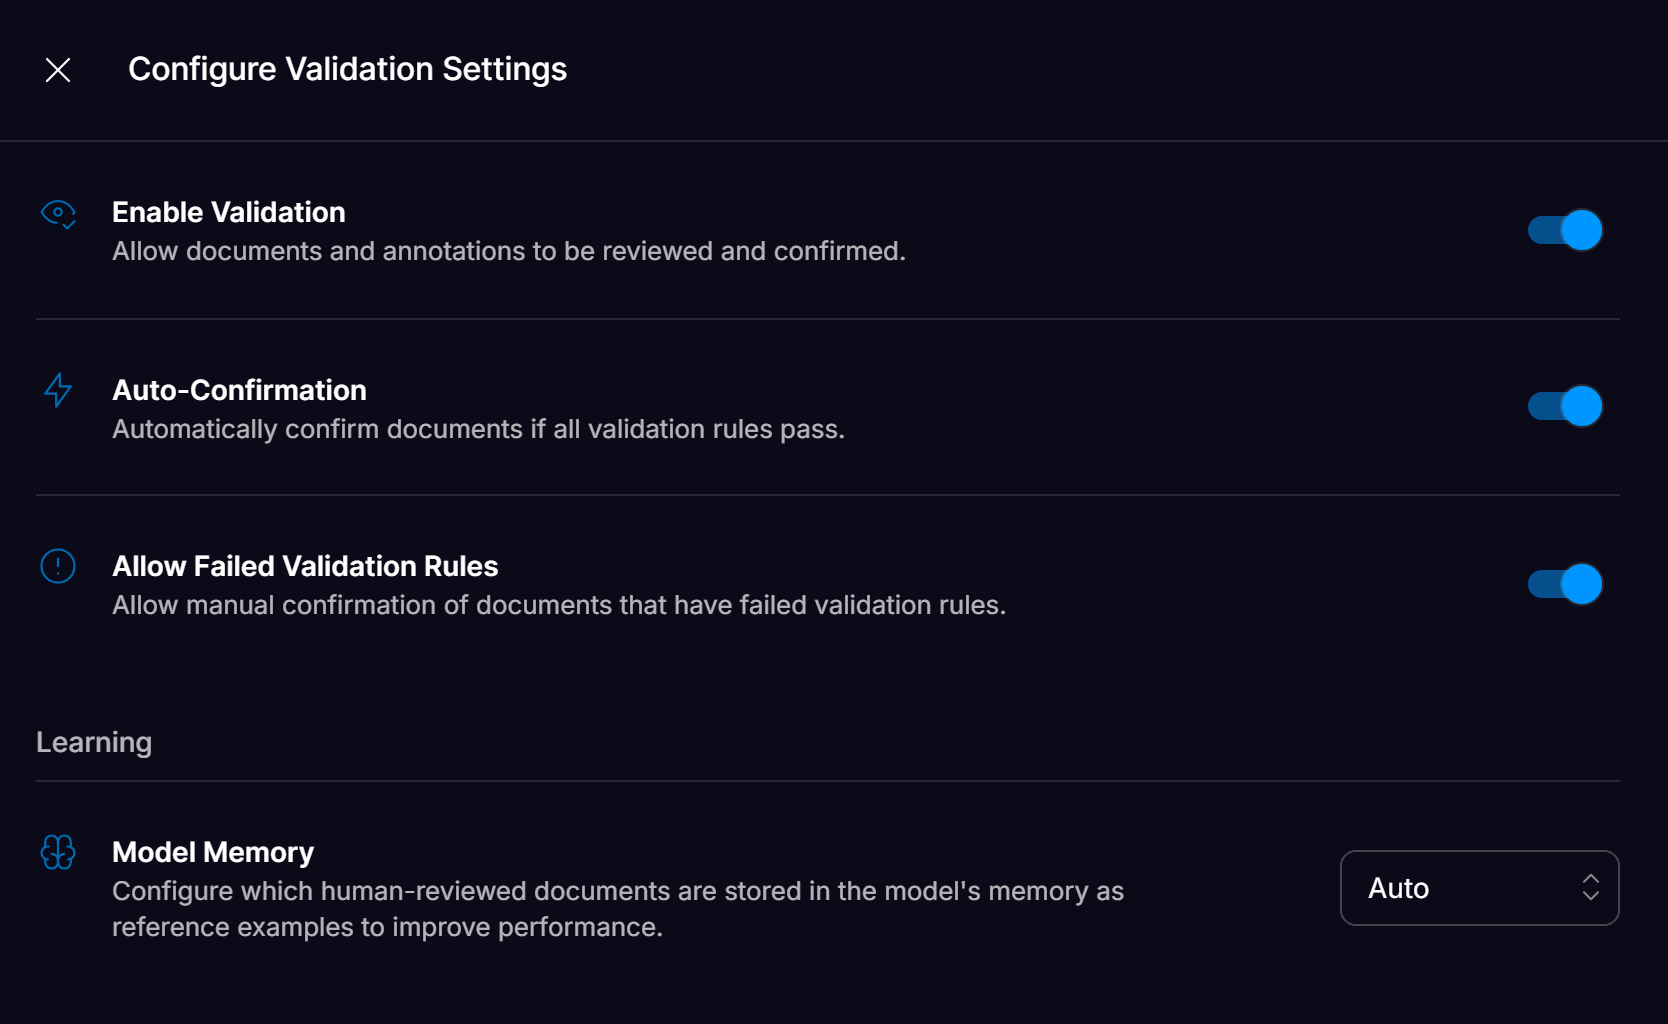
Validation Settings
Once you have your data mapping and validation rules configured, the last step to enable straight-through processing is to enable auto-confirmation. This allows Affinda to confirm documents that have passed all data mapping and validation rules, sending them downstream automatically without human review. Documents that fail data mapping or validation rules will be flagged and left for human review. You can enable auto-confirmation in the Validation Settings within your Workflow Settings.