Purpose
This tutorial introduces new users to the structure and core concepts of the Affinda platform. It explains how organizations, workspaces, document types, workflows, and statuses fit together, and walks through the document processing lifecycle step by step. The goal is to equip users with a clear mental model of how Affinda works, so they can confidently start uploading and managing documents.This tutorial is designed for all new users of the Affinda platform. No technical knowledge is required.
1. Understanding the Affinda Structure
- Organization: The top-level entity where your settings, document types, billing, and members live.
- Workspace: A dedicated area within your organization for specific workflows and document processing tasks.
1
Organizations
- Store your Document Types
- Manage members and permissions
- Control billing
- Configure Organization-wide settings
2
Workspaces
- Have unique workflows tailored to specific use cases (e.g., invoices, IDs, contracts)
- Display documents and their statuses
- Connect to specific document types
2. Document Types:
A Document Type in Affinda is a template that tells the platform how to recognise, extract and validate data from a certain category of documents- like invoice, passport or a specific type of contract. Created at the Organization level – Document Types are registered at the organizational level and then linked to one or more workspaces where they’ll be used. Deployed per Workspace – In each workspace, you select which Document Types apply. Affinda will only classify and extract documents using models for those selected Document Types.3. Workspace Dashboard
The Workspace Dashboard is the starting point for users to commence validating documents. By default, users will be directed to view documents in the ‘For Review’ queue for the workspace. However, documents at different statuses (see below) or in specific document types can easily be viewed.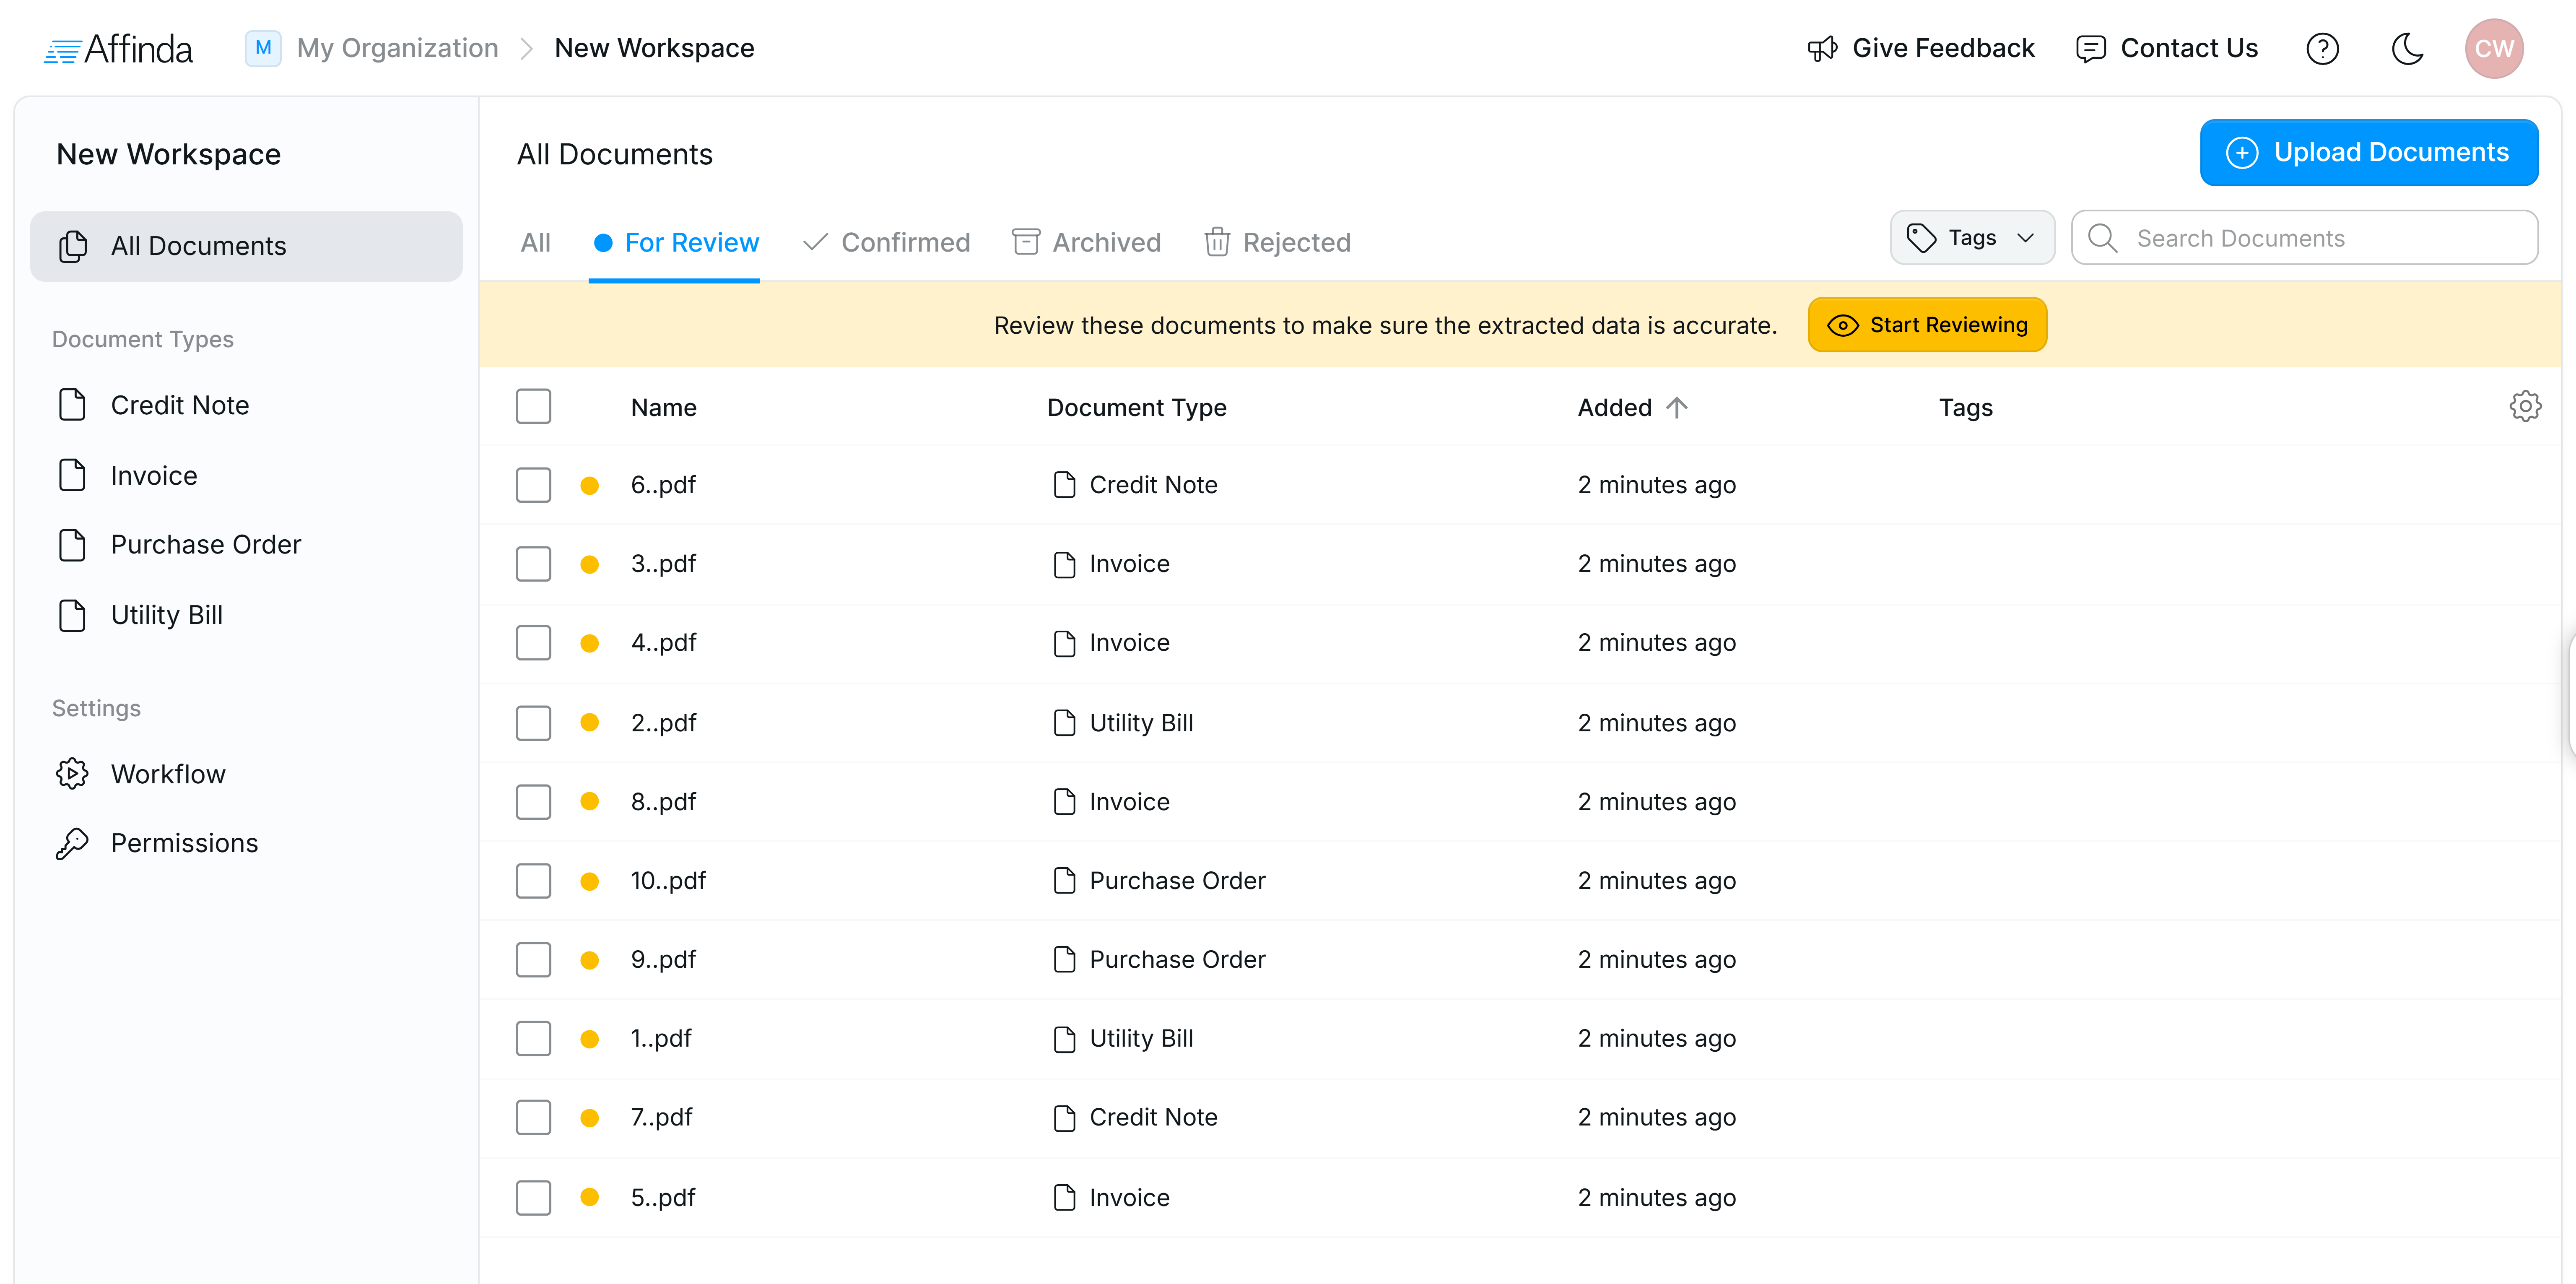
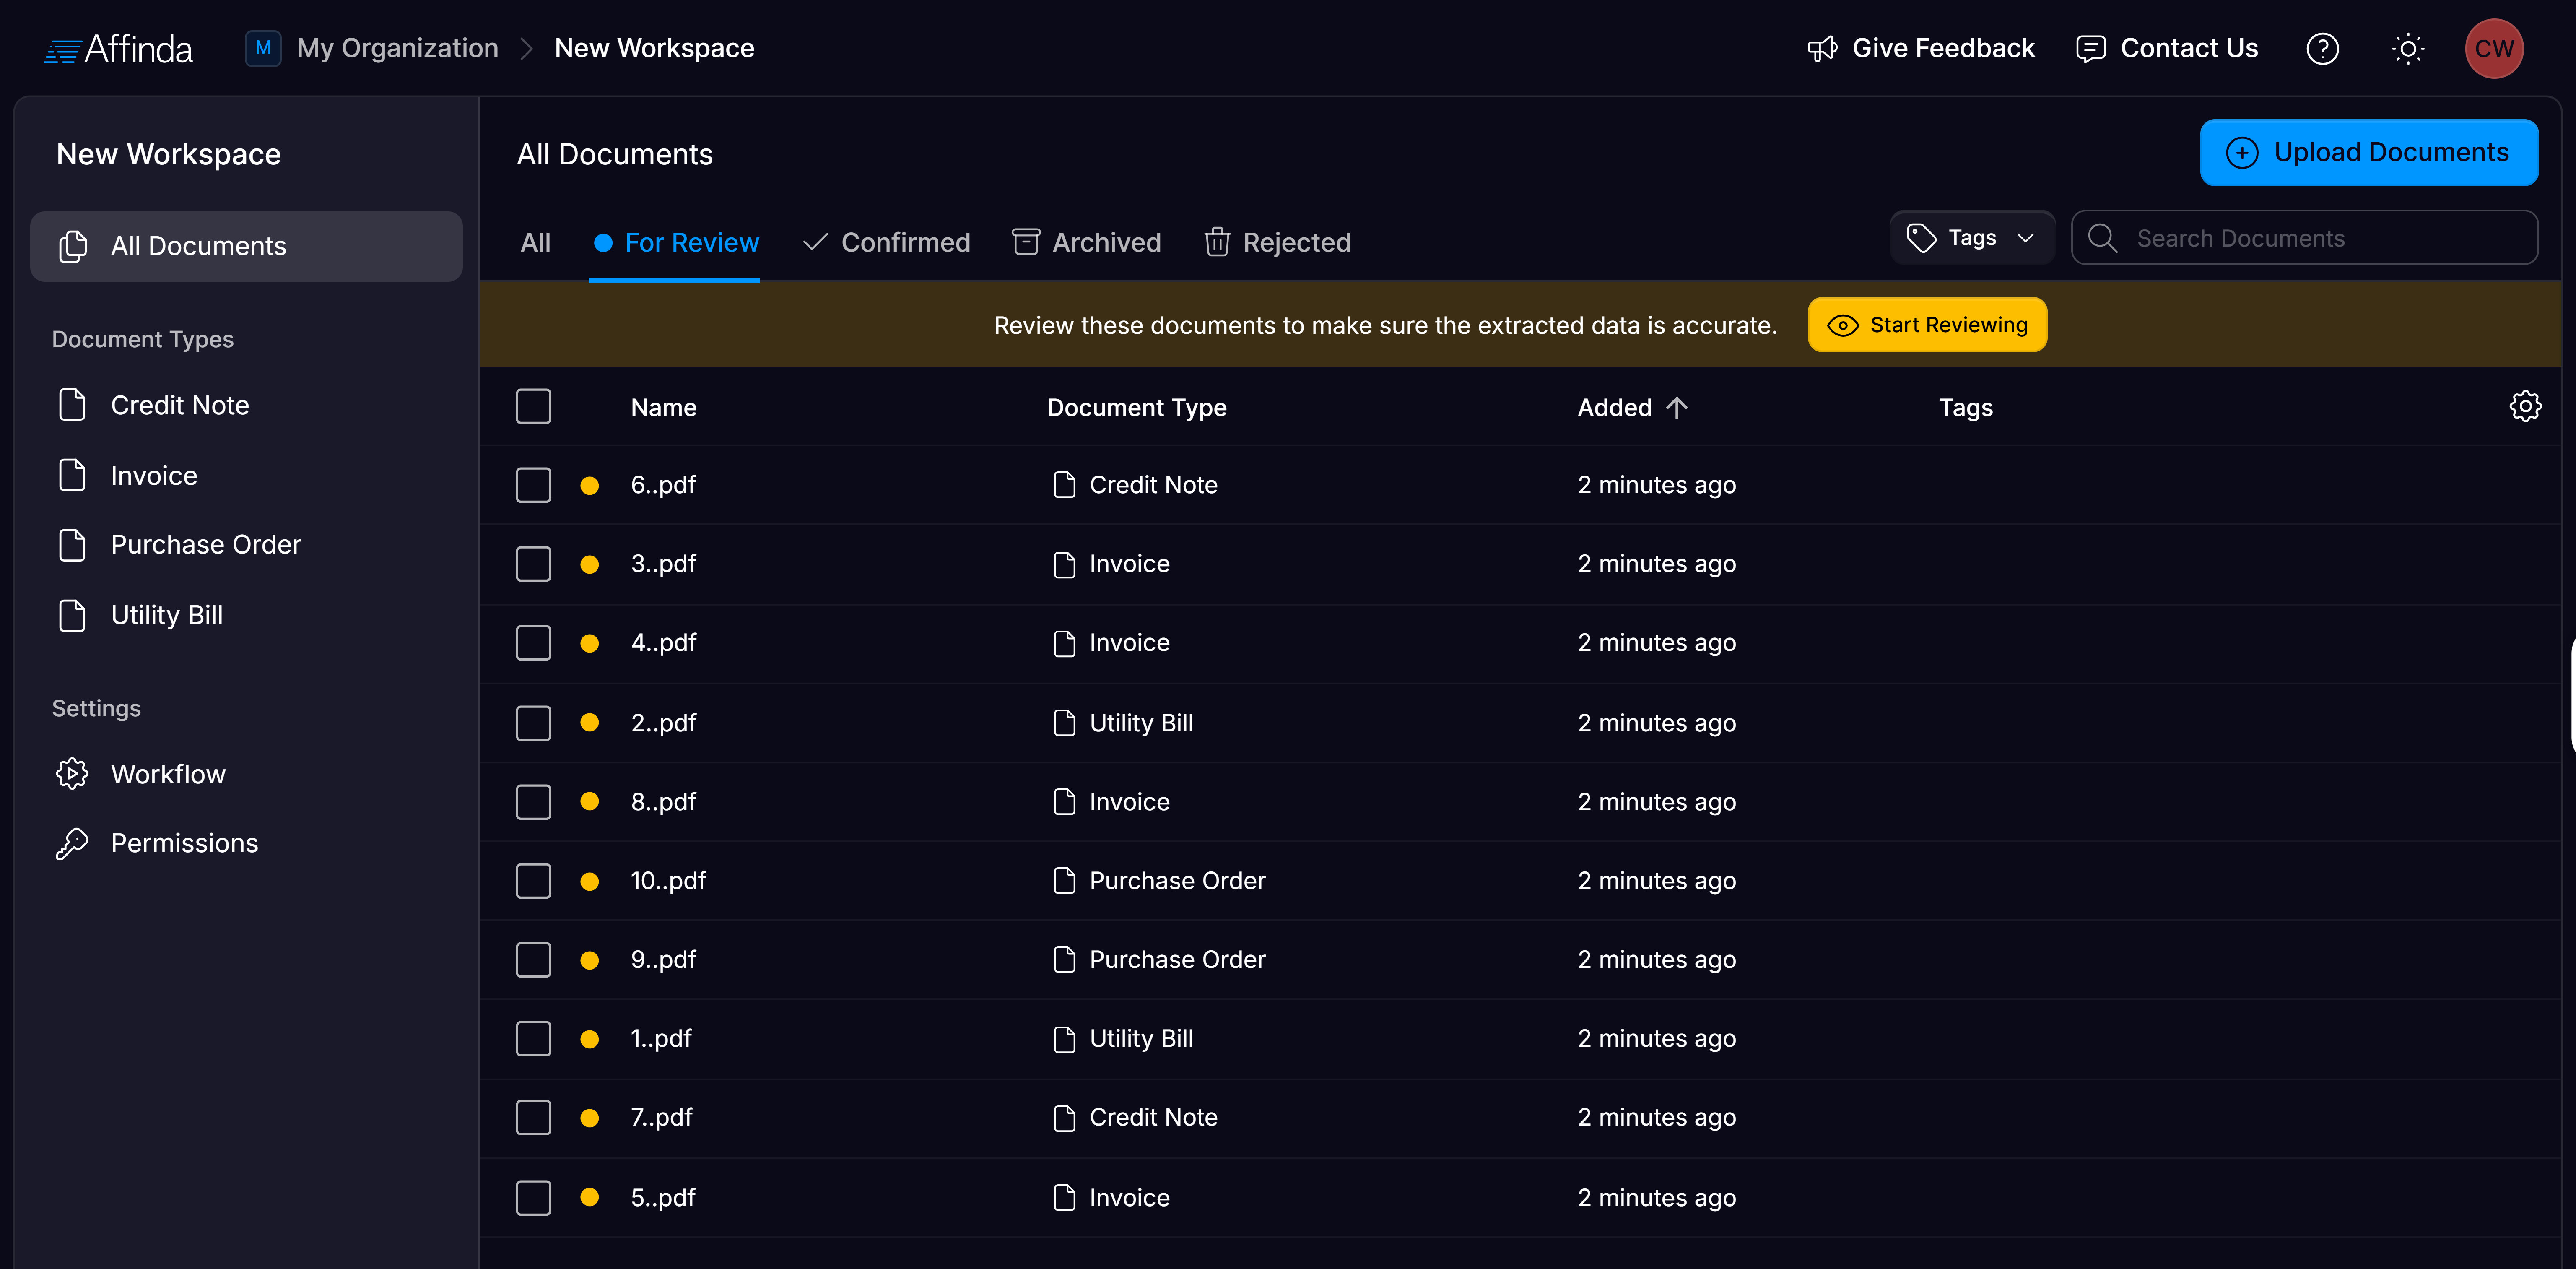
Document Status
Documents uploaded into a workspace will hold one of the following statuses:- For Review – Processed by the model but requires validation
- Confirmed – Passed validation, either through manual review or auto confirmation.
- Archived – No longer needed, but stored for reference
- Rejected – Removed from processing pipeline
Tags
Tags can be easily added to documents to ensure easy filtering of documents. A common use of tags is to flag documents that have specific issues with them for additional review or approval. Create new tags by clicking on the tags drop-down, typing in your label, and clicking “Create Tag”.Adding columns and sorting
Additional columns can be added to the dashboard by clicking the cog icon in the top right corner. Column values can be sorted in ascending or descending order. This means users can review either the oldest or newest documents first.4. Understanding your workflow
Documents are uploaded to a Workspace in Affinda and will follow it’s configured Workflow. Let’s walk through each step in the workflow and how you can configure it.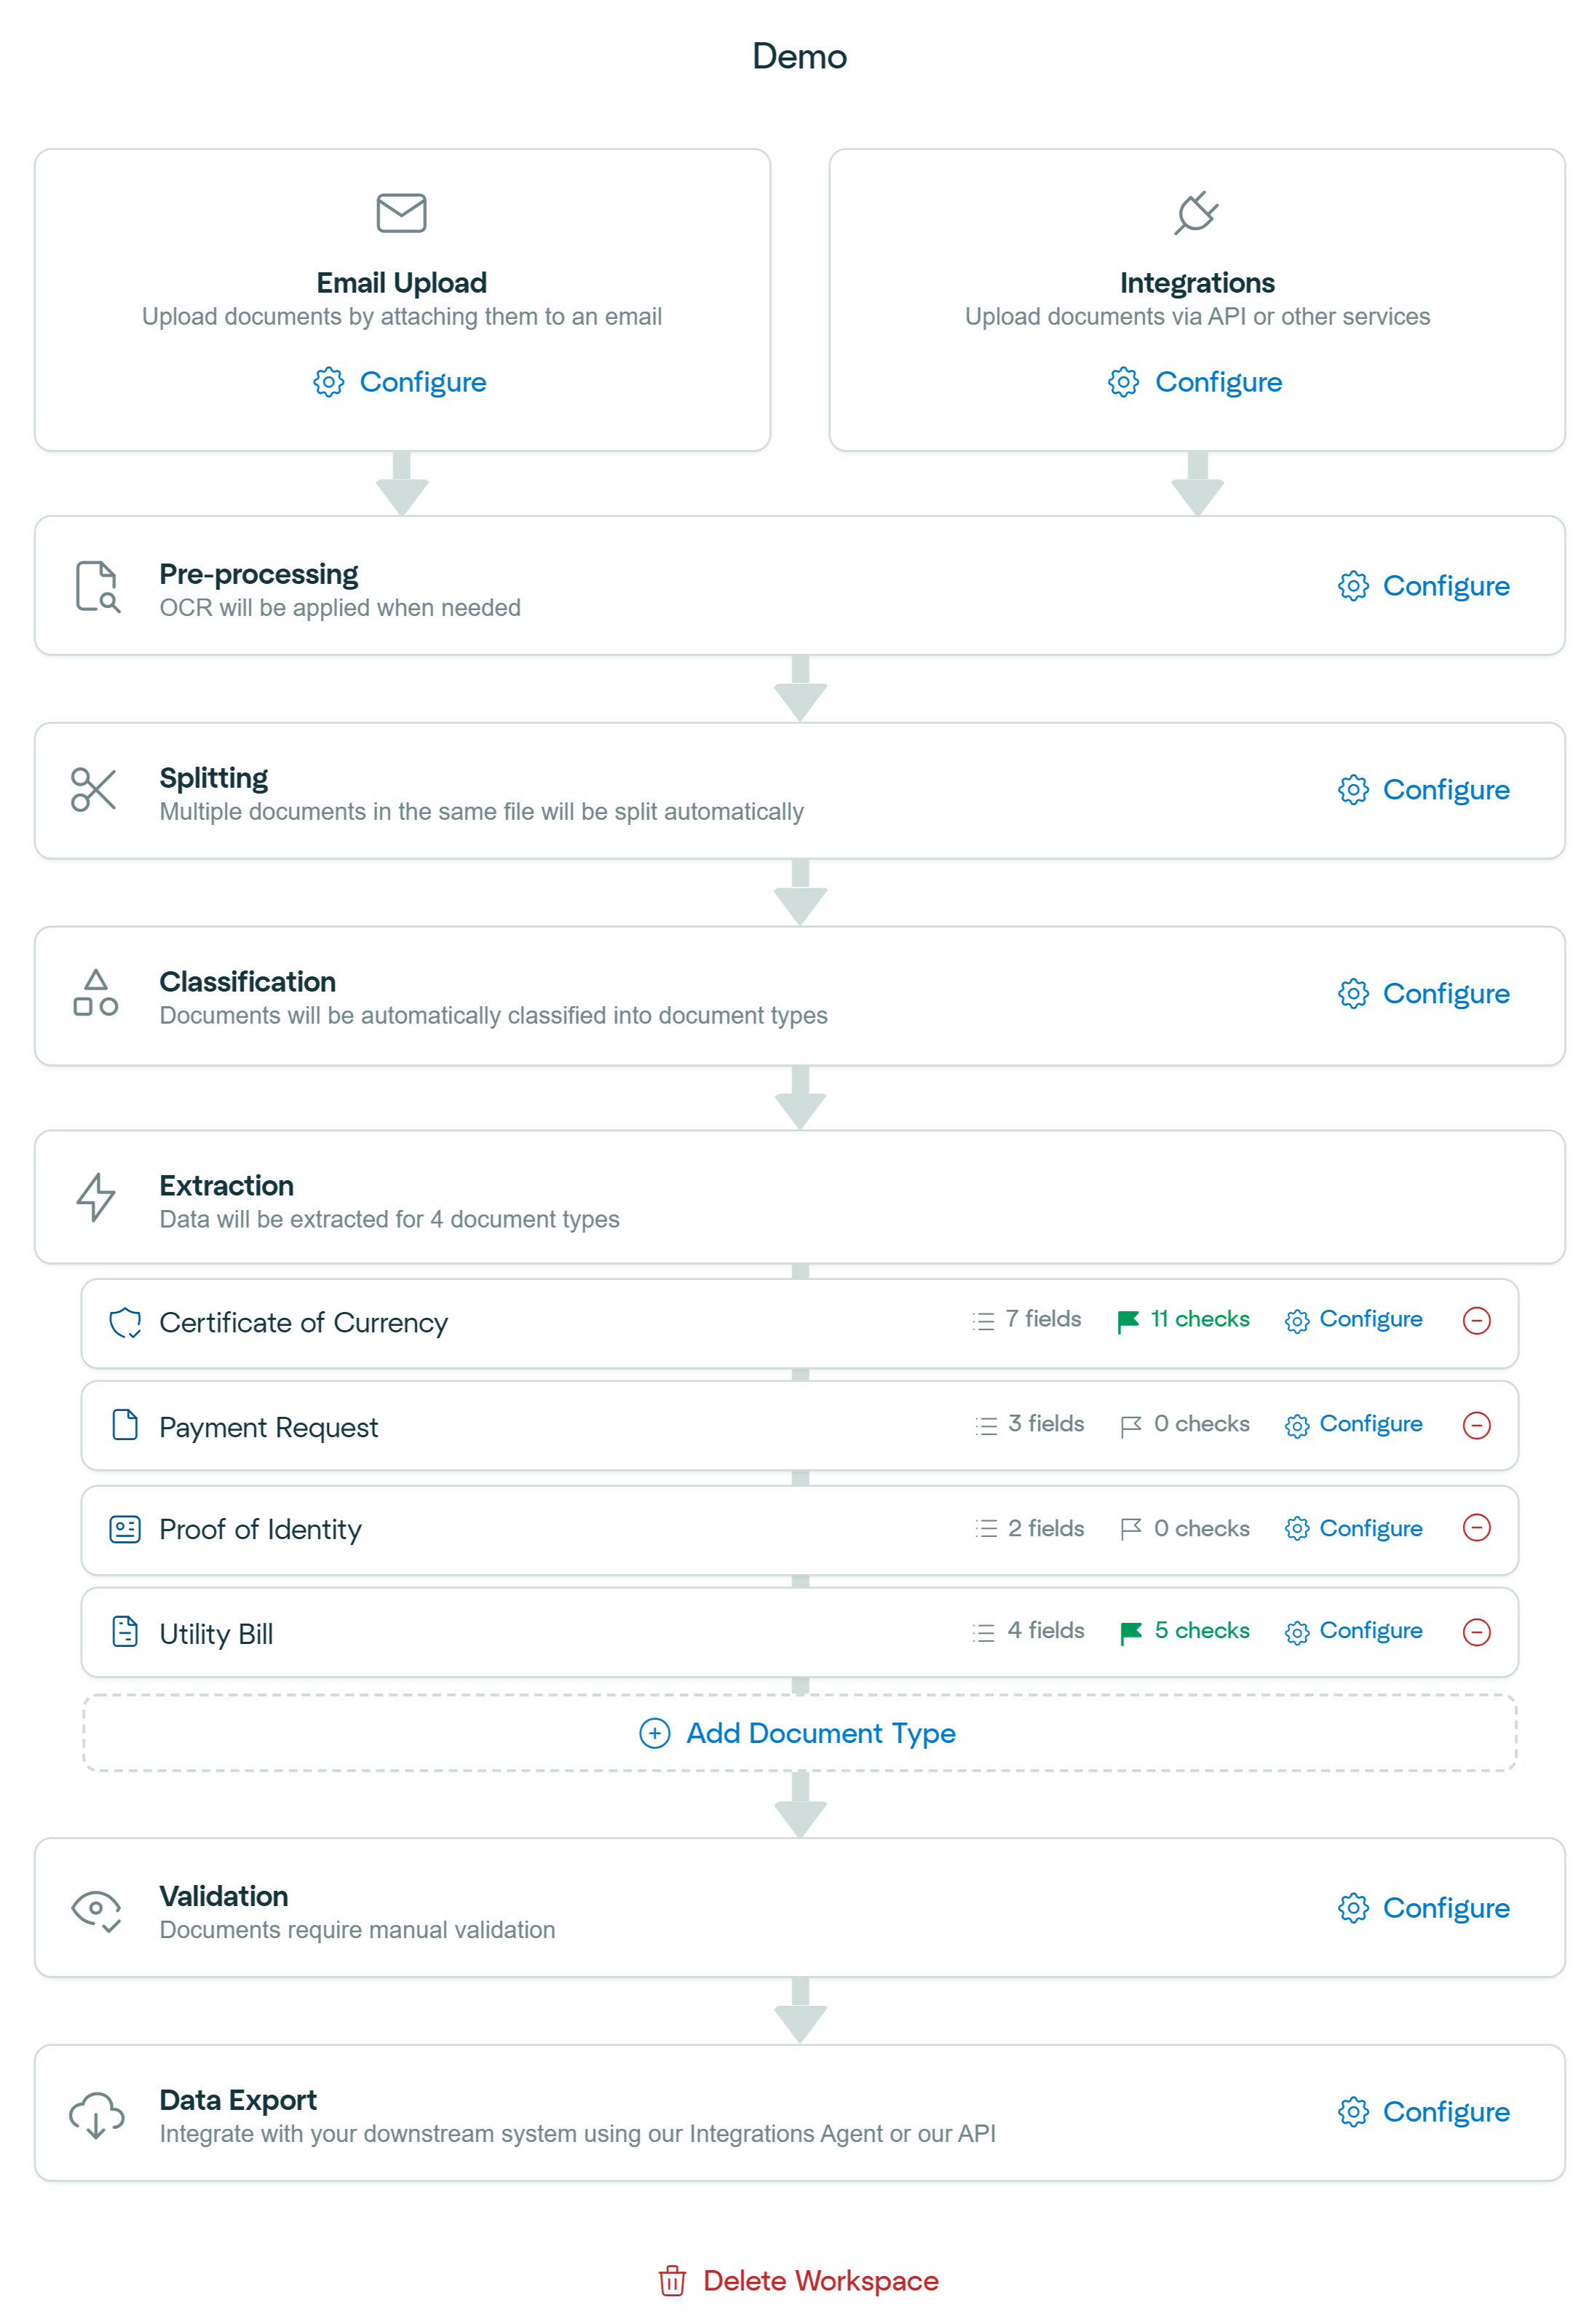
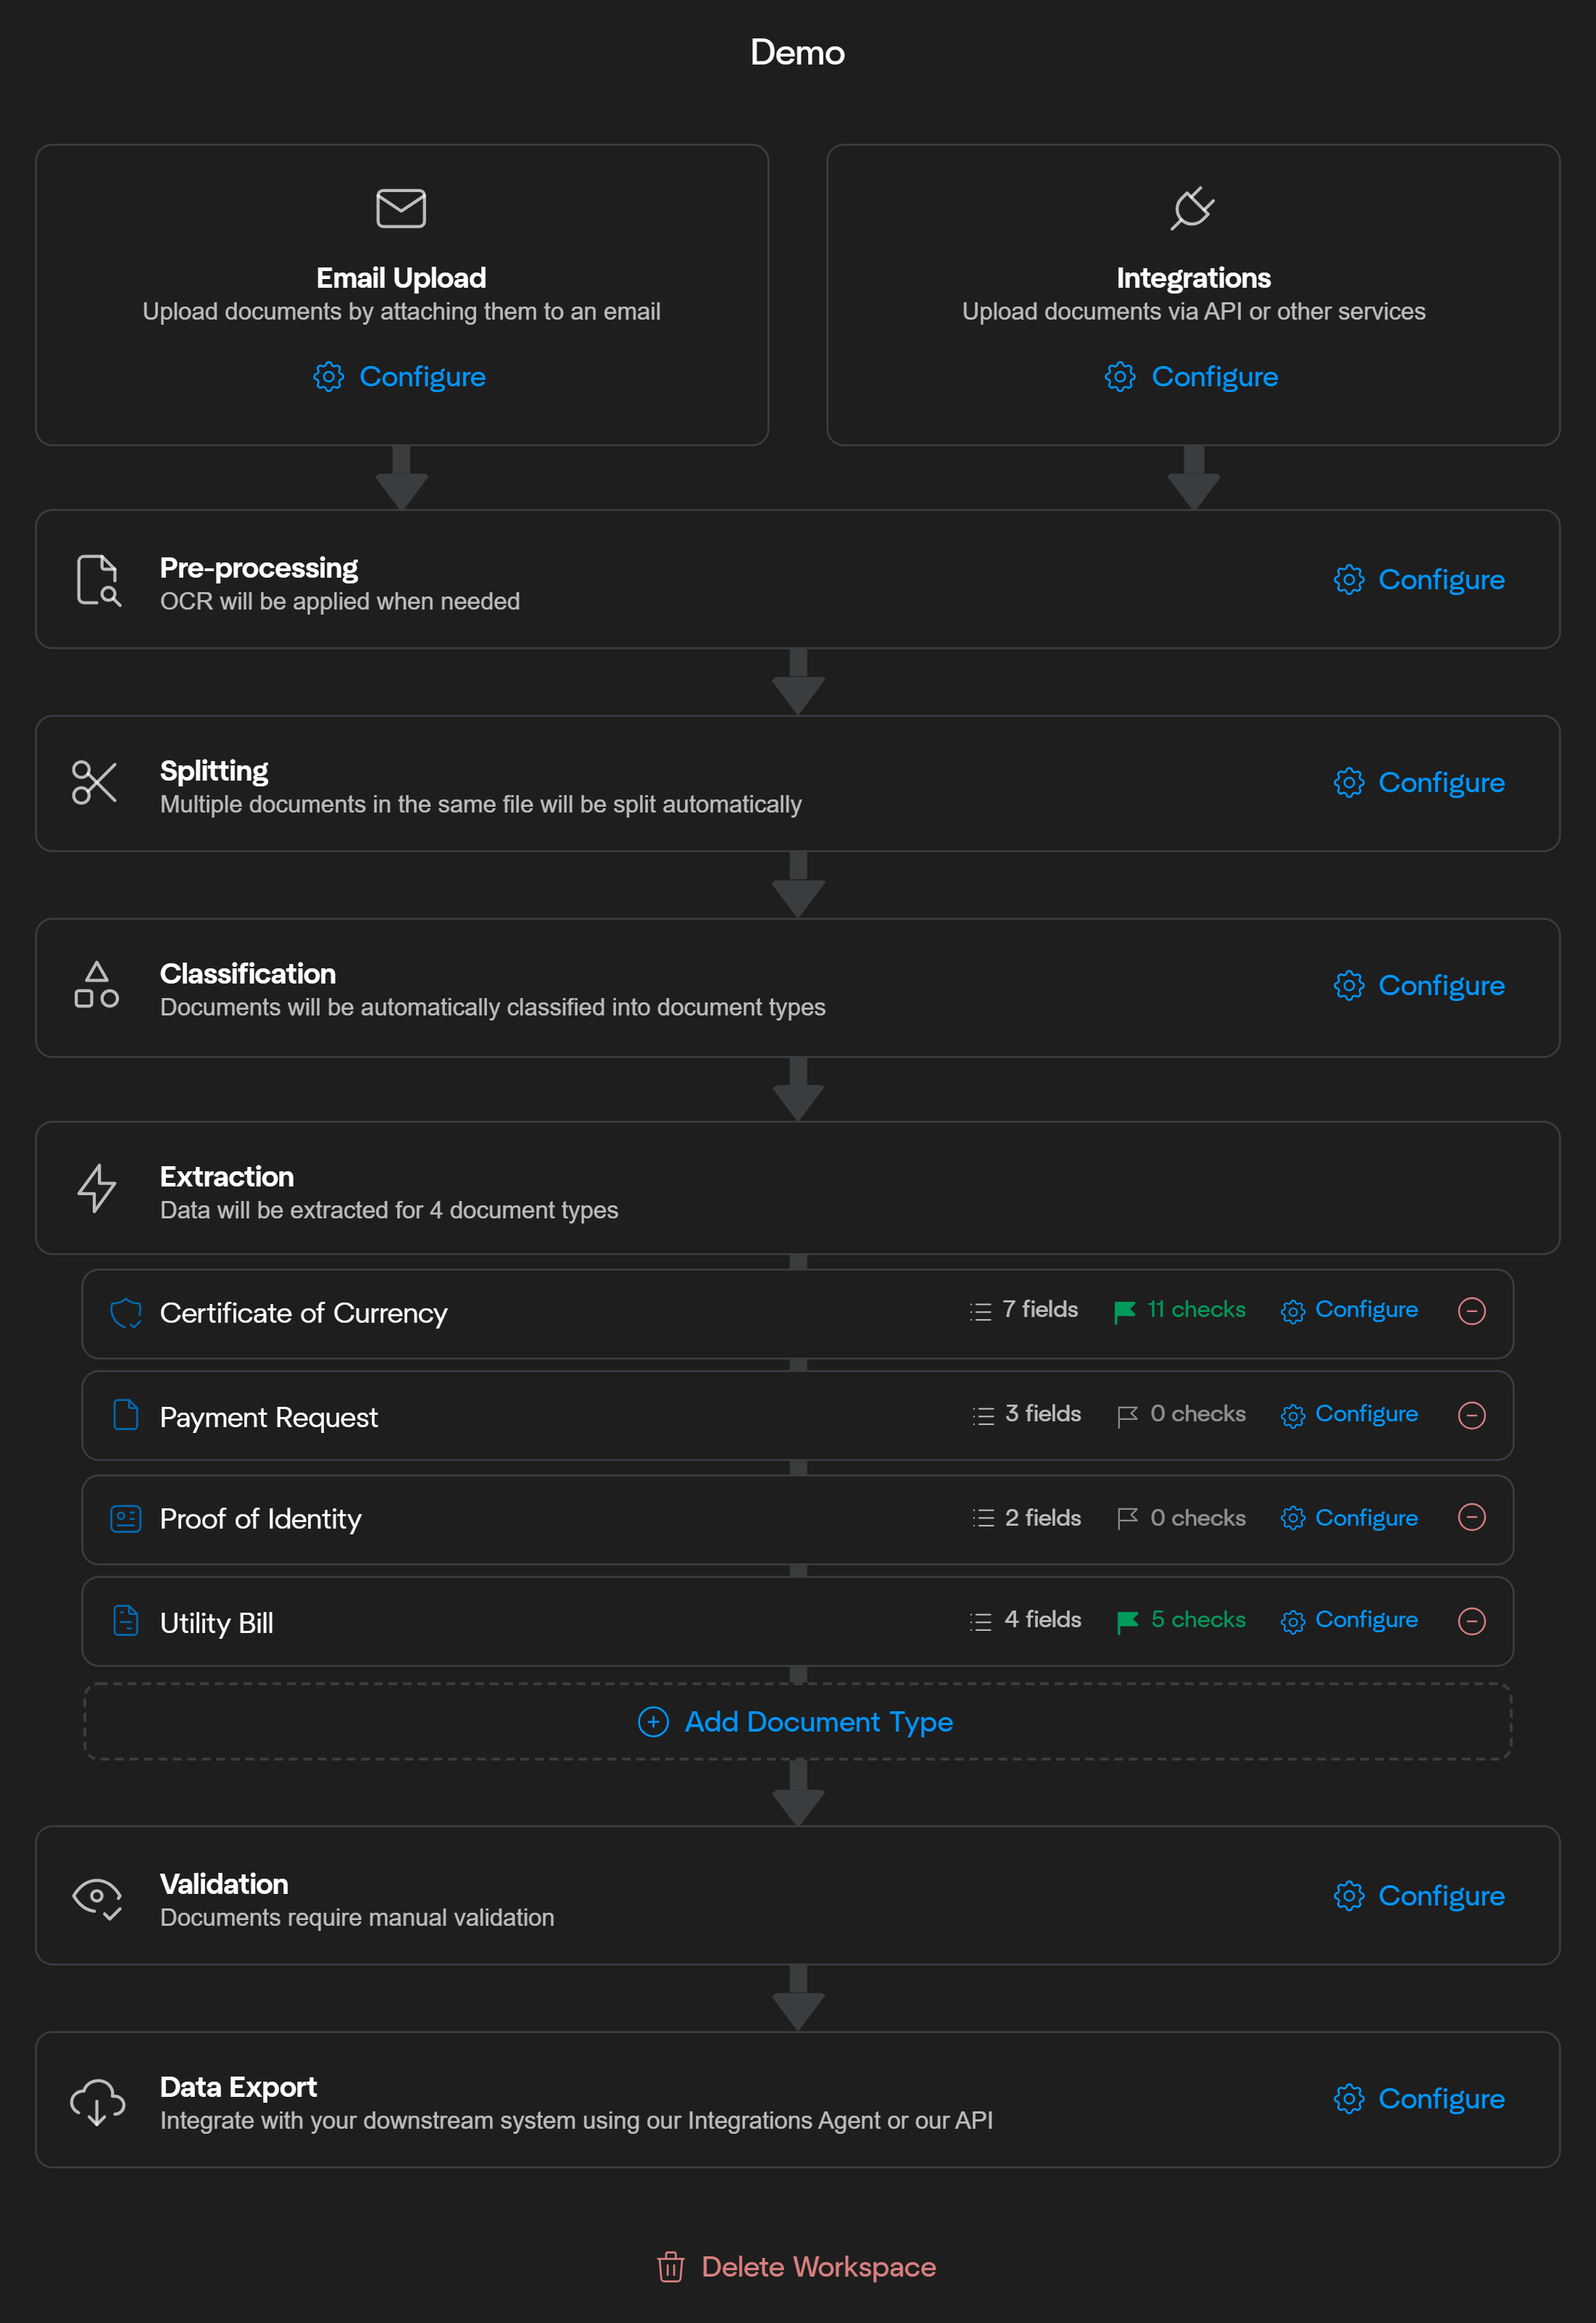
1
Uploading Documents
Choose how documents enter the Affinda Platform:
- Manual Upload – Drag and drop files
- Email Upload – Send to a unique email address
- Integrations – Use the API or other services, see API reference for more.
2
Pre-processing
Next, Affinda applies several steps to prepare your documents before model analysis. You can
- OCR (Optical Character Recognition) Options: Technology that converts printed or handwritten text into machine-readable text. Select either Auto-detect (default), Partial, Full, or Skip. Learn more about what OCR setting you should use here.
- Remove Duplicates – Save wasting credits on duplicates, only removes exact document matches.
- Advanced Options – Choose custom reading models or enable word-splitting
3
Document Splitting
Splitting in Affinda is the process of automatically separating a multi-document file (like a PDF with multiple invoices) into individual documents for more accurate processing.Enable this to detect and split files containing multiple documents (e.g., an invoice + tax form in one file).
4
Classification
Classification in Affinda is the step where Affinda identifies and labels the type of each document (e.g., invoice, resume, contract) to then route it to the correct workflow and extraction model.The platform classifies documents from the document types linked in that workspace. Our models will analyze the contents of your document against the Document type’s name and description.If a document doesn’t match any type:
- It will be marked as Unclassified
- You can choose to reject or manually review these
5
Extraction
Each document type has a specific extraction schema that defines fields to be captured (e.g., invoice number, due date).
6
Validation
Affinda offers a number of ways to validate the data extracted from your document is accurate.Users can manually validate documents through Affinda’s intuitive document validation interface. Documents should be confirmed when all extracted data is correct.Alternatively, Users can configure data mapping and validation rules to automatically validate data. Turning on auto confirmation will confirm documents that pass all validation rules. Documents that don’t pass all rules should be reviewed by a user.Select settings for Model Memory: a set of validated documents used by the model as examples. Model memory allows models to improve extraction accuracy over time, learning from your documents. We recommend Auto mode for most use cases (see Model Memory for more information).
7
Exporting Data
Use API keys or webhook secrets to export processed data to downstream systems.